> ## Documentation Index
> Fetch the complete documentation index at: https://university.triggr-app.com/llms.txt
> Use this file to discover all available pages before exploring further.
# Add your branding
> Put your name, logo and colours on client request pages, use your own domain and send client emails from your own address.
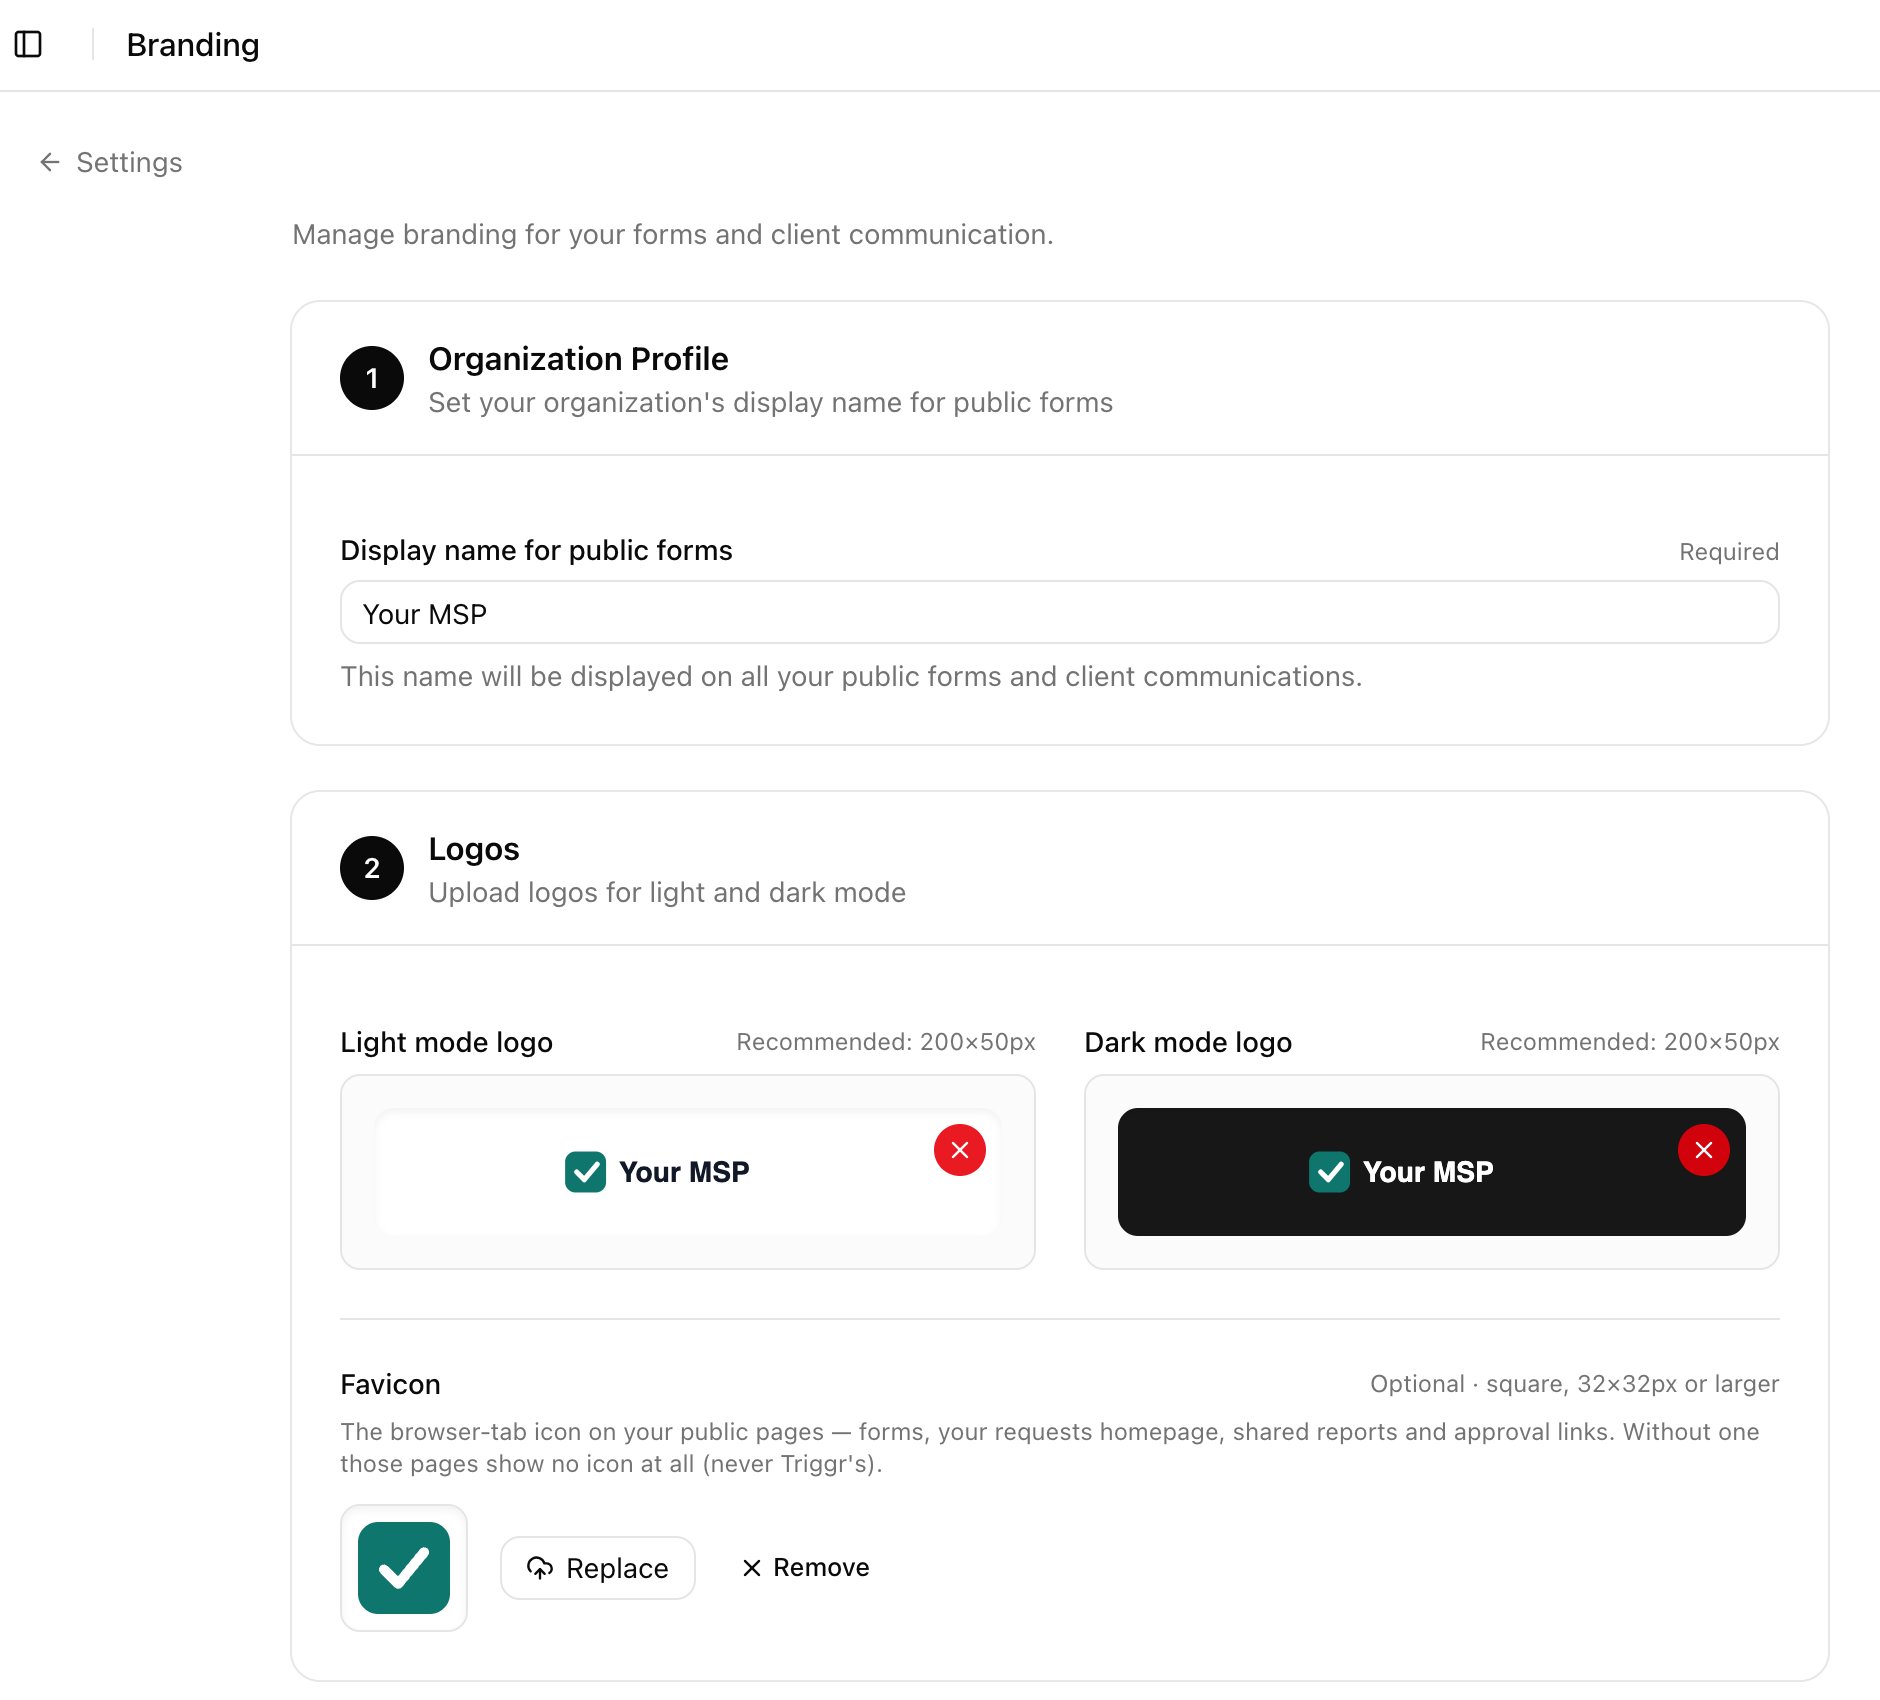
Your clients see your logo, name and colours on your public forms and approval pages. Approval emails carry your display name. On Home, click Set up next to Add your branding, or go to **Settings > Branding**.
## Add your name, logo and colours
Enter Display name for public forms and upload a Light mode logo (up to 2 MB). Dark mode logo and Favicon are optional; public pages use the light logo, and the dark one only when there's no light one. Saving a name or a logo ticks Add your branding on Home.
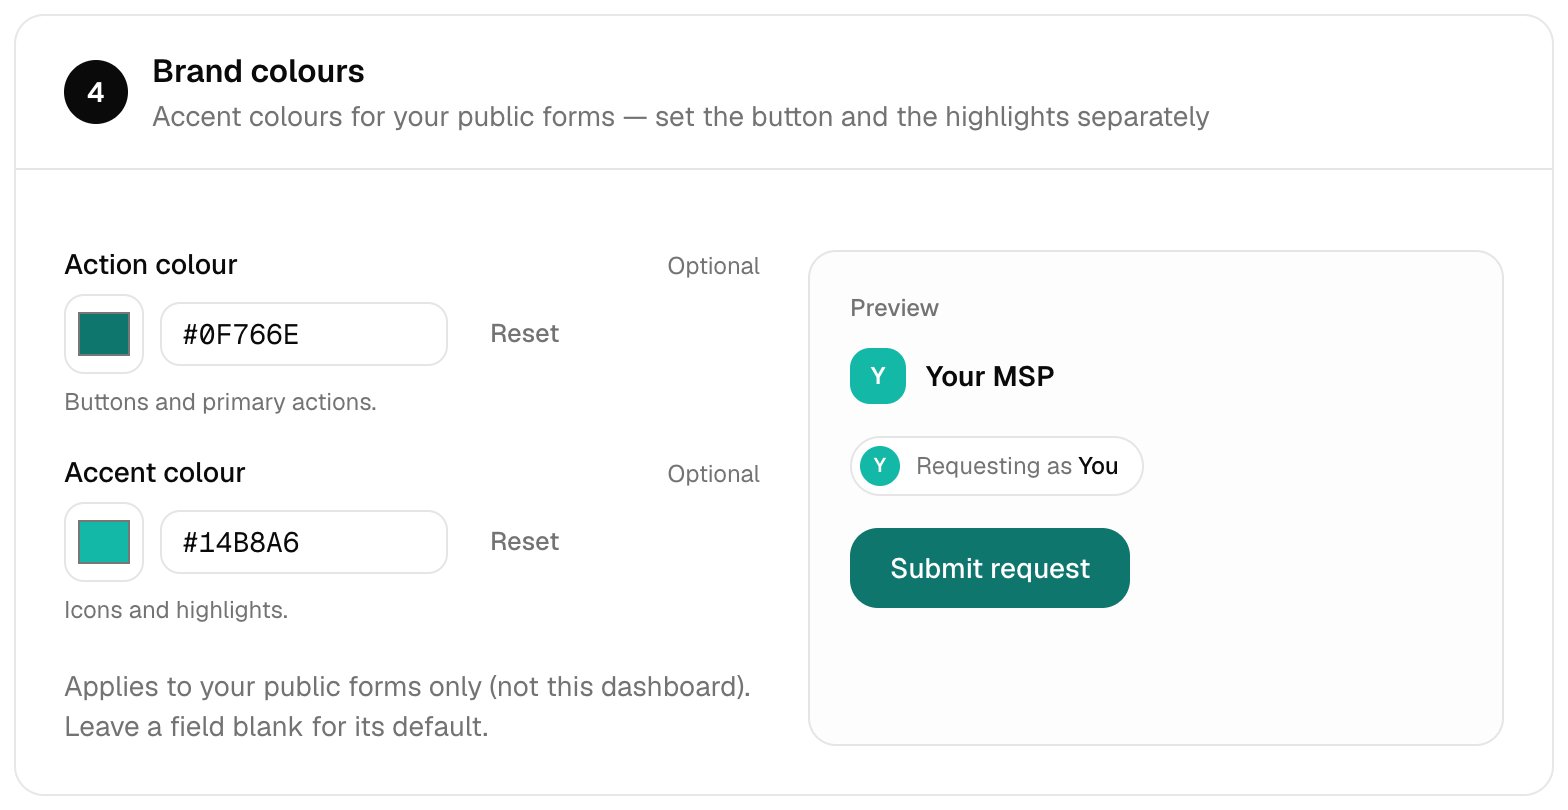
 Optionally enter hex values for Action colour (buttons) and Accent colour (highlights). They apply to your public forms only.
 Click **Save changes**. Uploads and removals aren't saved until you do.
## Use your own domain (optional)
Serve your forms, approval pages and reports from a subdomain such as `forms.yourmsp.com`. You need access to the domain's DNS.
Enter it in **Public forms domain** and click Save changes.
At your DNS host, create the `CNAME` record shown under DNS records to add. Name it `forms`, or `forms.yourmsp.com` if your provider wants the full name.
Click **Save changes**. Uploads and removals aren't saved until you do.
## Use your own domain (optional)
Serve your forms, approval pages and reports from a subdomain such as `forms.yourmsp.com`. You need access to the domain's DNS.
Enter it in **Public forms domain** and click Save changes.
At your DNS host, create the `CNAME` record shown under DNS records to add. Name it `forms`, or `forms.yourmsp.com` if your provider wants the full name.
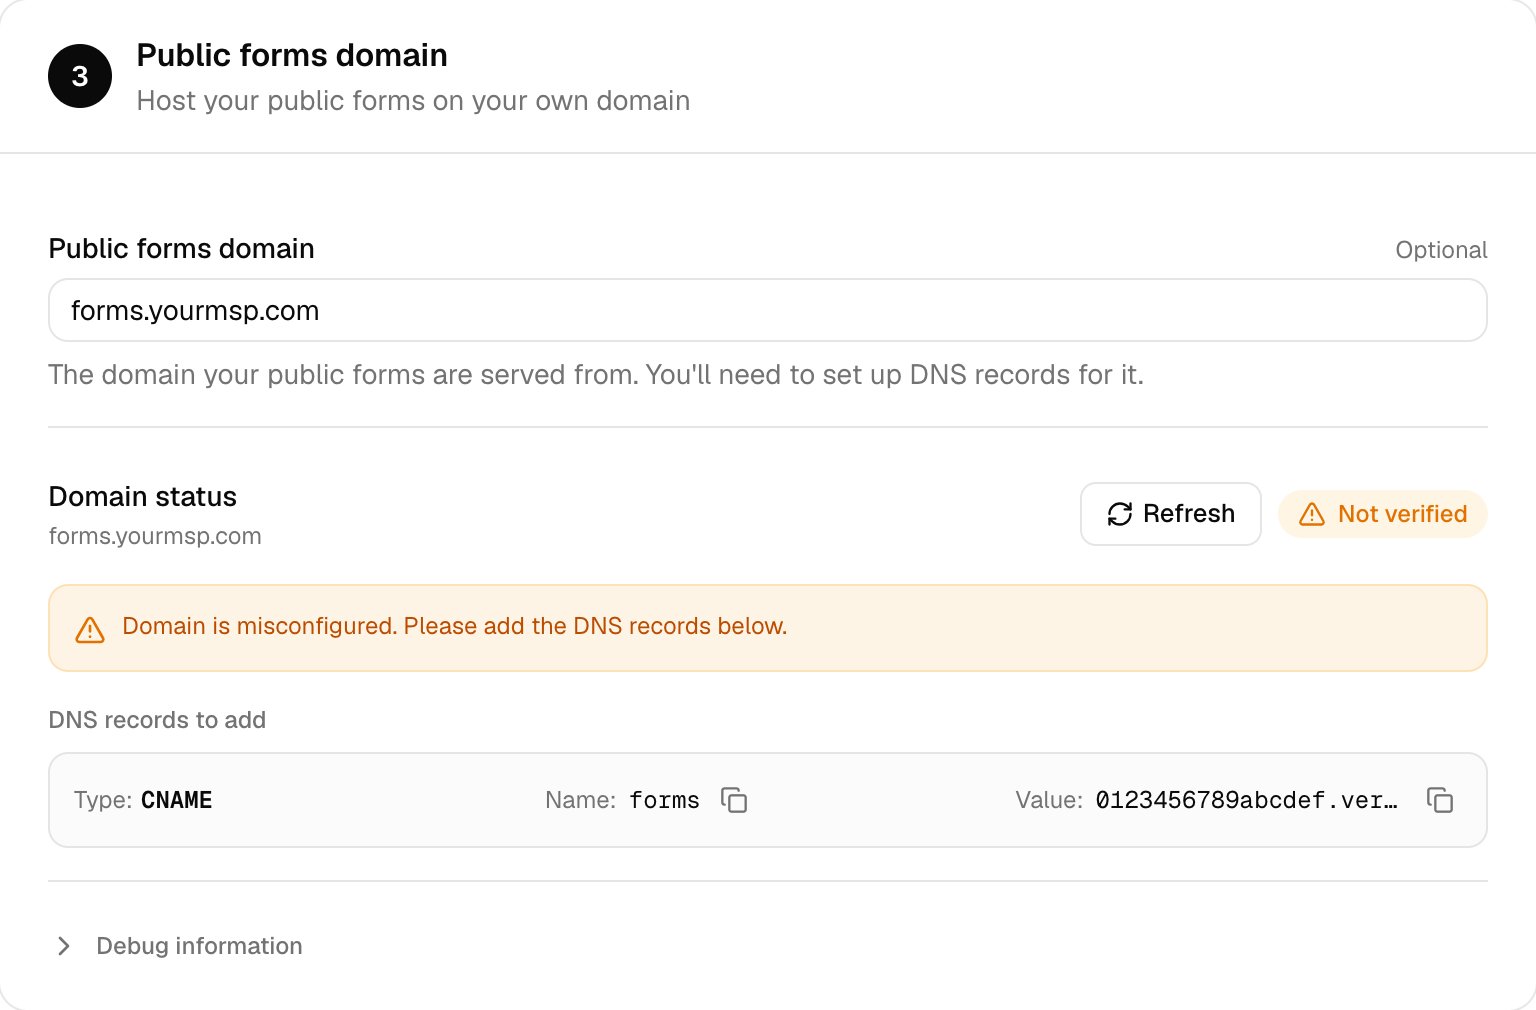 Click Refresh until the panel shows Verified and Certificate shows Active.
Links switch to your domain as soon as you save it, so don't share them until it's verified. Changing or clearing the domain breaks links that use it.
## Send client emails from your own address (optional)
External approval requests come from Triggr App (`app@triggr-app.com`) until you choose your own sender.
Go to **Integrations**, search for Microsoft Email and click **Configure**. Leave ClientID and ClientSecret as they are; they're Triggr's app. For TenantID, click Look up by domain and enter your own domain, not a client's, then click **Save configuration**. Click **Admin consent** and accept as a Global Administrator of your tenant. Admin consent shows Granted.
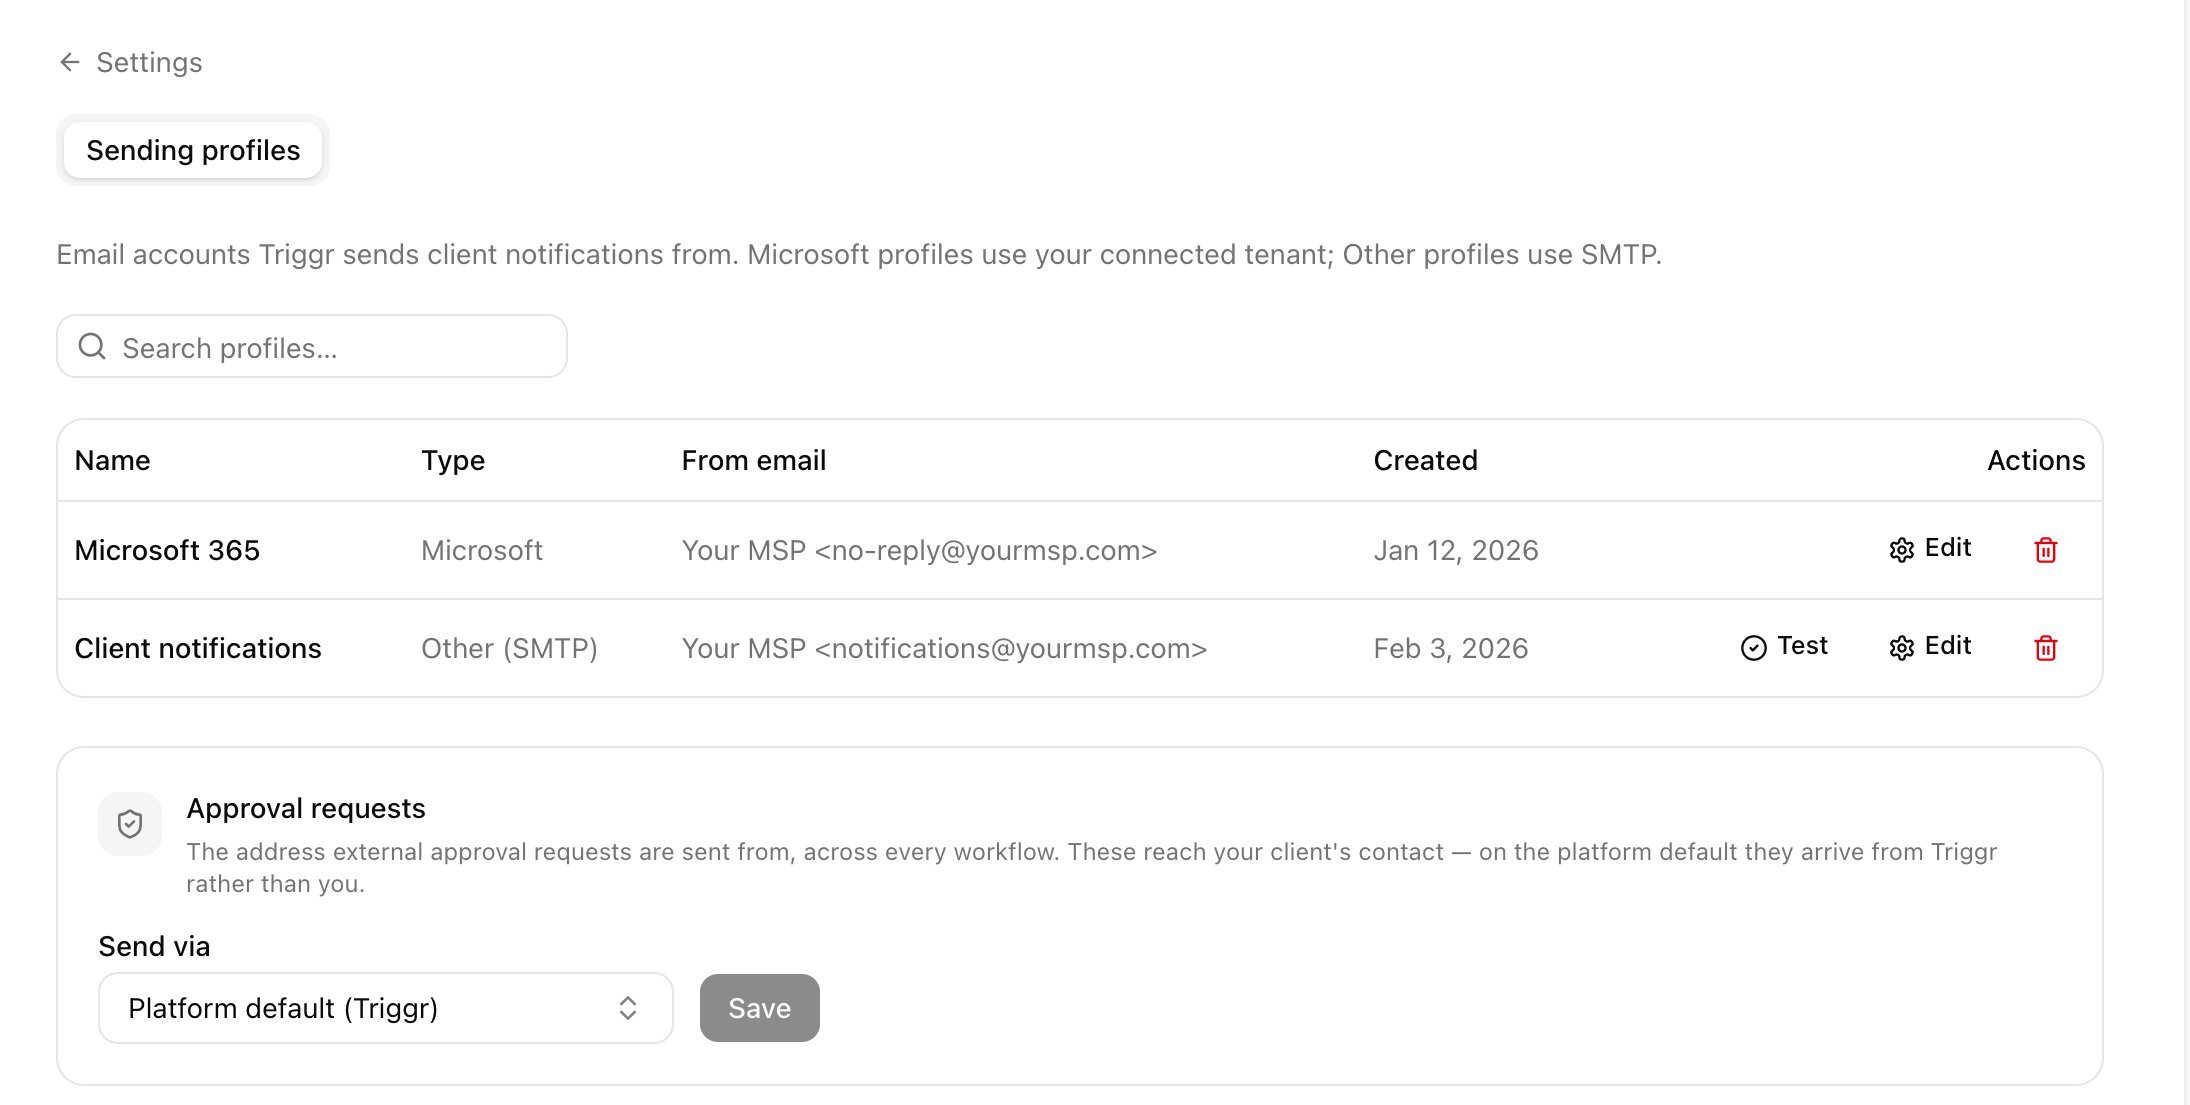
In **Settings > Email**, click **New profile**. Keep Microsoft, enter a Name and the From email (a mailbox in your tenant), and click **Create profile**. For another provider, choose Other (SMTP) and enter its server details. Test is on SMTP rows.
Click Refresh until the panel shows Verified and Certificate shows Active.
Links switch to your domain as soon as you save it, so don't share them until it's verified. Changing or clearing the domain breaks links that use it.
## Send client emails from your own address (optional)
External approval requests come from Triggr App (`app@triggr-app.com`) until you choose your own sender.
Go to **Integrations**, search for Microsoft Email and click **Configure**. Leave ClientID and ClientSecret as they are; they're Triggr's app. For TenantID, click Look up by domain and enter your own domain, not a client's, then click **Save configuration**. Click **Admin consent** and accept as a Global Administrator of your tenant. Admin consent shows Granted.
In **Settings > Email**, click **New profile**. Keep Microsoft, enter a Name and the From email (a mailbox in your tenant), and click **Create profile**. For another provider, choose Other (SMTP) and enter its server details. Test is on SMTP rows.
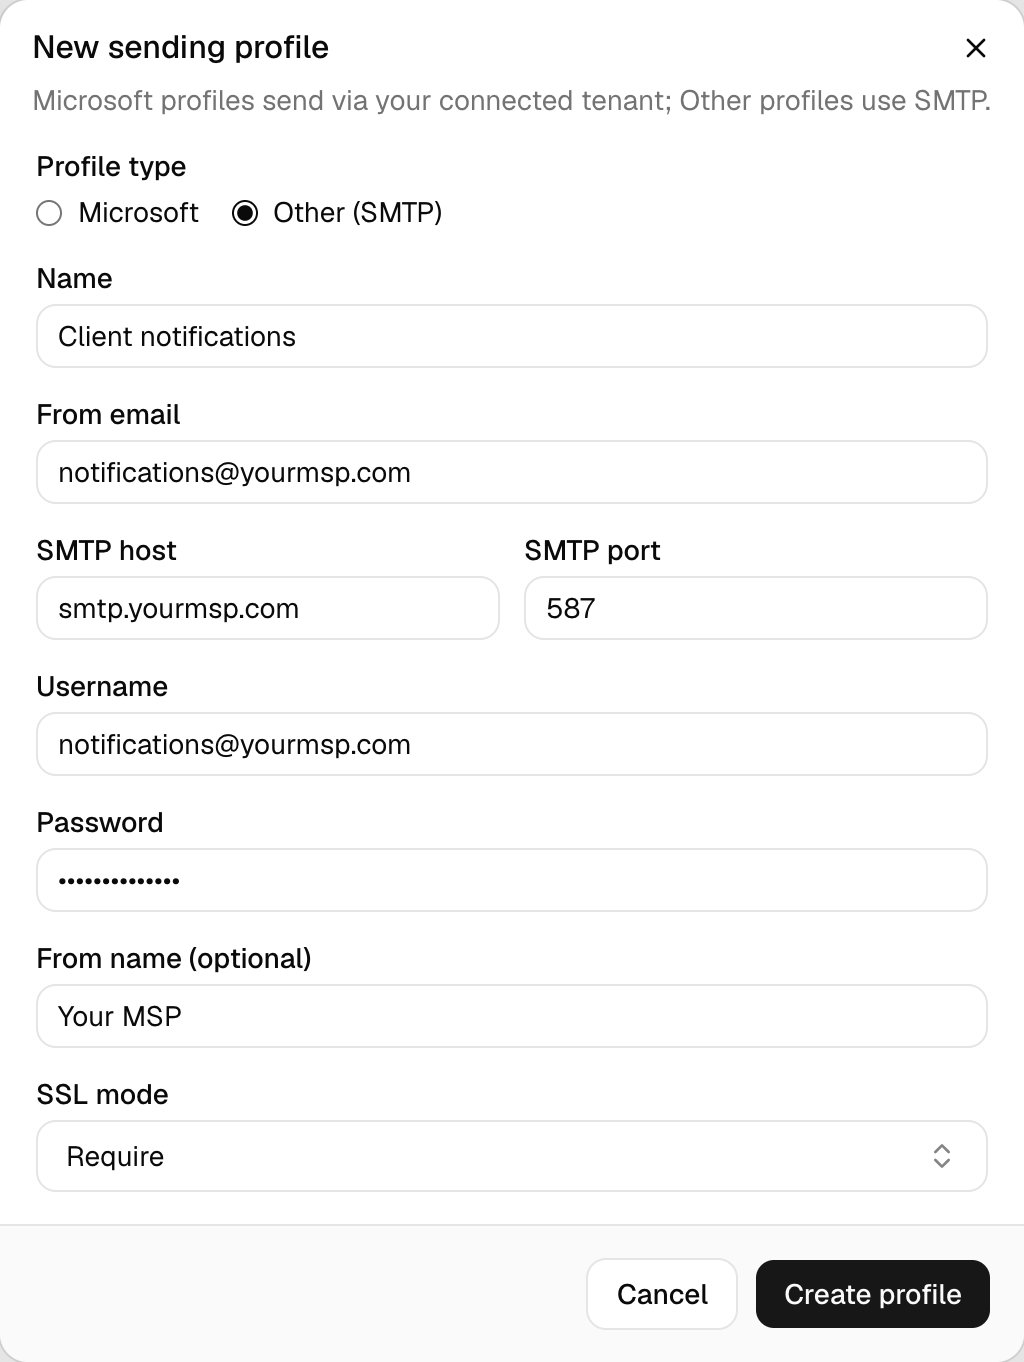 Reload the page so the new profile appears, then under Approval requests choose it in **Send via** and click Save. From the next request, external approval emails in every workflow come from that mailbox. If it can't send, the email goes from Triggr's default sender instead.
 Scheduled reports and Credential delivery have their own sender settings.
## Troubleshooting
Colours need `#` and 3 or 6 hex digits, and the domain must be a valid host name not already used by another Triggr organisation.
Shrink the logo or favicon and upload it again.
Check the record at your DNS host matches the panel exactly (Debug information lists your nameservers), then click Refresh.
Check the host, port and SSL mode with your email provider, and that the account allows SMTP sign-in.
Next: [Configure User Onboarding](/core/get-started/configure-user-onboarding).
This documentation is built and hosted on [Mintlify](https://mintlify.com), a developer documentation platform.
Scheduled reports and Credential delivery have their own sender settings.
## Troubleshooting
Colours need `#` and 3 or 6 hex digits, and the domain must be a valid host name not already used by another Triggr organisation.
Shrink the logo or favicon and upload it again.
Check the record at your DNS host matches the panel exactly (Debug information lists your nameservers), then click Refresh.
Check the host, port and SSL mode with your email provider, and that the account allows SMTP sign-in.
Next: [Configure User Onboarding](/core/get-started/configure-user-onboarding).
This documentation is built and hosted on [Mintlify](https://mintlify.com), a developer documentation platform.