> ## Documentation Index
> Fetch the complete documentation index at: https://university.triggr-app.com/llms.txt
> Use this file to discover all available pages before exploring further.
# Zendesk
> Connect Zendesk to Triggr with a Zendesk API token and the email address of the user Triggr acts as.
Triggr creates, lists and searches Zendesk tickets, reads ticket comments, and lists organizations and views.
## Set up Zendesk
You need a Zendesk admin account.
In Admin Center, go to **Apps and integrations > APIs > API configuration**, select Allow API token access and click Save. See Zendesk's [Turning on and off API access](https://support.zendesk.com/hc/en-us/articles/8662004958746-Turning-on-and-off-API-access).
Go to **APIs > API tokens**, click Add API token, enter a Description such as `Triggr` and click Save. Copy the token before you click Save again; Zendesk won't show it in full afterwards. See Zendesk's [Managing API token access](https://support.zendesk.com/hc/en-us/articles/4408889192858-Managing-access-to-the-Zendesk-API).
Triggr sends the token with a user's email address and sees only what that user can. Use an admin, or an agent with access to the tickets, organizations and views your workflows need; a dedicated user such as `triggr@yourcompany.com` makes Triggr's changes easy to spot.
## Connect it in Triggr
The Base Configuration serves workflows that don't run for a client.
Go to **Integrations > Zendesk** and click **Configure** on the Base Configuration card.
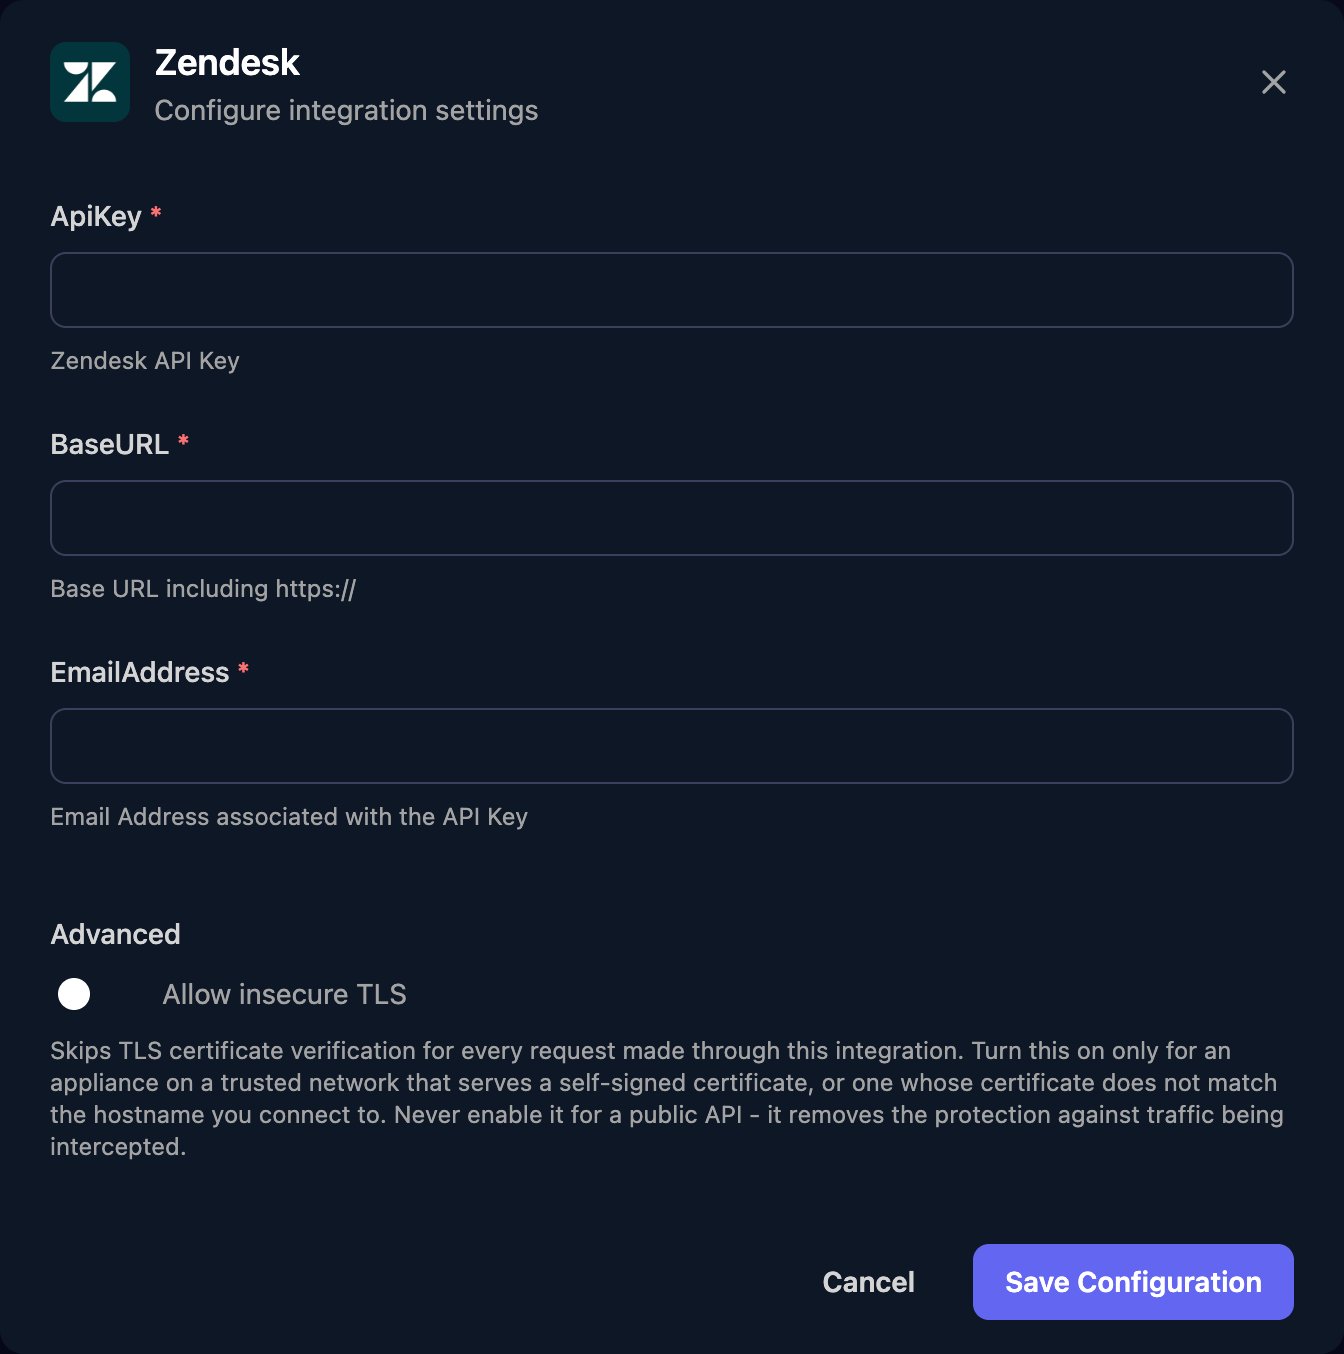
 Enter the token as ApiKey, your Zendesk address with nothing after the host as BaseURL (such as `https://yourcompany.zendesk.com`), and the user's email as EmailAddress. Click Save Configuration.
 ## Set up each client
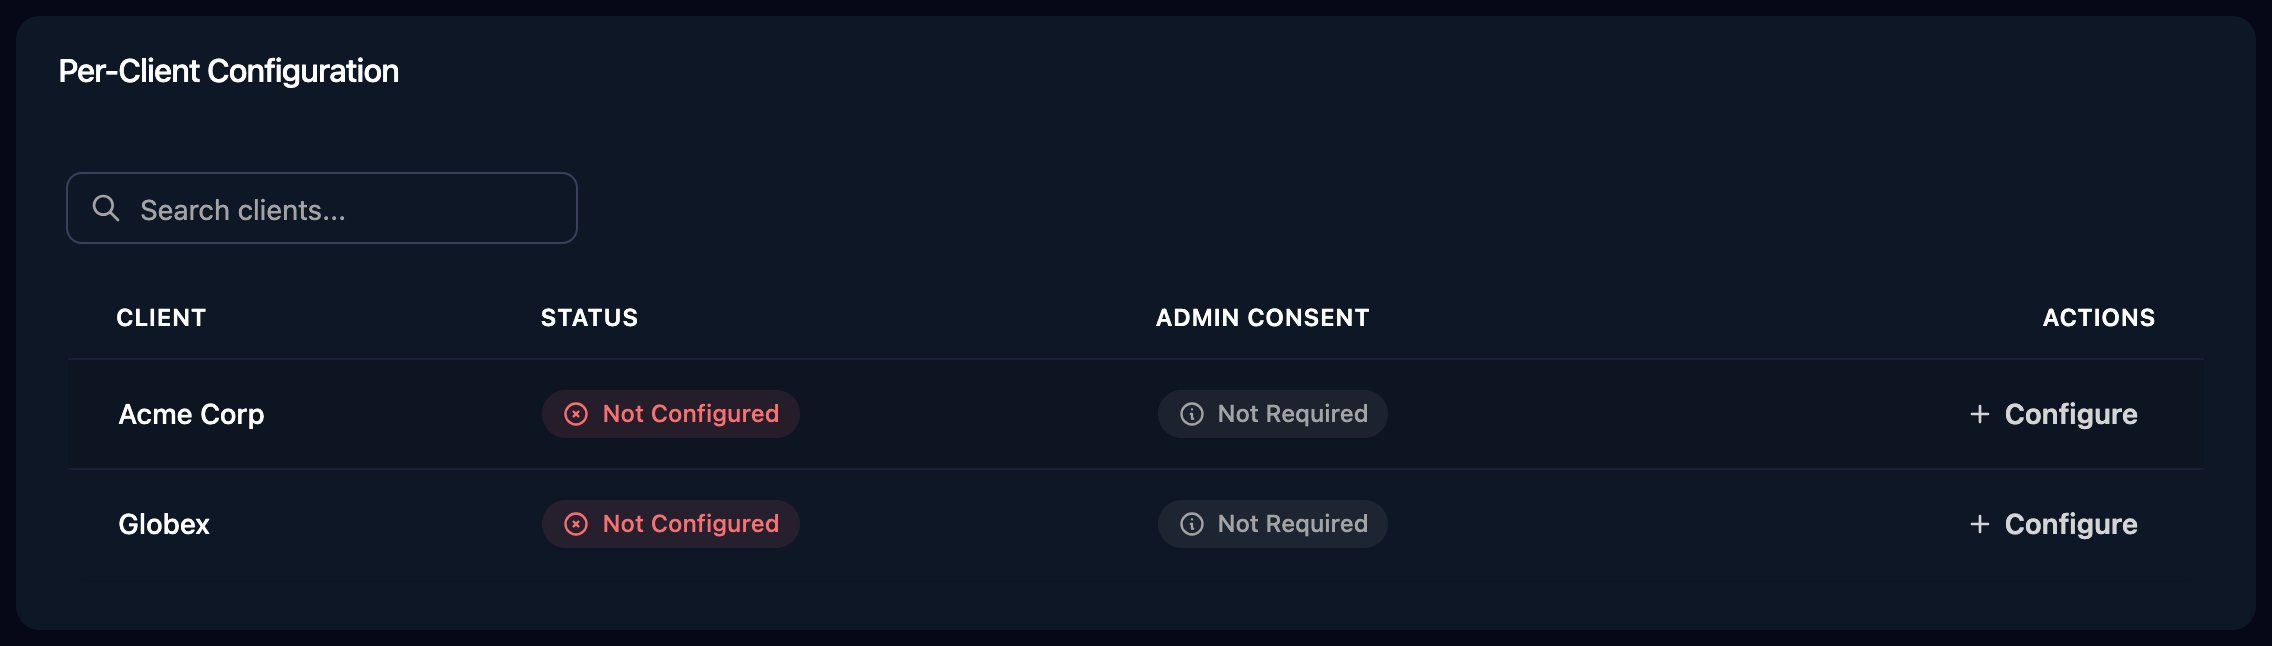
Per-client integrations never fall back to the Base Configuration, so a client's Zendesk steps fail until it's configured. Click **Configure** on each client's row and fill in all three fields: your own Zendesk details, or a token from the client's own Zendesk account.
## Set up each client
Per-client integrations never fall back to the Base Configuration, so a client's Zendesk steps fail until it's configured. Click **Configure** on each client's row and fill in all three fields: your own Zendesk details, or a token from the client's own Zendesk account.
 ## Use Zendesk in workflows
* Create Ticket takes a `ticket` object in `jsonBody`, in the shape of Zendesk's [Create Ticket](https://developer.zendesk.com/api-reference/ticketing/tickets/tickets/#create-ticket) endpoint. Only `comment` is required; add `requester_id` or `organization_id` as needed.
```json theme={null}
{
"ticket": {
"subject": "New starter: Jane Smith",
"comment": { "body": "Please set up a laptop and accounts for Jane Smith, starting Monday." },
"priority": "normal"
}
}
```
* List Tickets For Organization takes an `organizationId` from Get Organizations.
* Global Search takes Zendesk [search syntax](https://developer.zendesk.com/api-reference/ticketing/ticket-management/search/), such as `type:ticket status:open`, with `page` and `perPage` (up to 100).
* Actions with `pageSize` use [cursor pagination](https://developer.zendesk.com/api-reference/introduction/pagination/): pass `meta.after_cursor` as `afterCursor` while `meta.has_more` is `true`.
## Troubleshooting
Configure the client as described in [Set up each client](#set-up-each-client).
Check ApiKey is the full token, EmailAddress is a verified user in the same account, the token is still active (Zendesk deletes tokens unused for 30 days) and Allow API token access is still on.
The EmailAddress user can't see what the action asks for. Use an admin, or widen the user's role.
BaseURL must be `https://` plus the host only. Triggr adds `/api/v2` itself.
Create a new one, paste it into ApiKey in every configuration that uses it, then deactivate the old one under APIs > API tokens.
This documentation is built and hosted on [Mintlify](https://mintlify.com), a developer documentation platform.
## Use Zendesk in workflows
* Create Ticket takes a `ticket` object in `jsonBody`, in the shape of Zendesk's [Create Ticket](https://developer.zendesk.com/api-reference/ticketing/tickets/tickets/#create-ticket) endpoint. Only `comment` is required; add `requester_id` or `organization_id` as needed.
```json theme={null}
{
"ticket": {
"subject": "New starter: Jane Smith",
"comment": { "body": "Please set up a laptop and accounts for Jane Smith, starting Monday." },
"priority": "normal"
}
}
```
* List Tickets For Organization takes an `organizationId` from Get Organizations.
* Global Search takes Zendesk [search syntax](https://developer.zendesk.com/api-reference/ticketing/ticket-management/search/), such as `type:ticket status:open`, with `page` and `perPage` (up to 100).
* Actions with `pageSize` use [cursor pagination](https://developer.zendesk.com/api-reference/introduction/pagination/): pass `meta.after_cursor` as `afterCursor` while `meta.has_more` is `true`.
## Troubleshooting
Configure the client as described in [Set up each client](#set-up-each-client).
Check ApiKey is the full token, EmailAddress is a verified user in the same account, the token is still active (Zendesk deletes tokens unused for 30 days) and Allow API token access is still on.
The EmailAddress user can't see what the action asks for. Use an admin, or widen the user's role.
BaseURL must be `https://` plus the host only. Triggr adds `/api/v2` itself.
Create a new one, paste it into ApiKey in every configuration that uses it, then deactivate the old one under APIs > API tokens.
This documentation is built and hosted on [Mintlify](https://mintlify.com), a developer documentation platform.