> ## Documentation Index
> Fetch the complete documentation index at: https://university.triggr-app.com/llms.txt
> Use this file to discover all available pages before exploring further.
# Team and permissions
> Invite your team to Studio, choose each person's role, group your approvers, and remove people safely.
Your team signs in to Studio and Triggr Core with one account; members, roles and user groups are shared by both apps.
## Invite your team
Click your organisation's name at the top right, then **Manage > Members**.
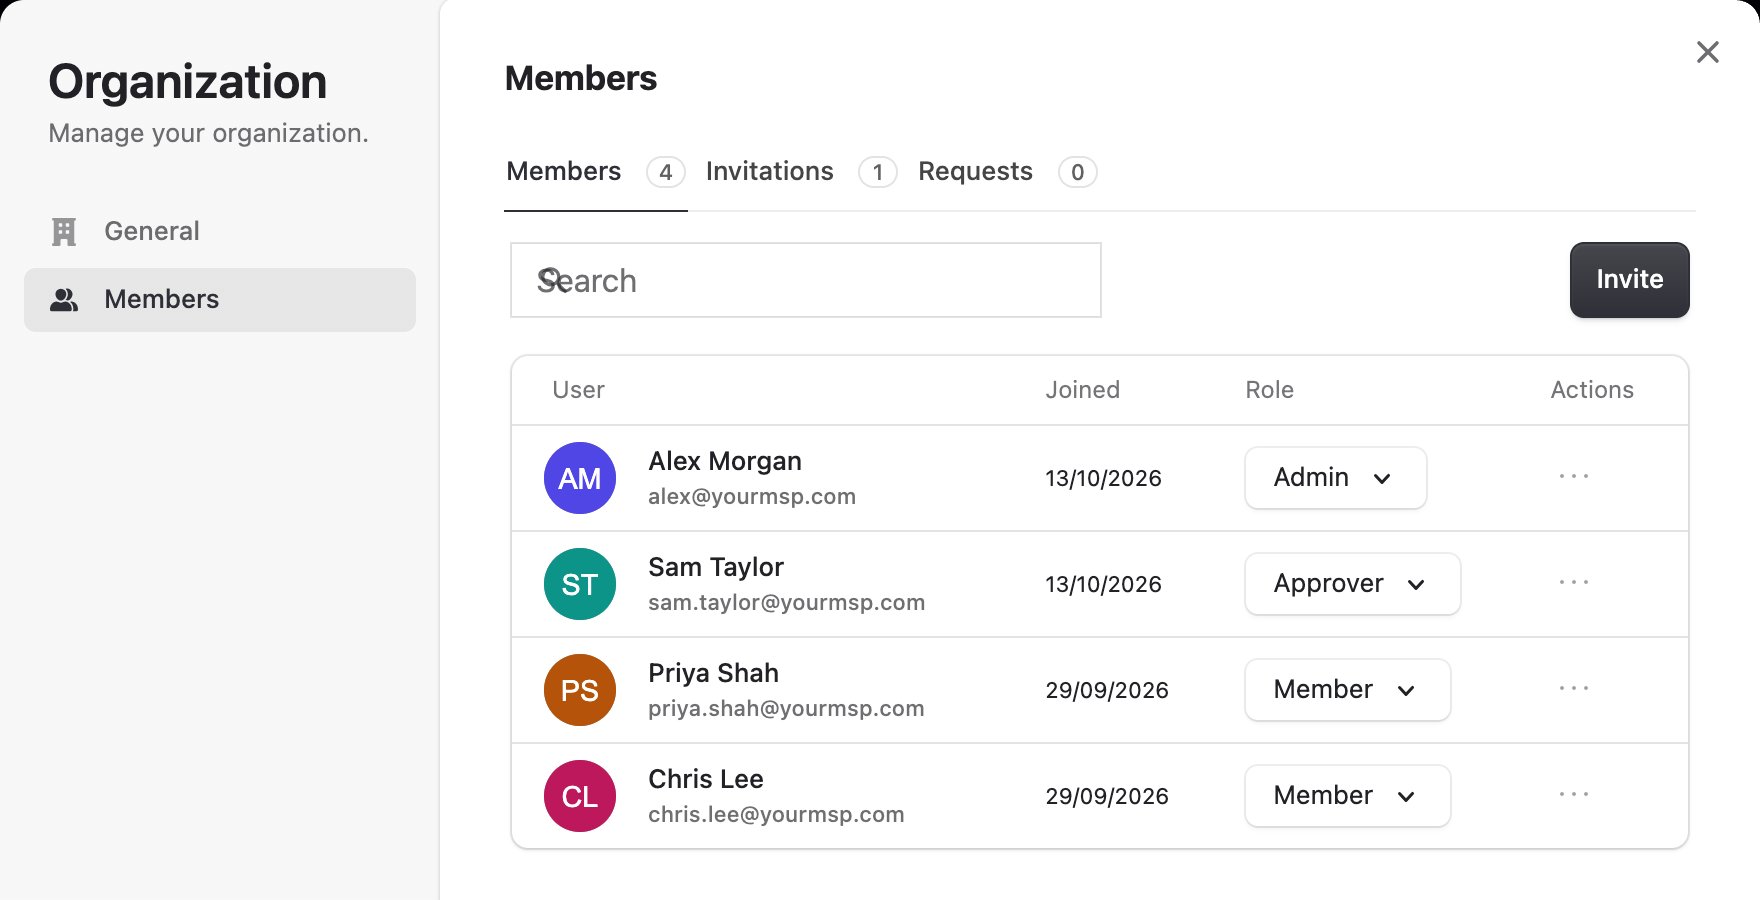 Click **Invite**, enter email addresses separated by spaces or commas, choose the Role and click **Send invitations**.
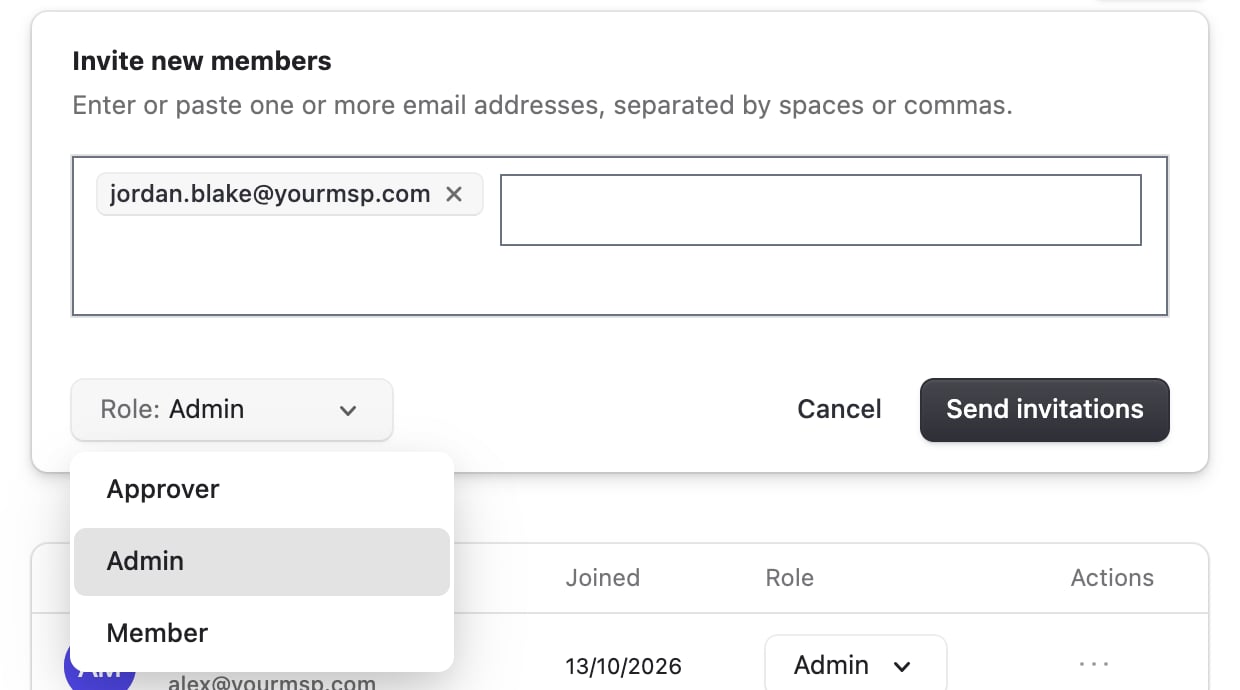 Each person follows the emailed link, then signs in at [app.triggr-app.com](https://app.triggr-app.com).
To change someone's role later, pick it from the Role list on their row.
## Roles
Studio has three roles. You can't add your own or change what a role includes.
| Role | Can see | Can change |
| - | - | - |
| Admin | Everything | Everything, including Integrations, Settings, members and roles |
| Approver | Clients, Forms and submissions, Workflows and runs, Internal Apps, On-Prem and Reporting | Approvals and manual steps |
| Member | Internal Apps and the Dashboard | Approvals and manual steps |
Whatever their role, anyone can answer an approval sent to their email address or to a [user group](#group-your-approvers) they're in, and complete tasks on Manual Steps.
Admin for the people who build, Approver for engineers who follow requests and runs, Member for people who only use your internal apps and approve.
## Group your approvers
A user group lets anyone in it answer an approval, so requests don't wait for one person. Find them in **Settings > User Groups**.
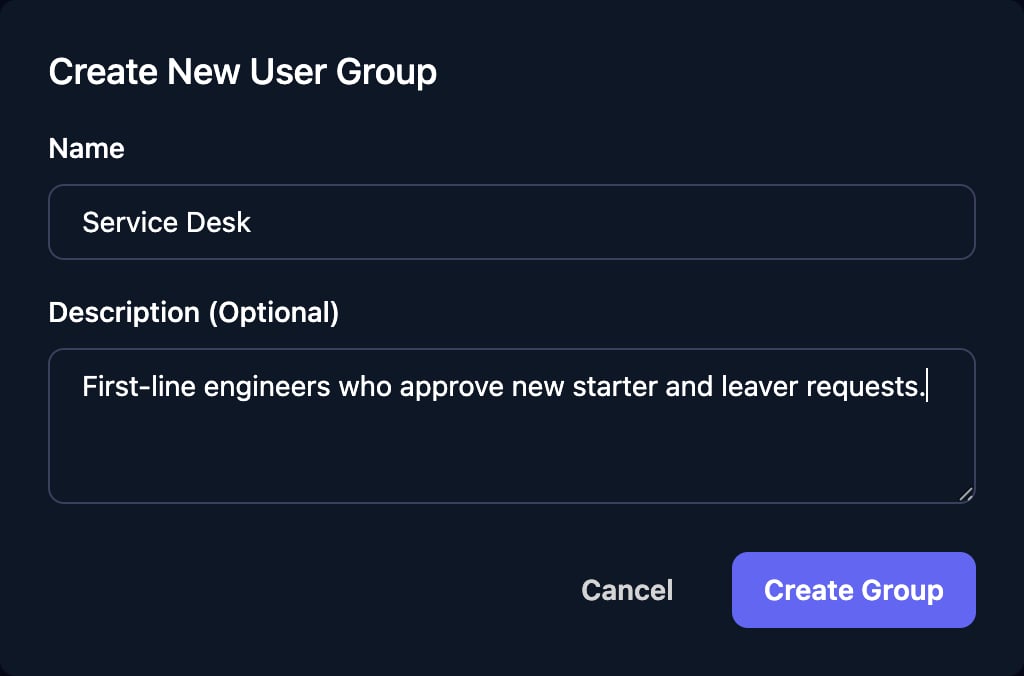
Click **New Group**, enter the Name and Description, and click **Create Group**.
Each person follows the emailed link, then signs in at [app.triggr-app.com](https://app.triggr-app.com).
To change someone's role later, pick it from the Role list on their row.
## Roles
Studio has three roles. You can't add your own or change what a role includes.
| Role | Can see | Can change |
| - | - | - |
| Admin | Everything | Everything, including Integrations, Settings, members and roles |
| Approver | Clients, Forms and submissions, Workflows and runs, Internal Apps, On-Prem and Reporting | Approvals and manual steps |
| Member | Internal Apps and the Dashboard | Approvals and manual steps |
Whatever their role, anyone can answer an approval sent to their email address or to a [user group](#group-your-approvers) they're in, and complete tasks on Manual Steps.
Admin for the people who build, Approver for engineers who follow requests and runs, Member for people who only use your internal apps and approve.
## Group your approvers
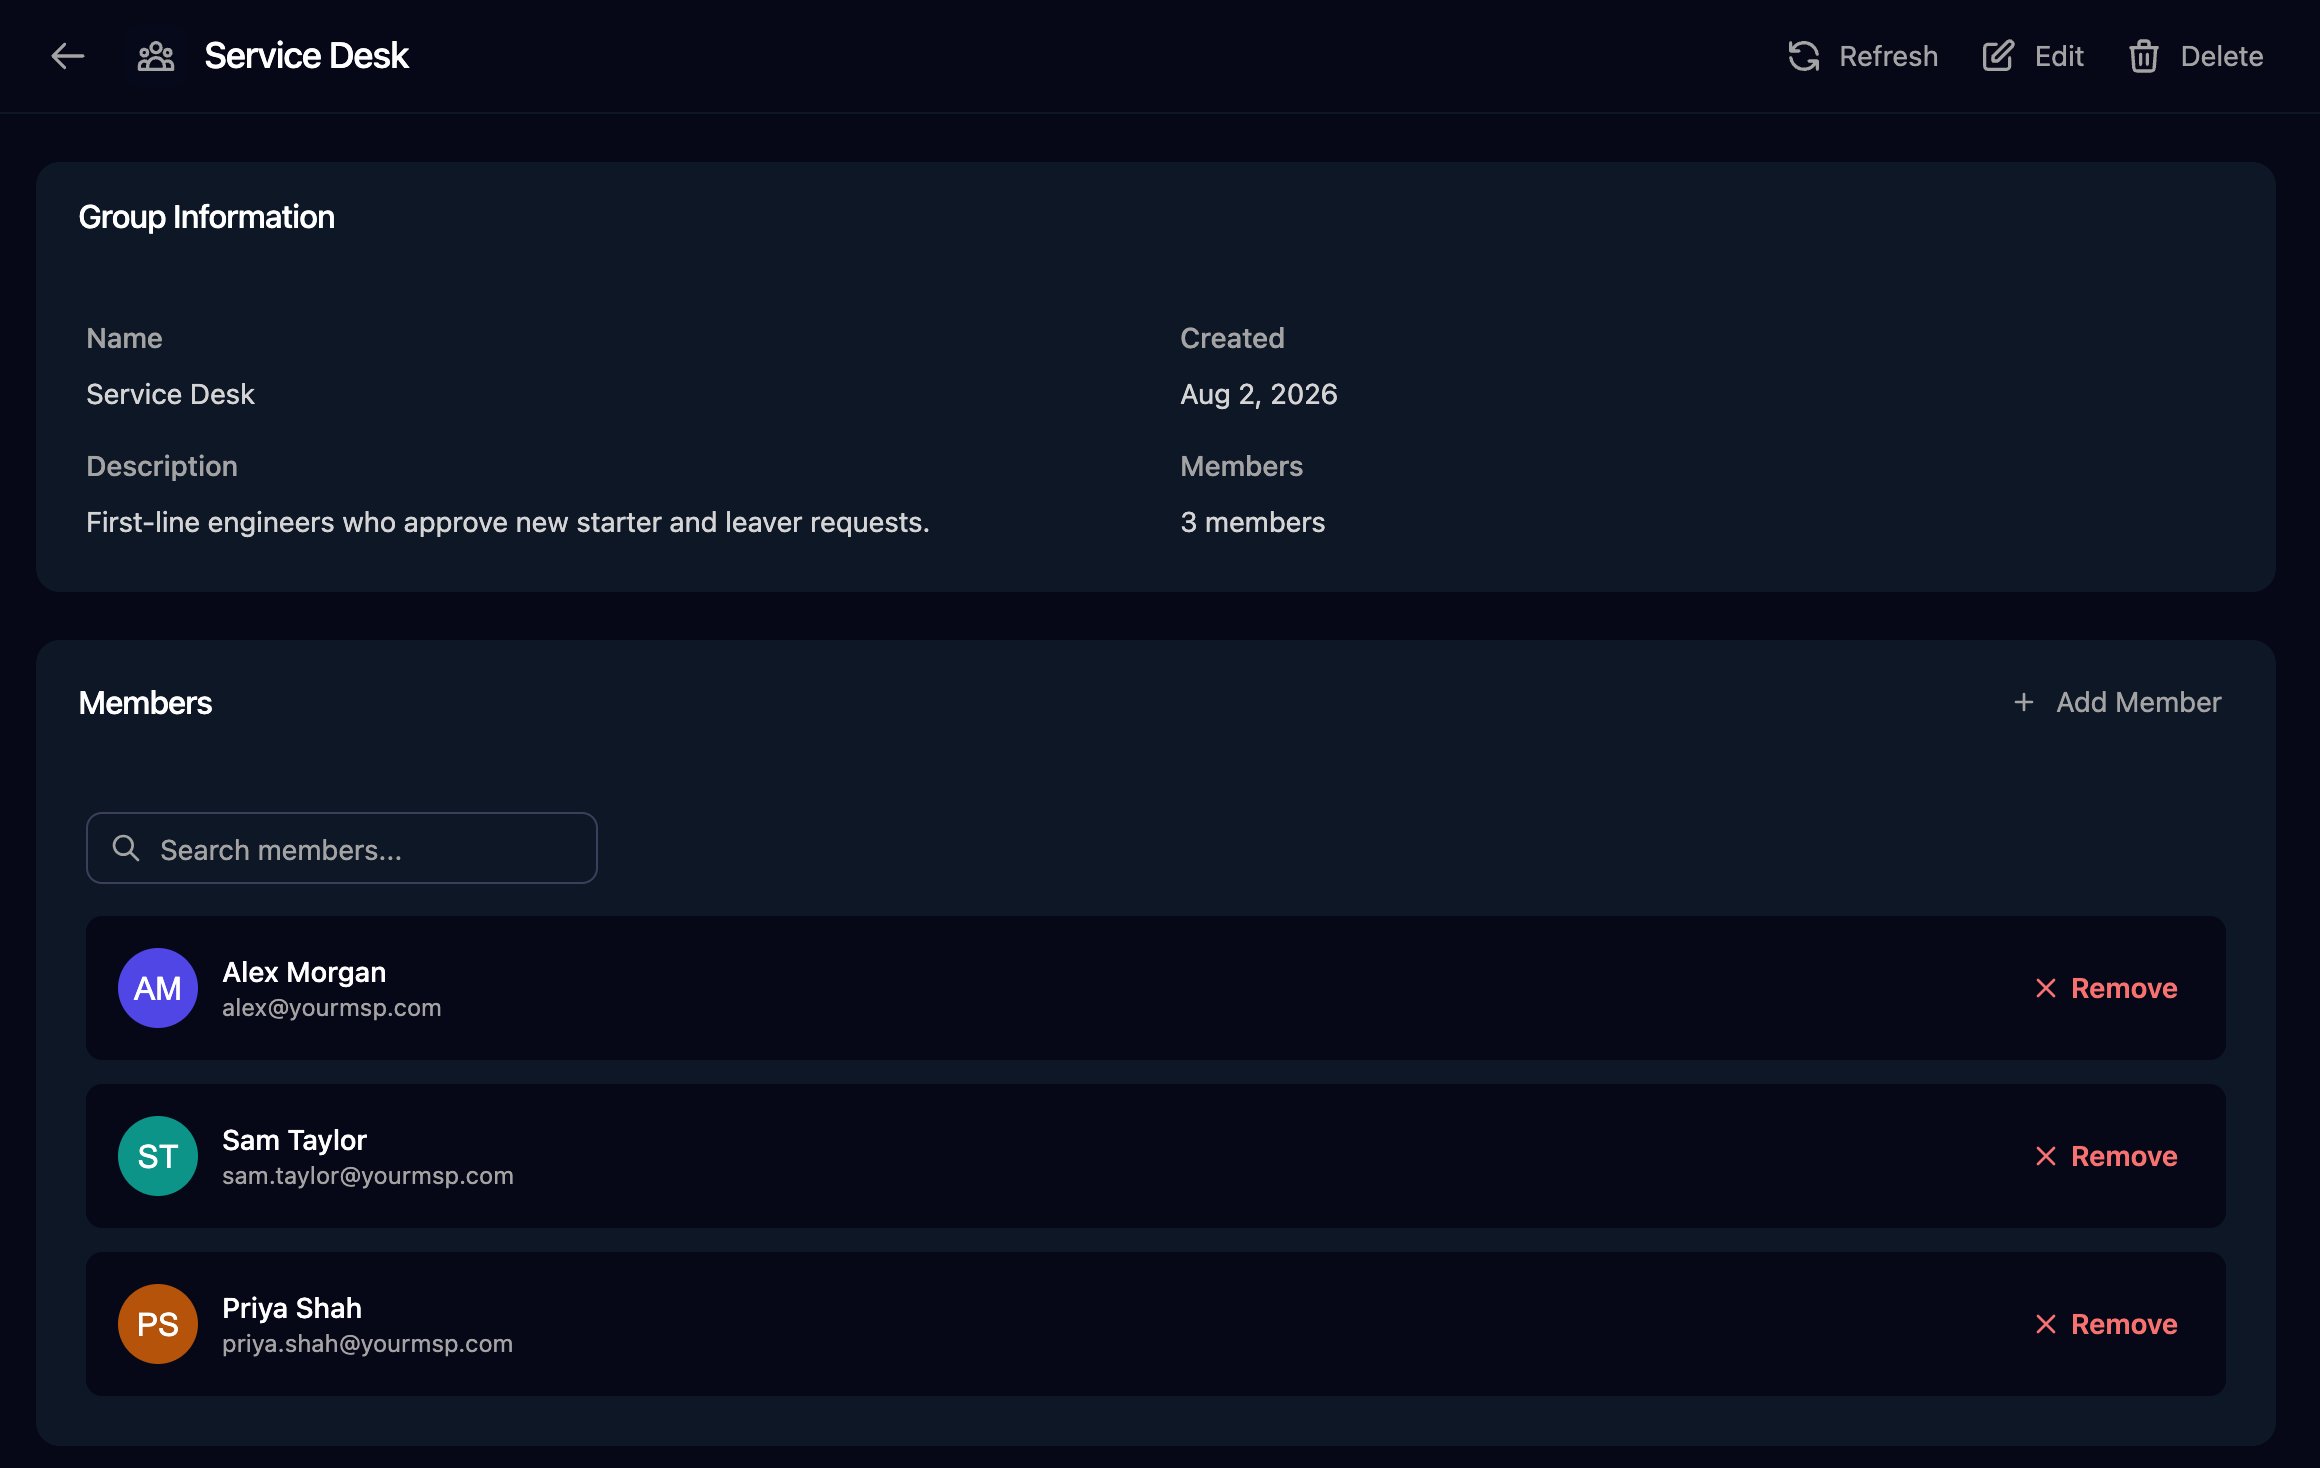
A user group lets anyone in it answer an approval, so requests don't wait for one person. Find them in **Settings > User Groups**.
Click **New Group**, enter the Name and Description, and click **Create Group**.
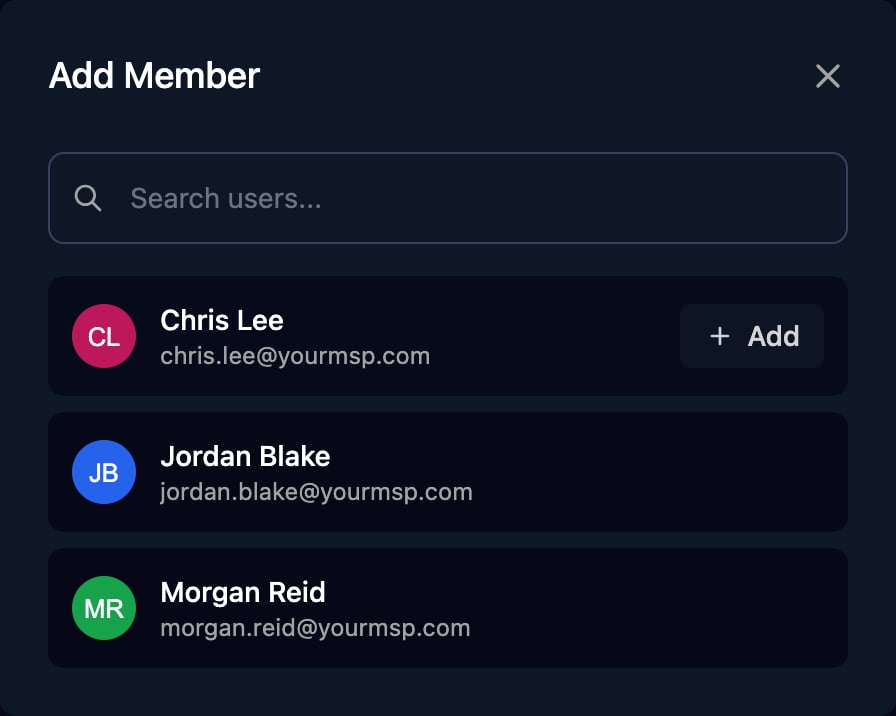
 Click Members on the group's row, then **Add Member**, point to a person and click **Add**. The dialog closes after each one, so click Add Member again for the next.
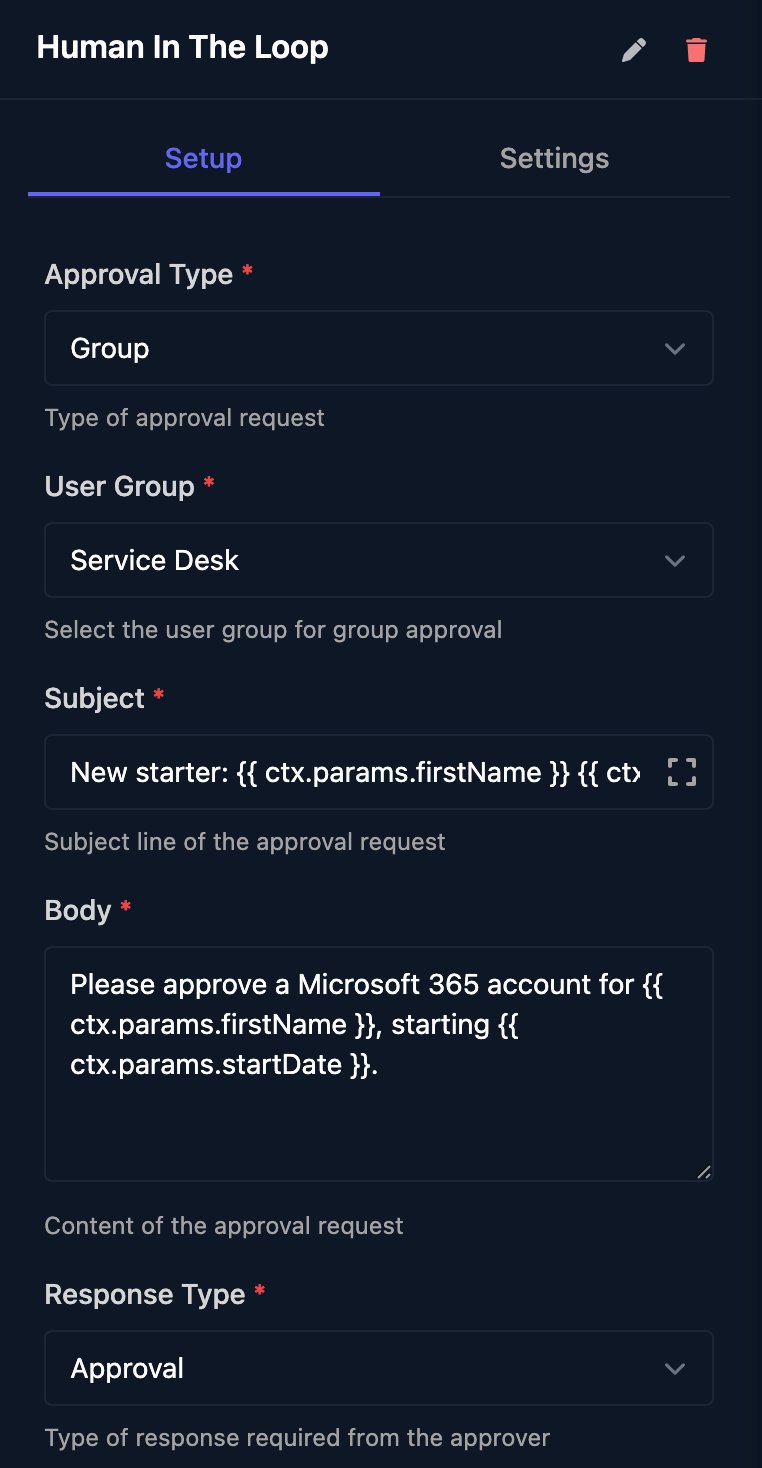
 In a workflow, set a Human In The Loop or Approval With Logging step's **Approval Type** to Group and choose the User Group.
 Group approvals don't send an email: members find them on Approvals, and the first answer counts. See [Approvals and manual steps](/studio/workflows/approvals-and-manual-steps).
## Remove someone
Open each group in **Settings > User Groups** and click **Remove** on their row. Do this first: removing someone from the organisation leaves them in every group, listed as Unknown.
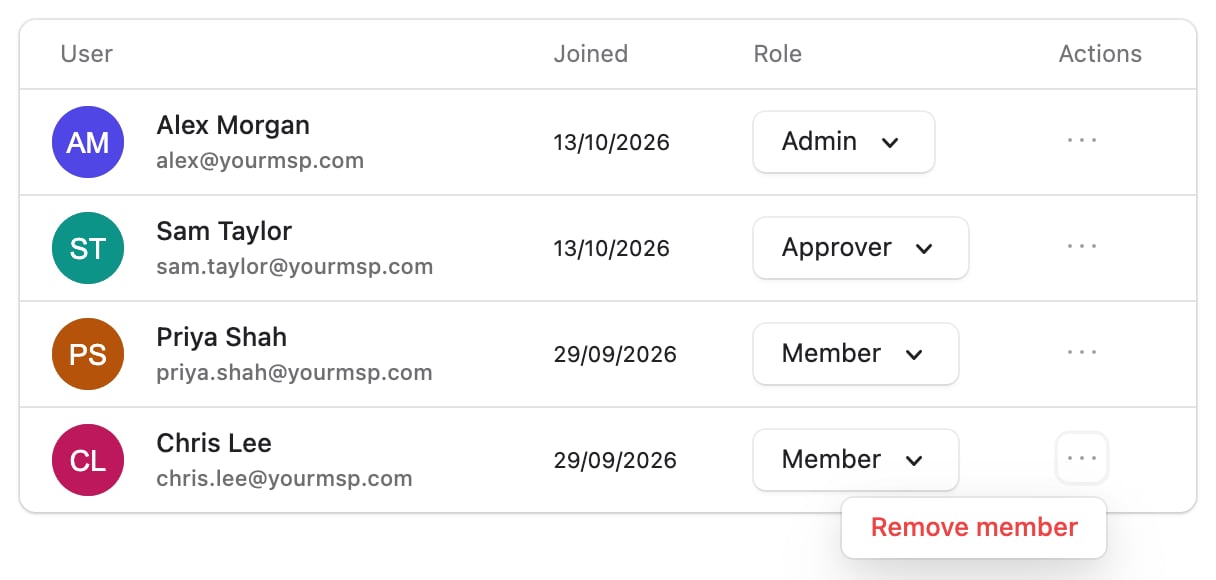
On Members, click … on their row, then **Remove member**. They lose access to Studio and Triggr Core at once.
Group approvals don't send an email: members find them on Approvals, and the first answer counts. See [Approvals and manual steps](/studio/workflows/approvals-and-manual-steps).
## Remove someone
Open each group in **Settings > User Groups** and click **Remove** on their row. Do this first: removing someone from the organisation leaves them in every group, listed as Unknown.
On Members, click … on their row, then **Remove member**. They lose access to Studio and Triggr Core at once.
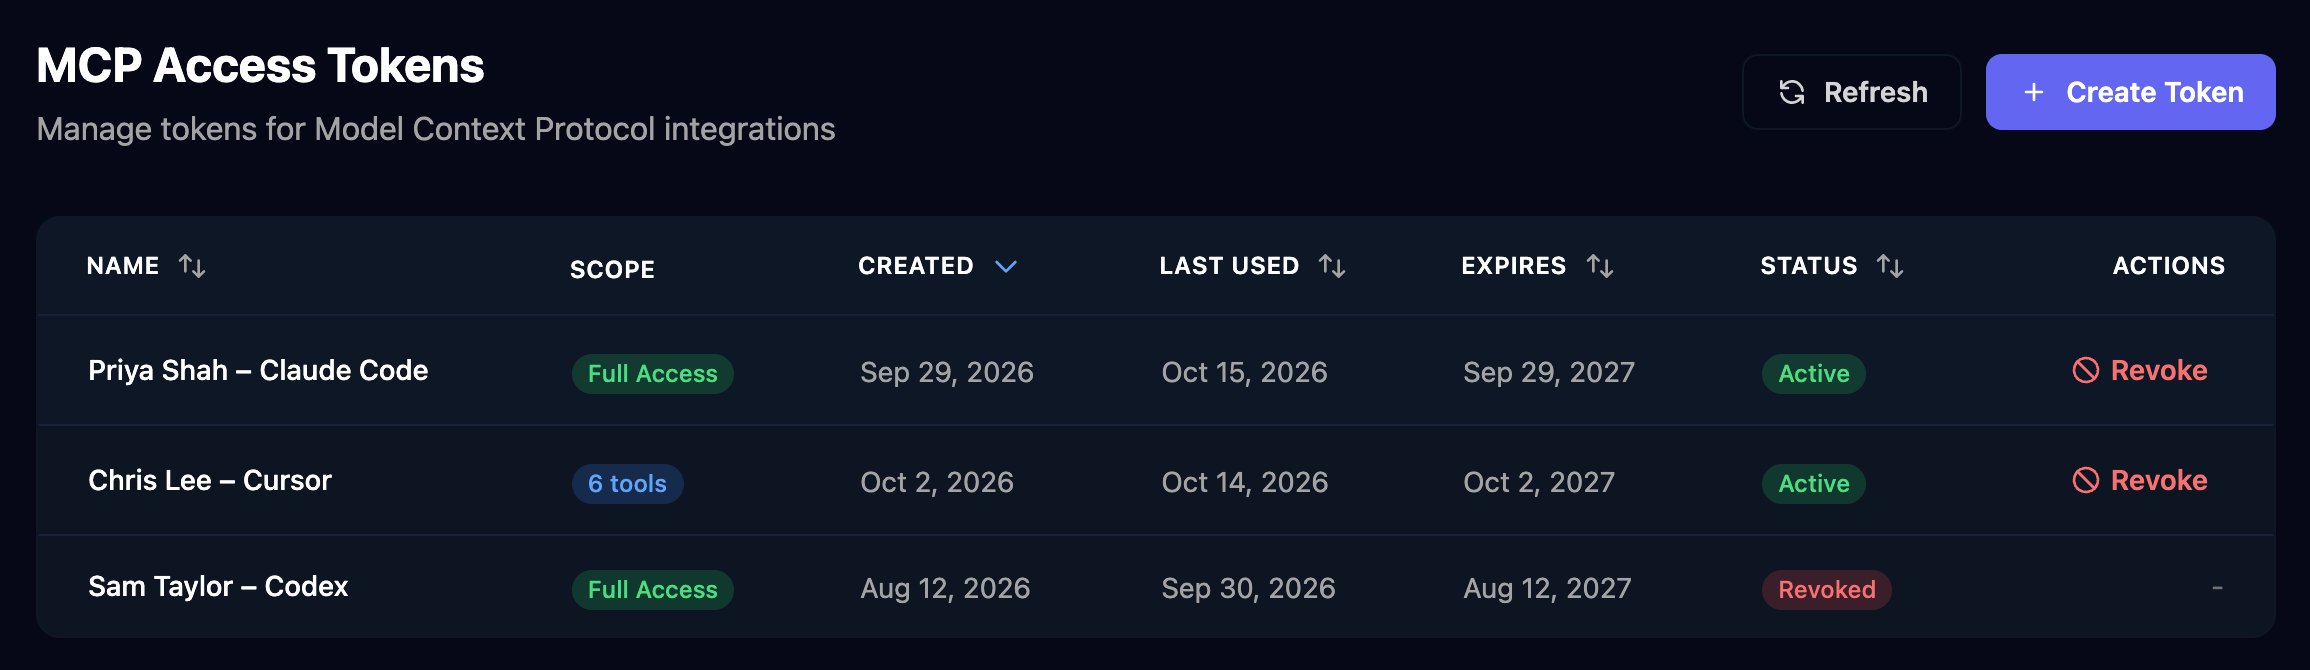
 Removing someone doesn't stop their tokens. Go to **Settings > MCP**, click **Revoke** on each one, then **Revoke Token**; the list doesn't show owners, so name tokens after the person who uses them.
 Revoke any API Keys they knew (keys belong to the organisation, not a person).
## Partner Access
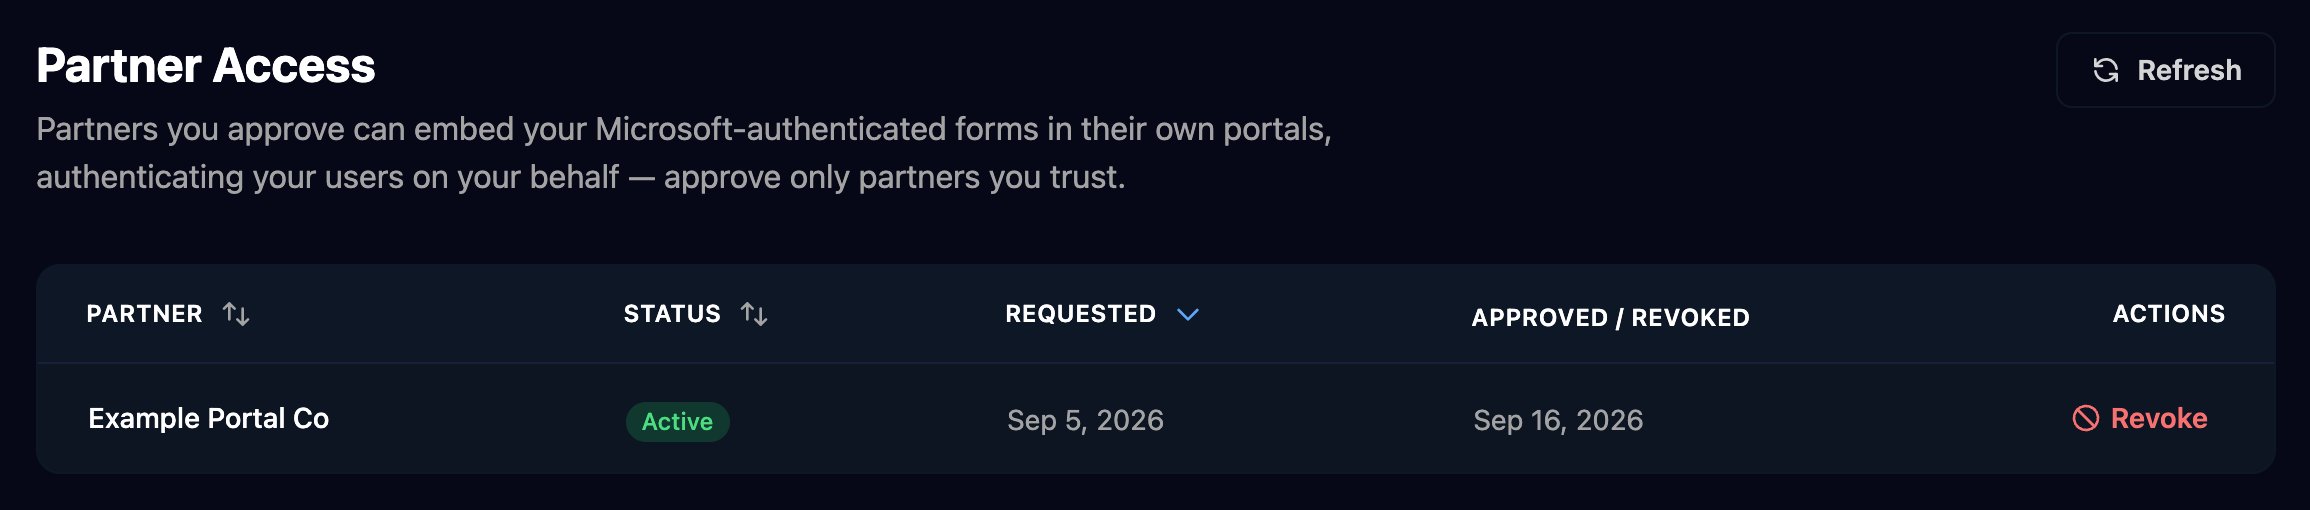
When a portal provider that partners with Triggr asks to embed your forms, the request appears in Settings > Partner Access (admins only). Click **Approve** or **Deny**: approving lets the partner show your Microsoft-authenticated forms in its own portal and sign your clients' users in, for every client you manage. Revoke on an Active row stops that at once.
Revoke any API Keys they knew (keys belong to the organisation, not a person).
## Partner Access
When a portal provider that partners with Triggr asks to embed your forms, the request appears in Settings > Partner Access (admins only). Click **Approve** or **Deny**: approving lets the partner show your Microsoft-authenticated forms in its own portal and sign your clients' users in, for every client you manage. Revoke on an Active row stops that at once.
 ## FAQ
Member sees only Internal Apps and the Dashboard; Approver adds Clients, Forms and Workflows; Integrations, Settings and the New buttons need Admin.
Group approvals don't email anyone. Check they're in the group the step names, then look on Approvals.
A denied or revoked request stays revoked, even if the partner asks again. Contact Triggr support.
This documentation is built and hosted on [Mintlify](https://mintlify.com), a developer documentation platform.
## FAQ
Member sees only Internal Apps and the Dashboard; Approver adds Clients, Forms and Workflows; Integrations, Settings and the New buttons need Admin.
Group approvals don't email anyone. Check they're in the group the step names, then look on Approvals.
A denied or revoked request stays revoked, even if the partner asks again. Contact Triggr support.
This documentation is built and hosted on [Mintlify](https://mintlify.com), a developer documentation platform.