> ## Documentation Index
> Fetch the complete documentation index at: https://university.triggr-app.com/llms.txt
> Use this file to discover all available pages before exploring further.
# Introduction to forms
> Build your first Studio form, choose who can open it, connect it to a workflow and share it with a client.
A form collects answers from your team or your clients. Each submission starts every active workflow connected to it.
 ## Build a new starter request form
Client staff use this form to request a new user. Microsoft sign-in tells Triggr which client they belong to, so each client needs a `microsoftTenantId` variable ([Clients and variables](/studio/clients/clients-and-variables#give-it-variables)).
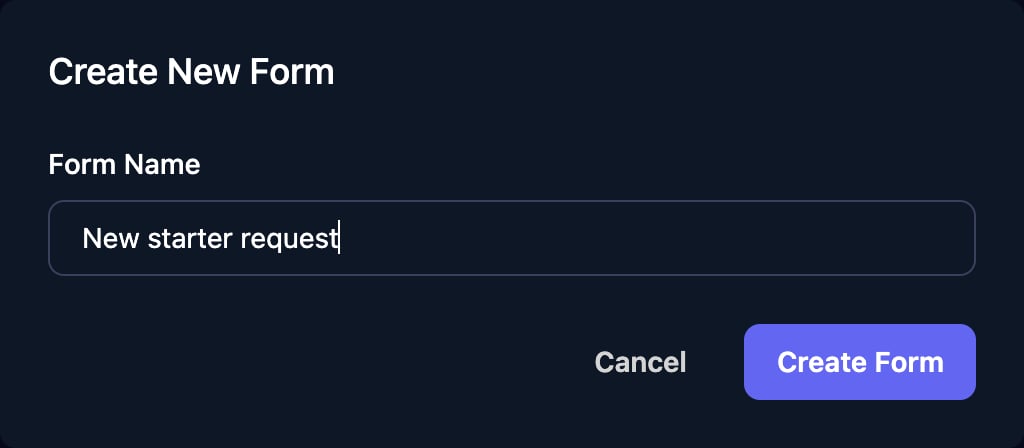
In Forms, click **New Form**, enter `New starter request` and click Create Form.
## Build a new starter request form
Client staff use this form to request a new user. Microsoft sign-in tells Triggr which client they belong to, so each client needs a `microsoftTenantId` variable ([Clients and variables](/studio/clients/clients-and-variables#give-it-variables)).
In Forms, click **New Form**, enter `New starter request` and click Create Form.
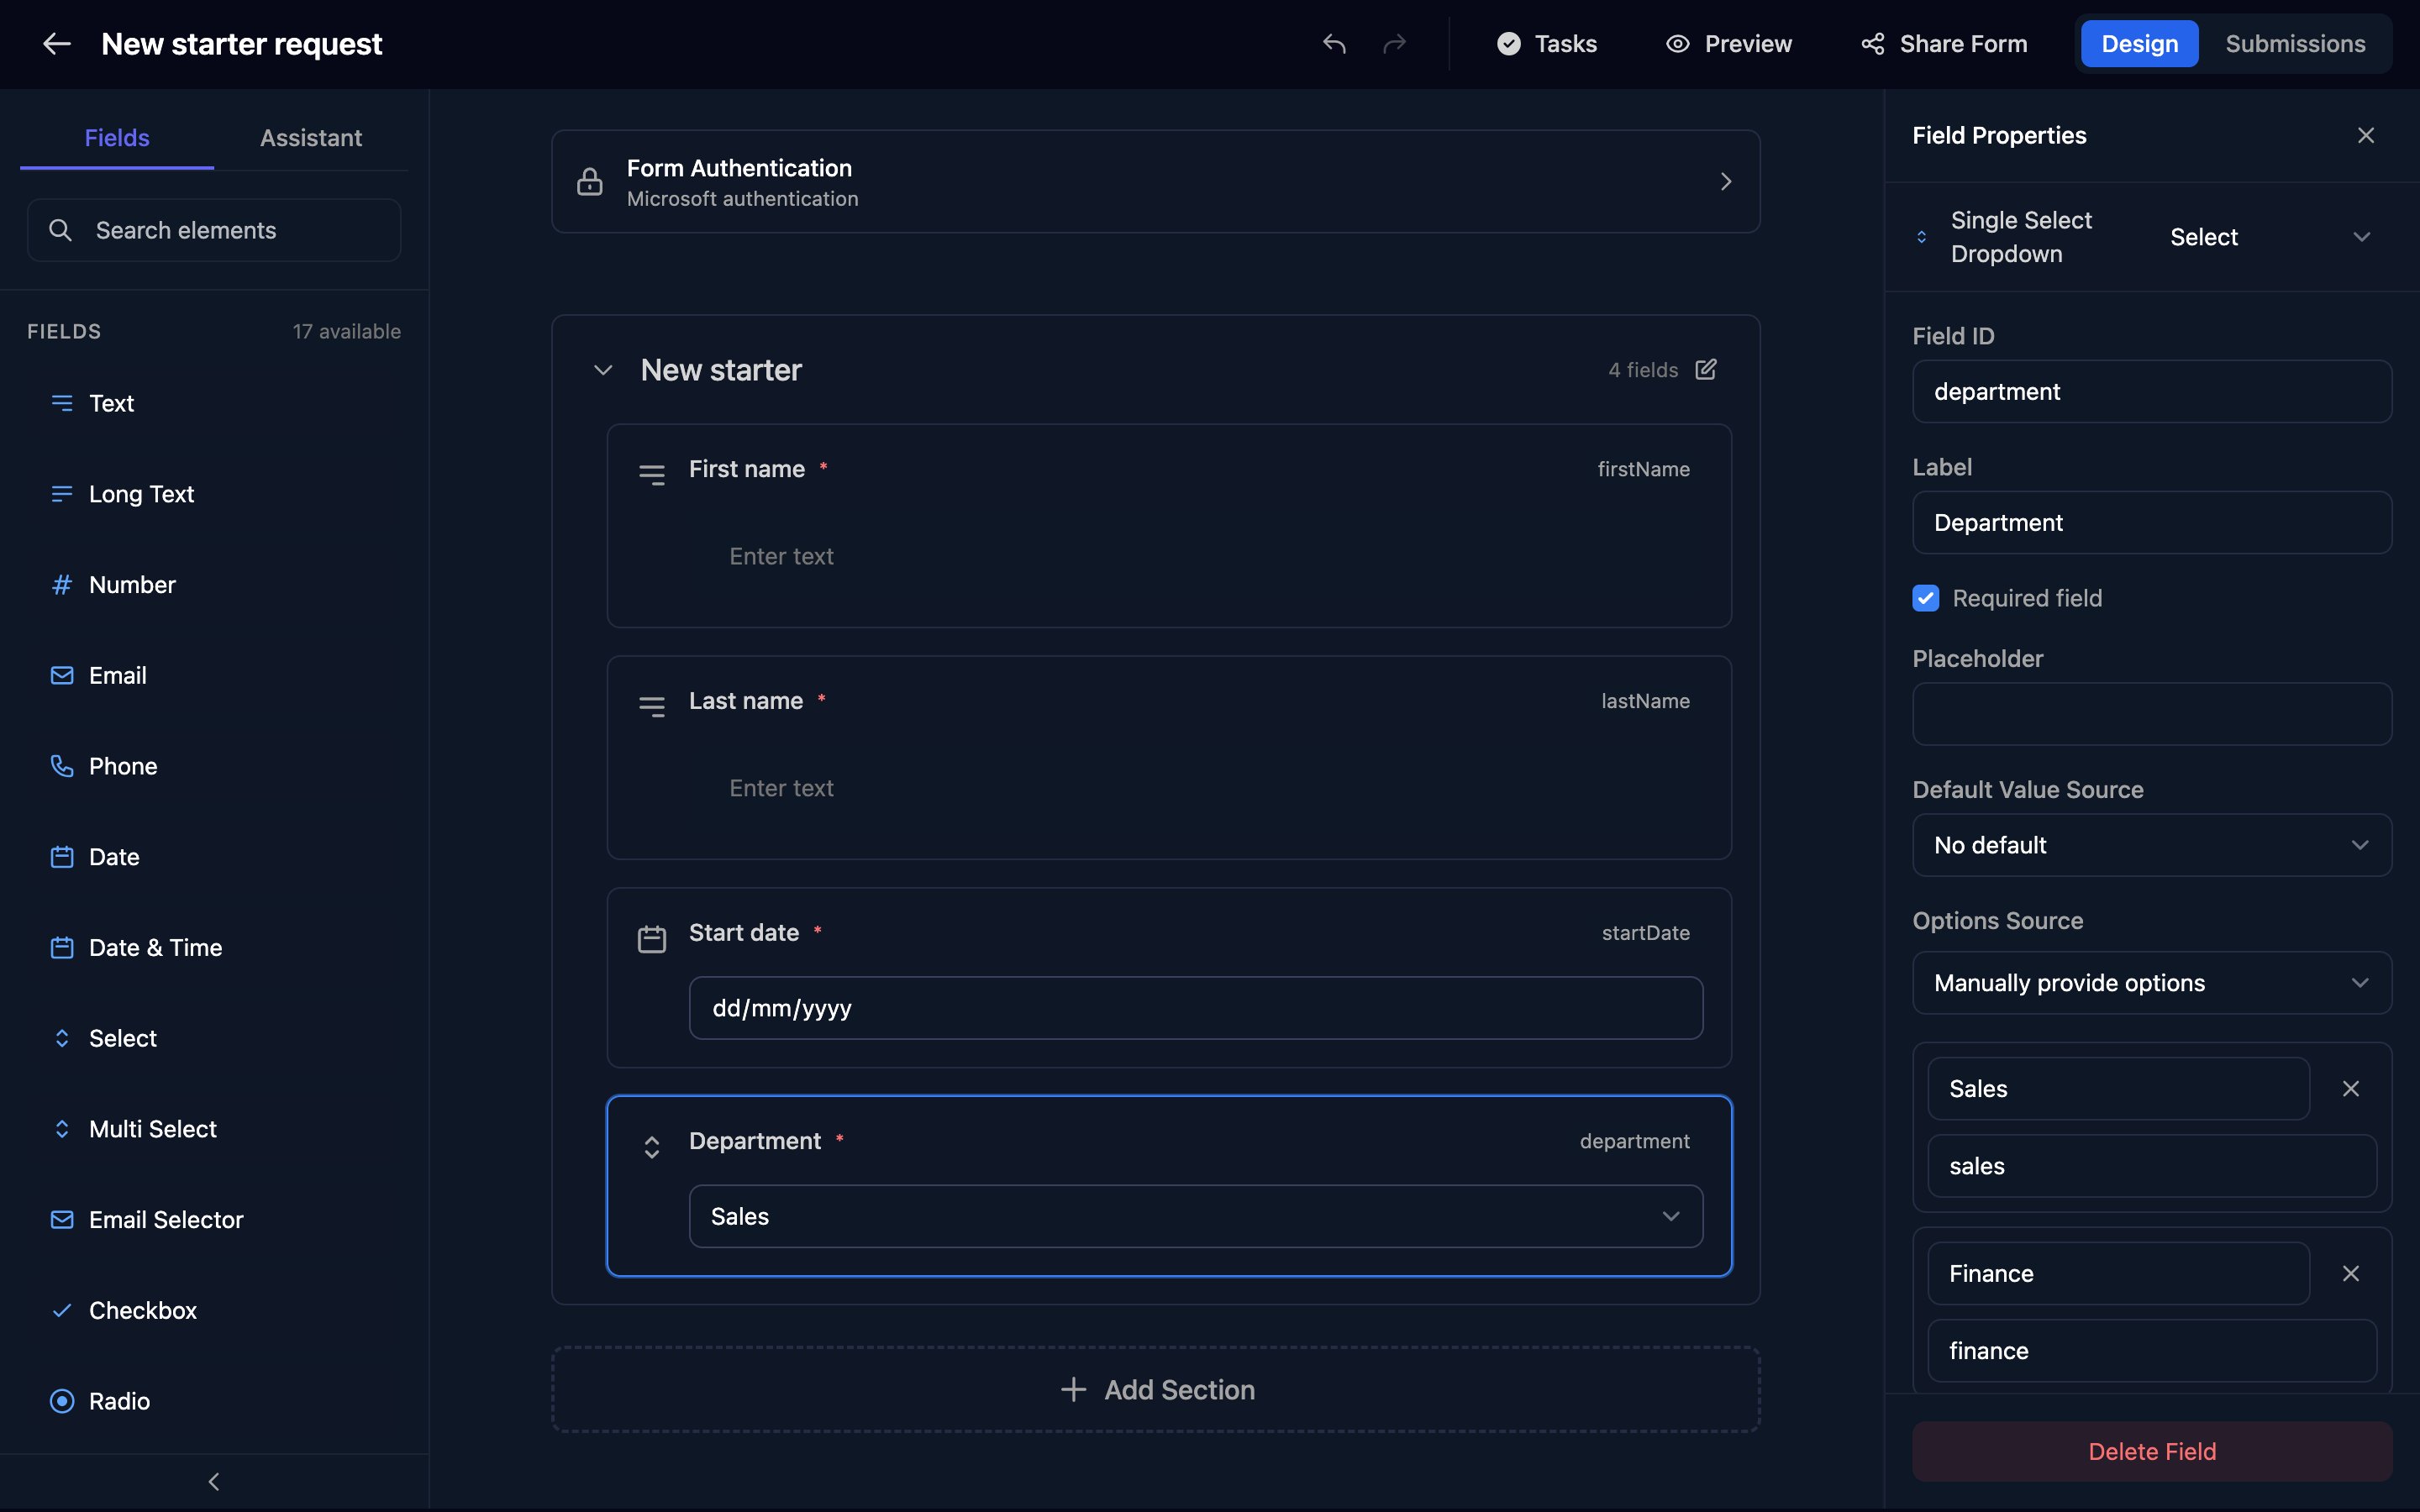
 Drag each field onto the canvas, click it, and set its Label, Field ID and Required field. For Department, type each option's label and value.
| Field | Label | Field ID |
| - | - | - |
| Text | First name | `firstName` |
| Text | Last name | `lastName` |
| Date | Start date | `startDate` |
| Select | Department | `department` |
Workflows read each answer by its Field ID, such as `{{ ctx.params.firstName }}`, so replace the default `property1`, `property2`… before you build the workflow. Click **Save** in the bar at the bottom of the designer.
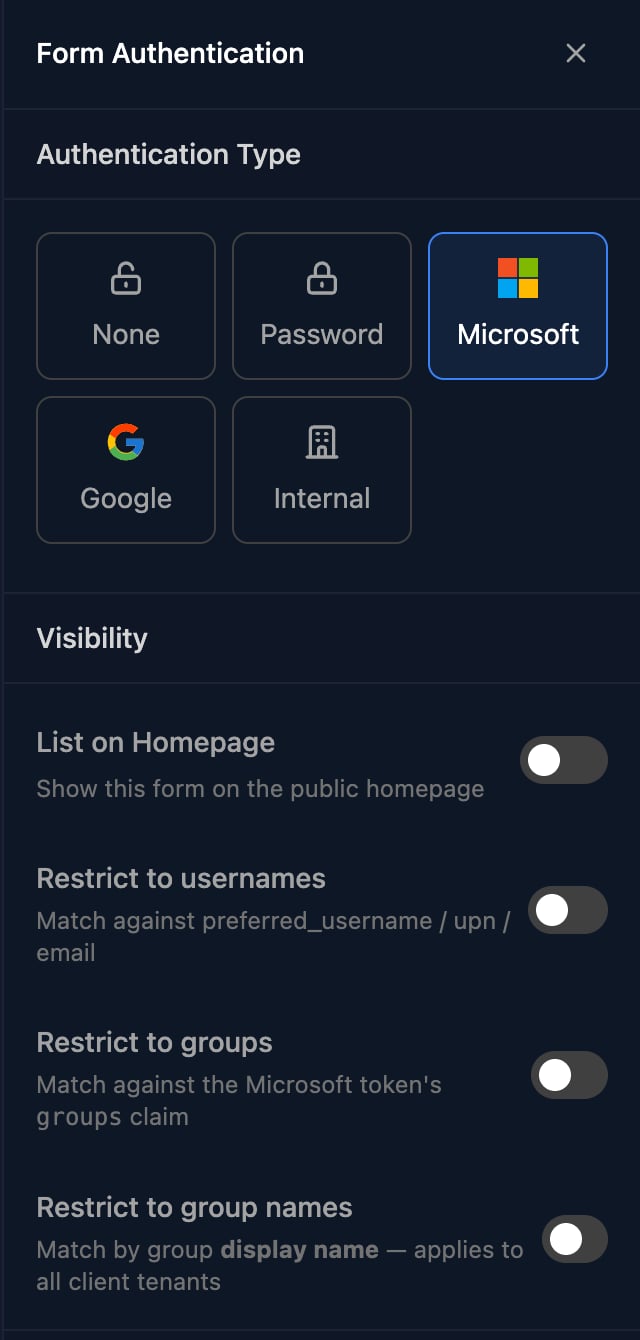
Click **Form Authentication**, choose Microsoft and click Save.
Drag each field onto the canvas, click it, and set its Label, Field ID and Required field. For Department, type each option's label and value.
| Field | Label | Field ID |
| - | - | - |
| Text | First name | `firstName` |
| Text | Last name | `lastName` |
| Date | Start date | `startDate` |
| Select | Department | `department` |
Workflows read each answer by its Field ID, such as `{{ ctx.params.firstName }}`, so replace the default `property1`, `property2`… before you build the workflow. Click **Save** in the bar at the bottom of the designer.
Click **Form Authentication**, choose Microsoft and click Save.
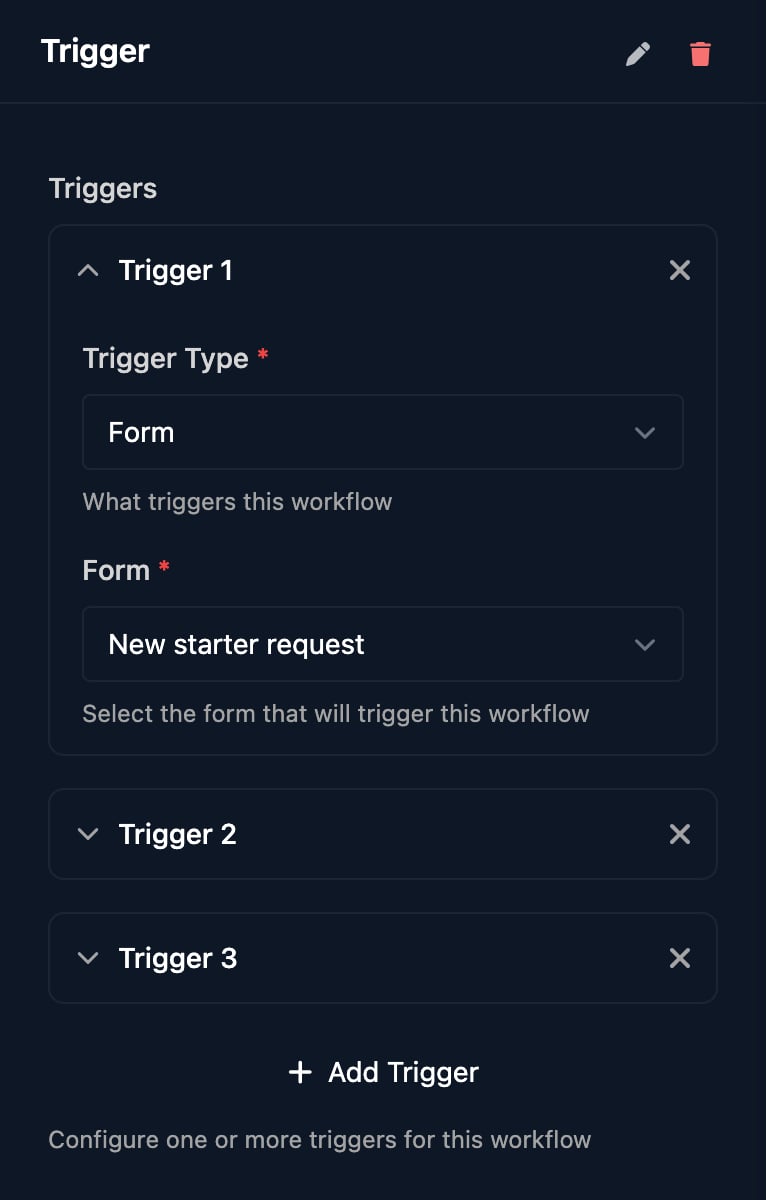
 In your [workflow](/studio/workflows/triggers#form), click the Trigger, set **Trigger Type** to Form, choose New starter request and click Save. Only Active workflows start from a form.
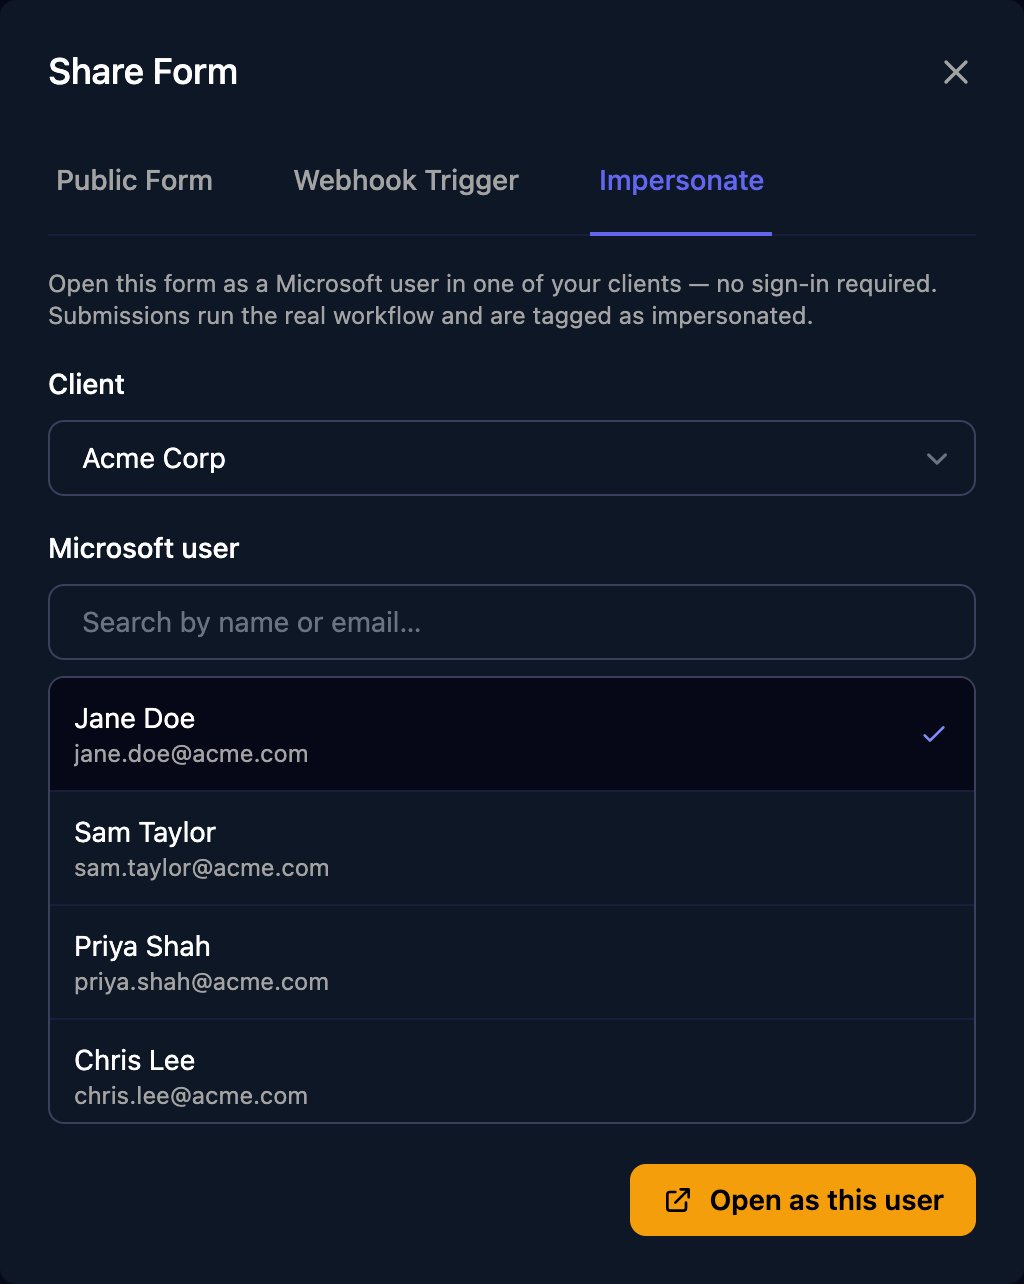
 Click **Share Form > Impersonate**, pick a Client and a Microsoft user, and click Open as this user. Submitting runs the workflow for real.
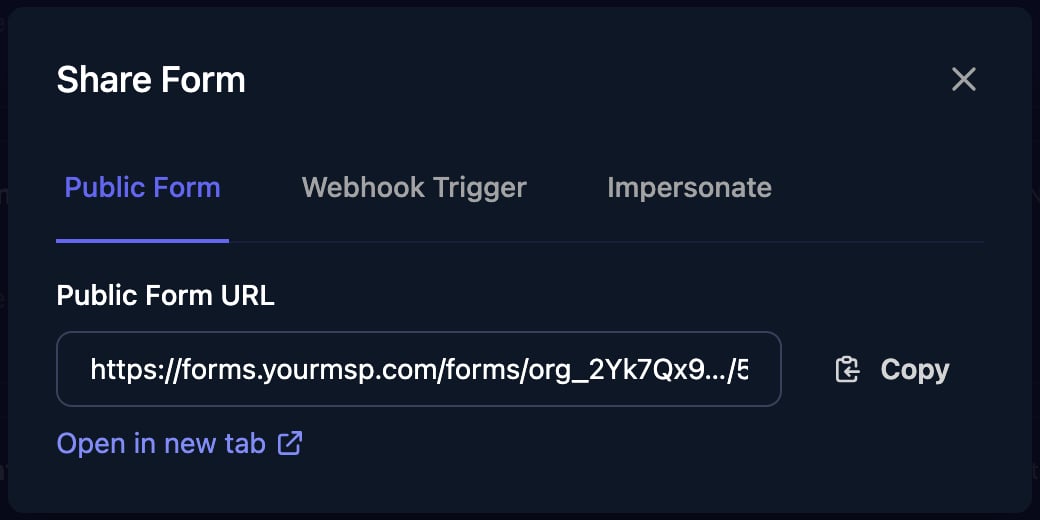
 In Share Form, click **Copy** next to Public Form URL and send it to the client. With a Custom Forms Domain (Settings > Branding), the link uses your own domain.
 ## Who can open a form
Form Authentication lets in anyone (None), anyone with the password (Password), client staff who sign in with Microsoft or Google, or your own team (Internal). Only Microsoft, Google and Internal with Manually Set Client tell the workflow which client the person belongs to; see [Form authentication](/studio/forms/authentication). Send your clients' staff the [guides for your clients](/guides/overview).
## See submissions
Click Submissions in the designer header or on the form's row. It lists the last 24 hours until you change Date Range. Click **View** on a submission for its Data and its Metadata, including who signed in, and untick Pretty Format (Show Display Values) to see each answer by Field ID, as your workflow receives it.
## Troubleshooting
No client's `microsoftTenantId` matches the person's tenant, or they aren't in the usernames or groups you restricted the form to.
Preview never submits. Test with Share Form > Impersonate or the Public Form URL instead.
## Go further
* [Field reference](/studio/forms/fields): every field type and its settings.
* [Dynamic options](/studio/forms/dynamic-options): fill a dropdown from a workflow, Microsoft or an integration, and reload it when another answer changes.
* [Conditional fields](/studio/forms/conditional-fields): show or hide fields and sections based on other answers.
Next: [Introduction to workflows](/studio/workflows/introduction).
This documentation is built and hosted on [Mintlify](https://mintlify.com), a developer documentation platform.
## Who can open a form
Form Authentication lets in anyone (None), anyone with the password (Password), client staff who sign in with Microsoft or Google, or your own team (Internal). Only Microsoft, Google and Internal with Manually Set Client tell the workflow which client the person belongs to; see [Form authentication](/studio/forms/authentication). Send your clients' staff the [guides for your clients](/guides/overview).
## See submissions
Click Submissions in the designer header or on the form's row. It lists the last 24 hours until you change Date Range. Click **View** on a submission for its Data and its Metadata, including who signed in, and untick Pretty Format (Show Display Values) to see each answer by Field ID, as your workflow receives it.
## Troubleshooting
No client's `microsoftTenantId` matches the person's tenant, or they aren't in the usernames or groups you restricted the form to.
Preview never submits. Test with Share Form > Impersonate or the Public Form URL instead.
## Go further
* [Field reference](/studio/forms/fields): every field type and its settings.
* [Dynamic options](/studio/forms/dynamic-options): fill a dropdown from a workflow, Microsoft or an integration, and reload it when another answer changes.
* [Conditional fields](/studio/forms/conditional-fields): show or hide fields and sections based on other answers.
Next: [Introduction to workflows](/studio/workflows/introduction).
This documentation is built and hosted on [Mintlify](https://mintlify.com), a developer documentation platform.