User Onboarding creates a new starter’s Microsoft 365 account from a form. Set it up once on Base config, then per client once you’ve added your clients. Connect Microsoft 365 first, and your PSA if you want tickets.

Your first new starter: set up User Onboarding, run it for a client and follow it in Executions (1:25).

Set up User Onboarding

1

Open it

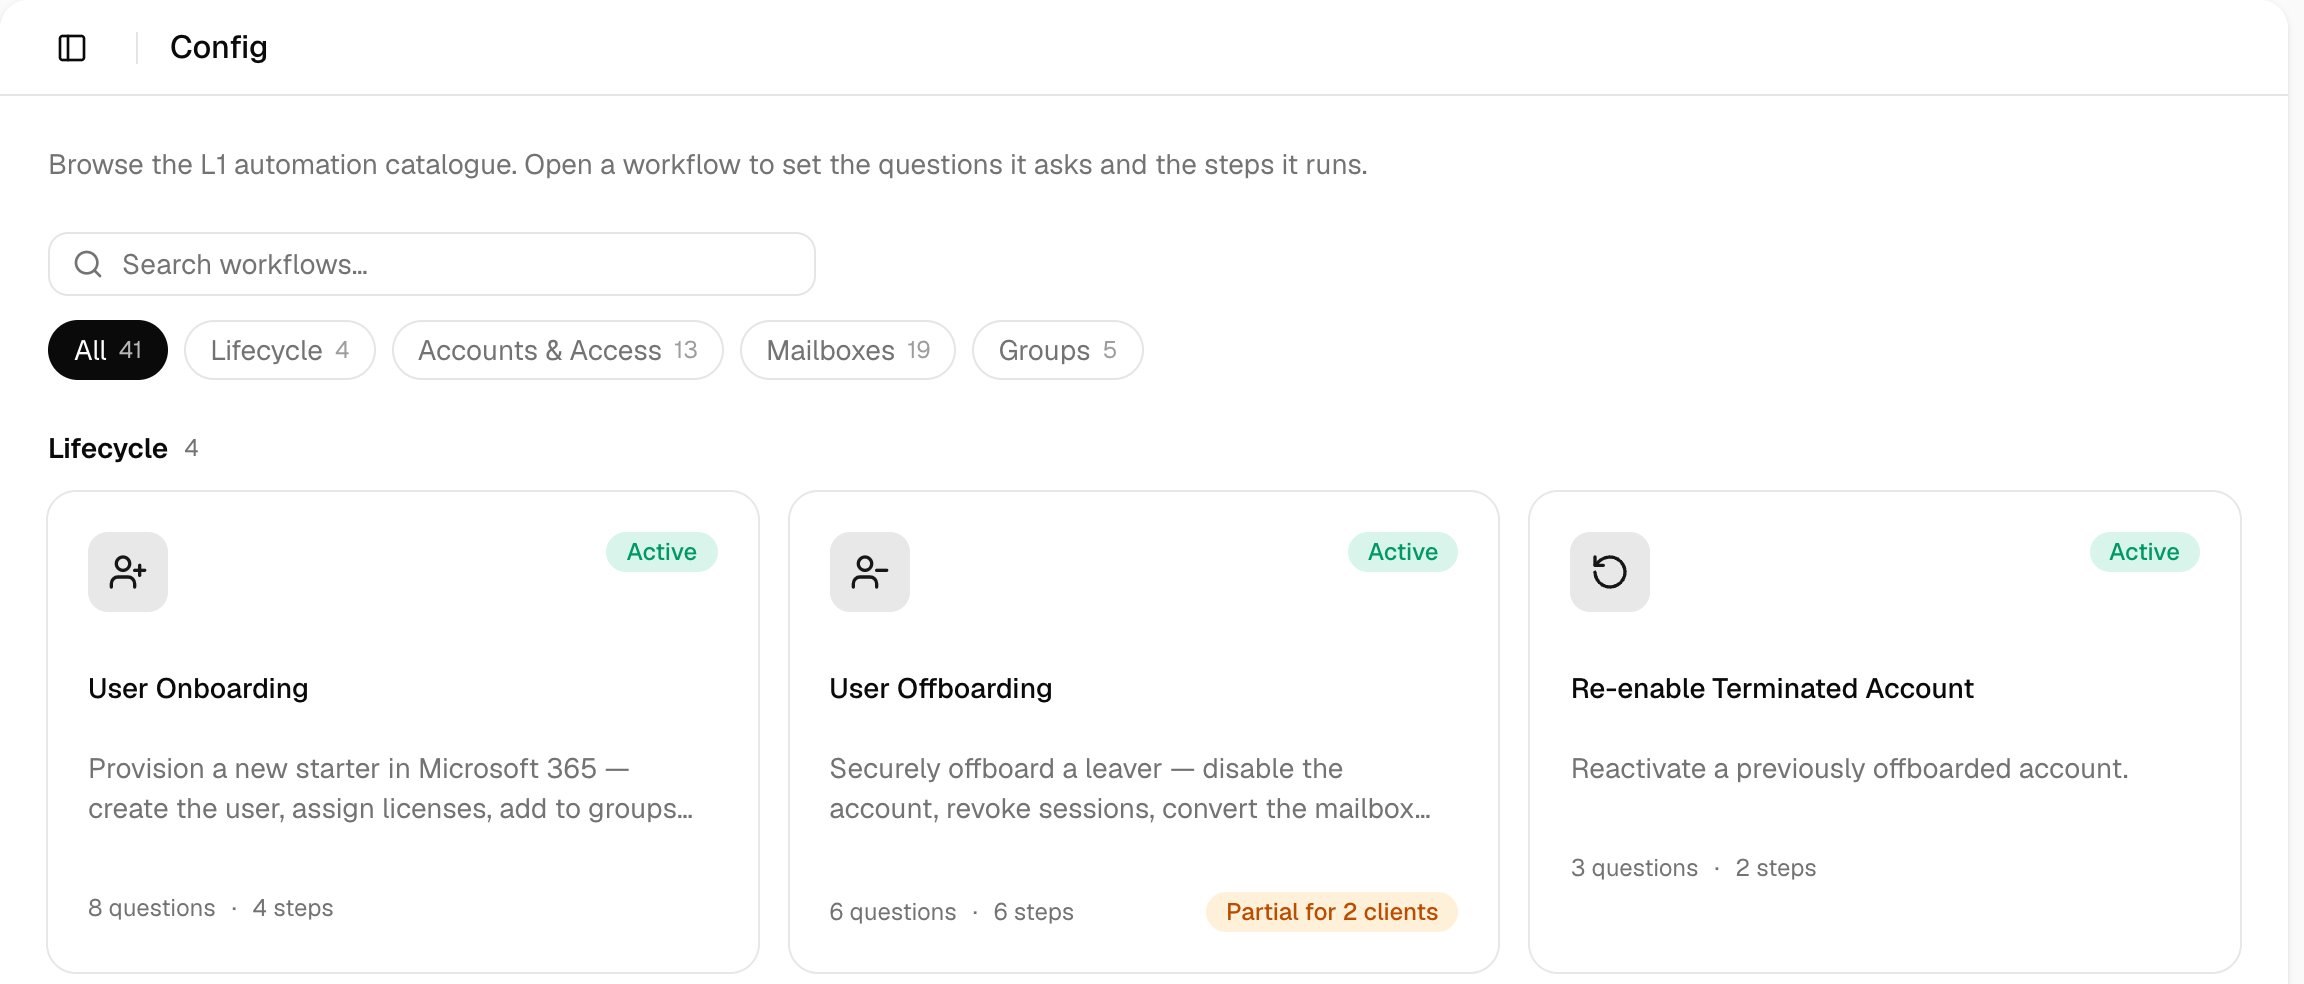
Go to Config and click User Onboarding. It starts as Internal only; to offer it to clients, see Share your forms.
The Config page with a Search workflows box, All, Lifecycle, Accounts & Access, Mailboxes and Groups filters, and Lifecycle cards for User Onboarding, User Offboarding and Re-enable Terminated Account, each marked Active.
2

Set the questions

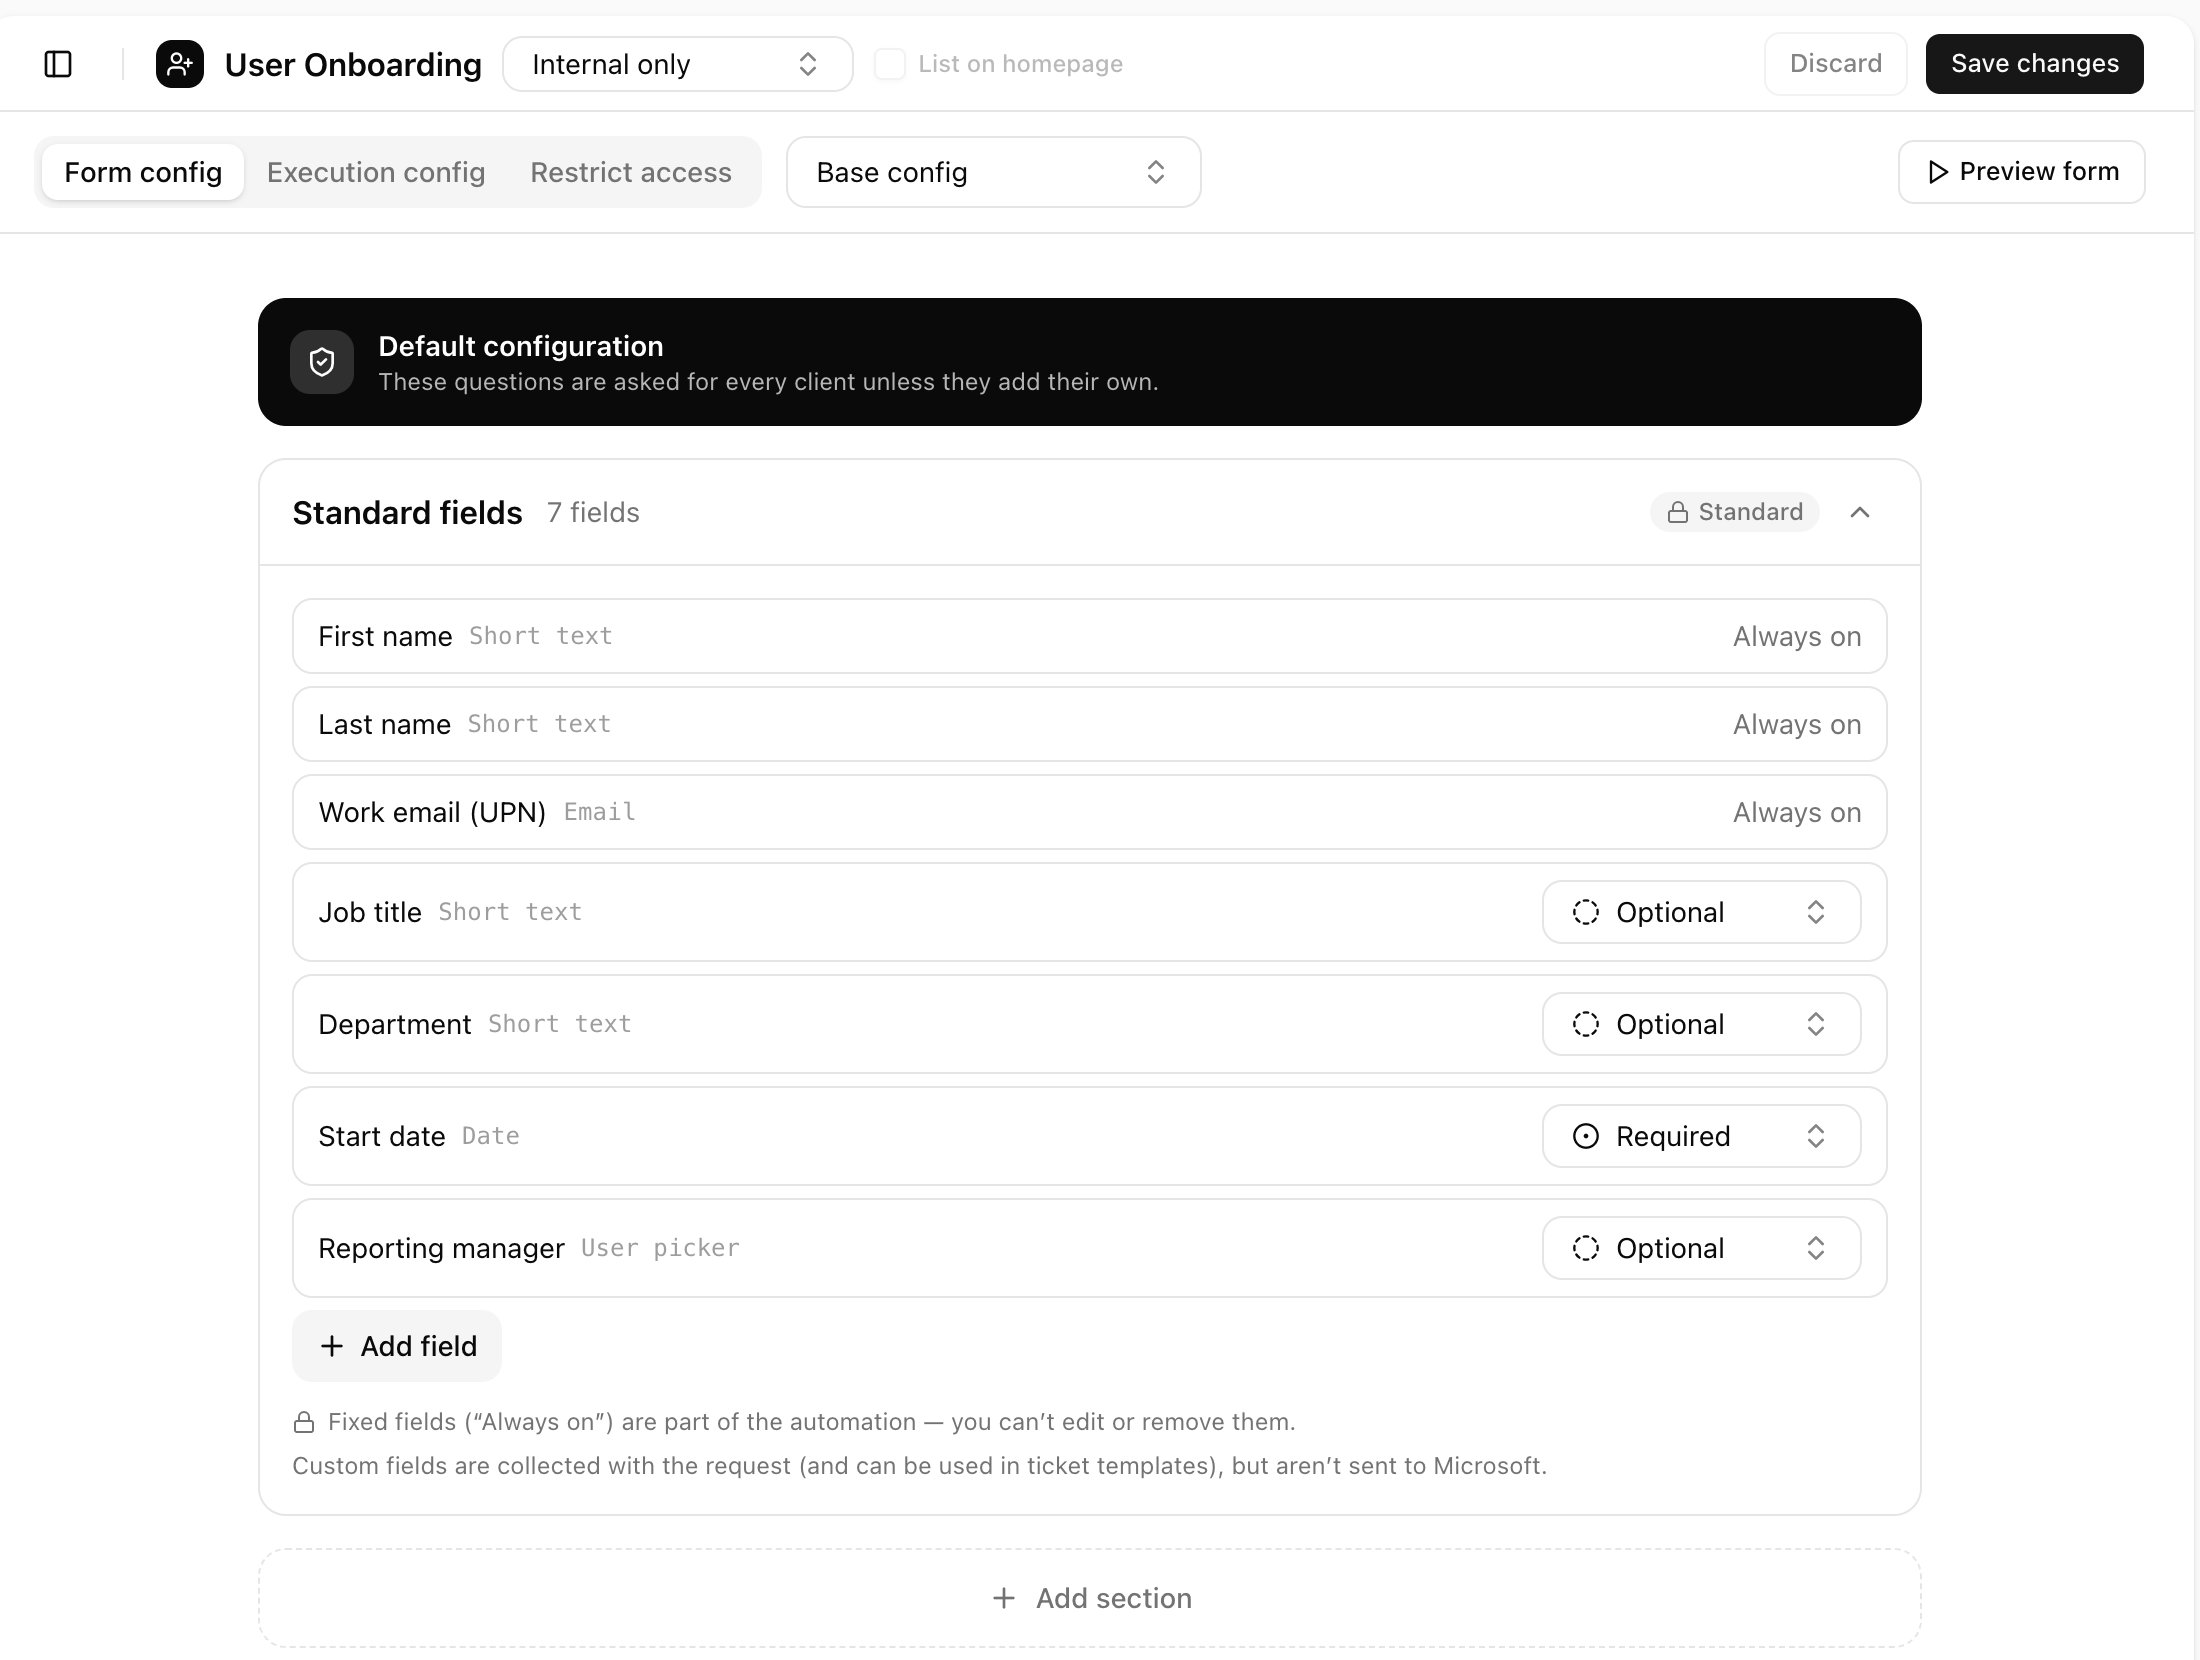
On Form config, set each optional field to Hidden, Optional or Required. Add field and Add section add your own questions.
The Form config tab on Base config, with First name, Last name and Work email (UPN) set to Always on, Job title, Department and Reporting manager set to Optional, Start date set to Required, and Add field and Add section buttons.
3

Set what it does

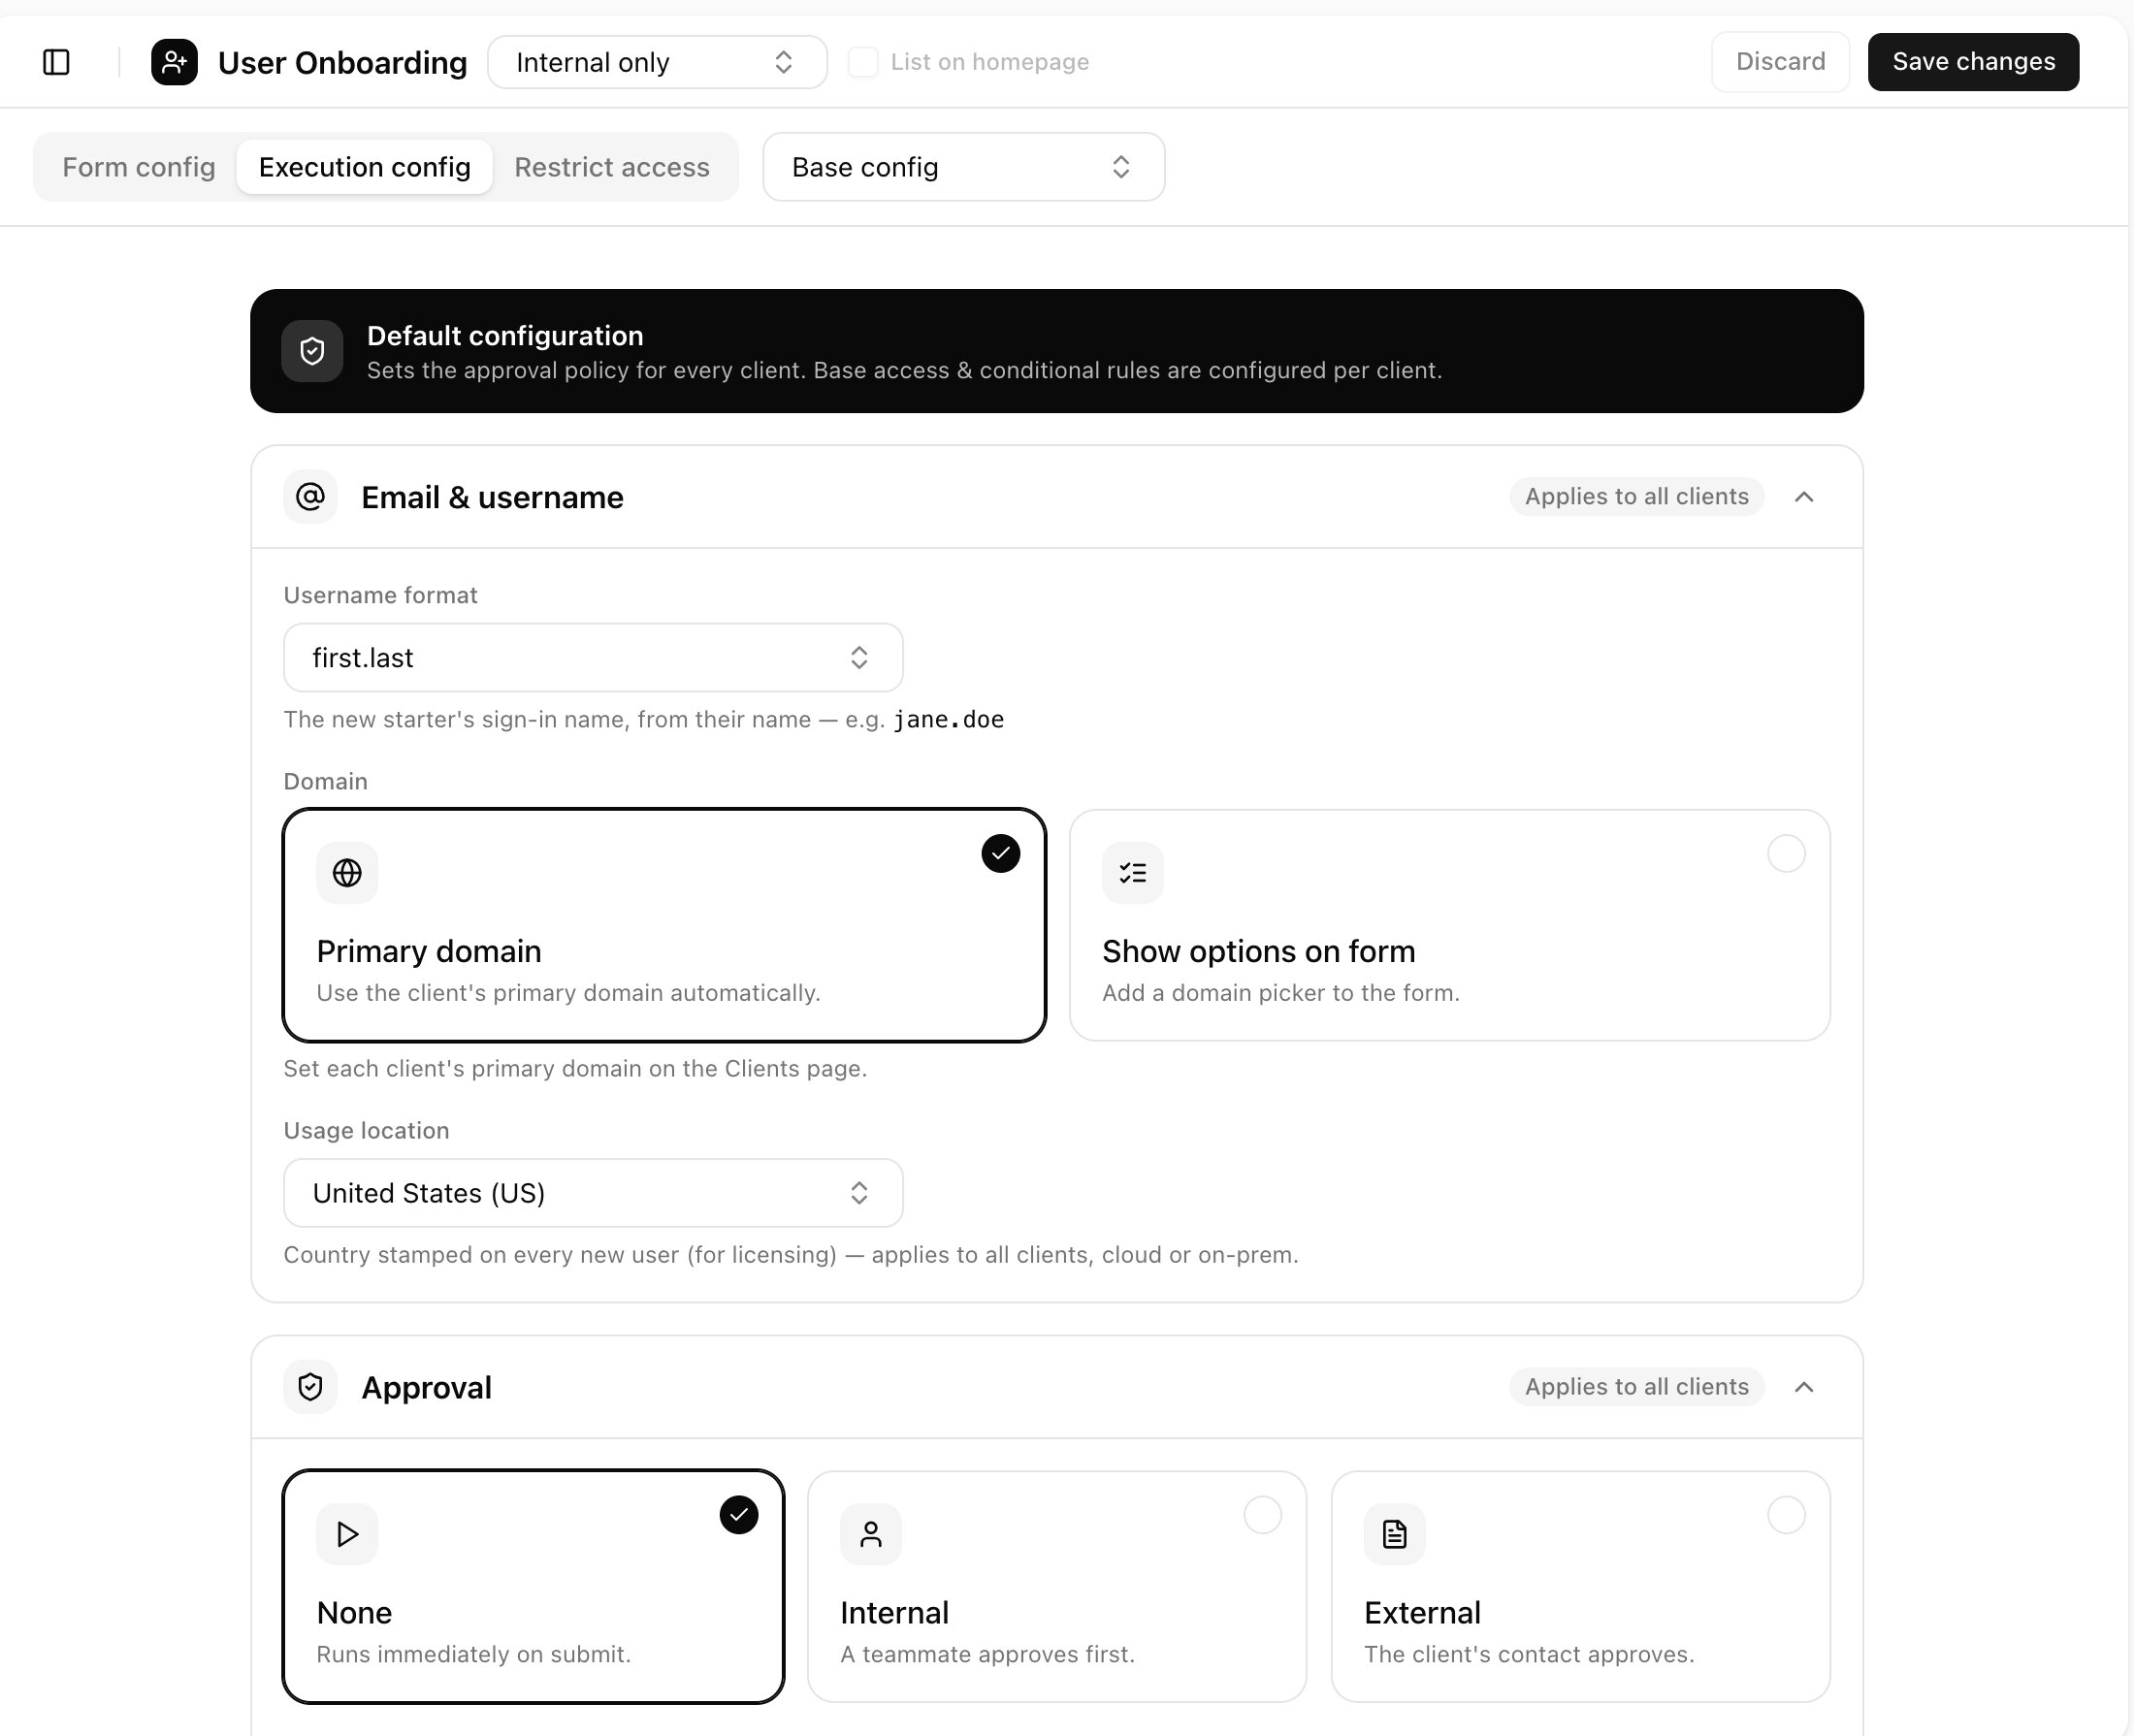
On Execution config, choose the Username format, Domain and Usage location, and who approves under Approval (see Approvals). Tick Wait until close to the start date to create the account shortly before the start date instead of at approval.
The Execution config tab on Base config, showing the Email & username card with Username format first.last, Domain set to Primary domain and Usage location United States (US), and the Approval card with None, Internal and External.
4

Create a ticket for each run

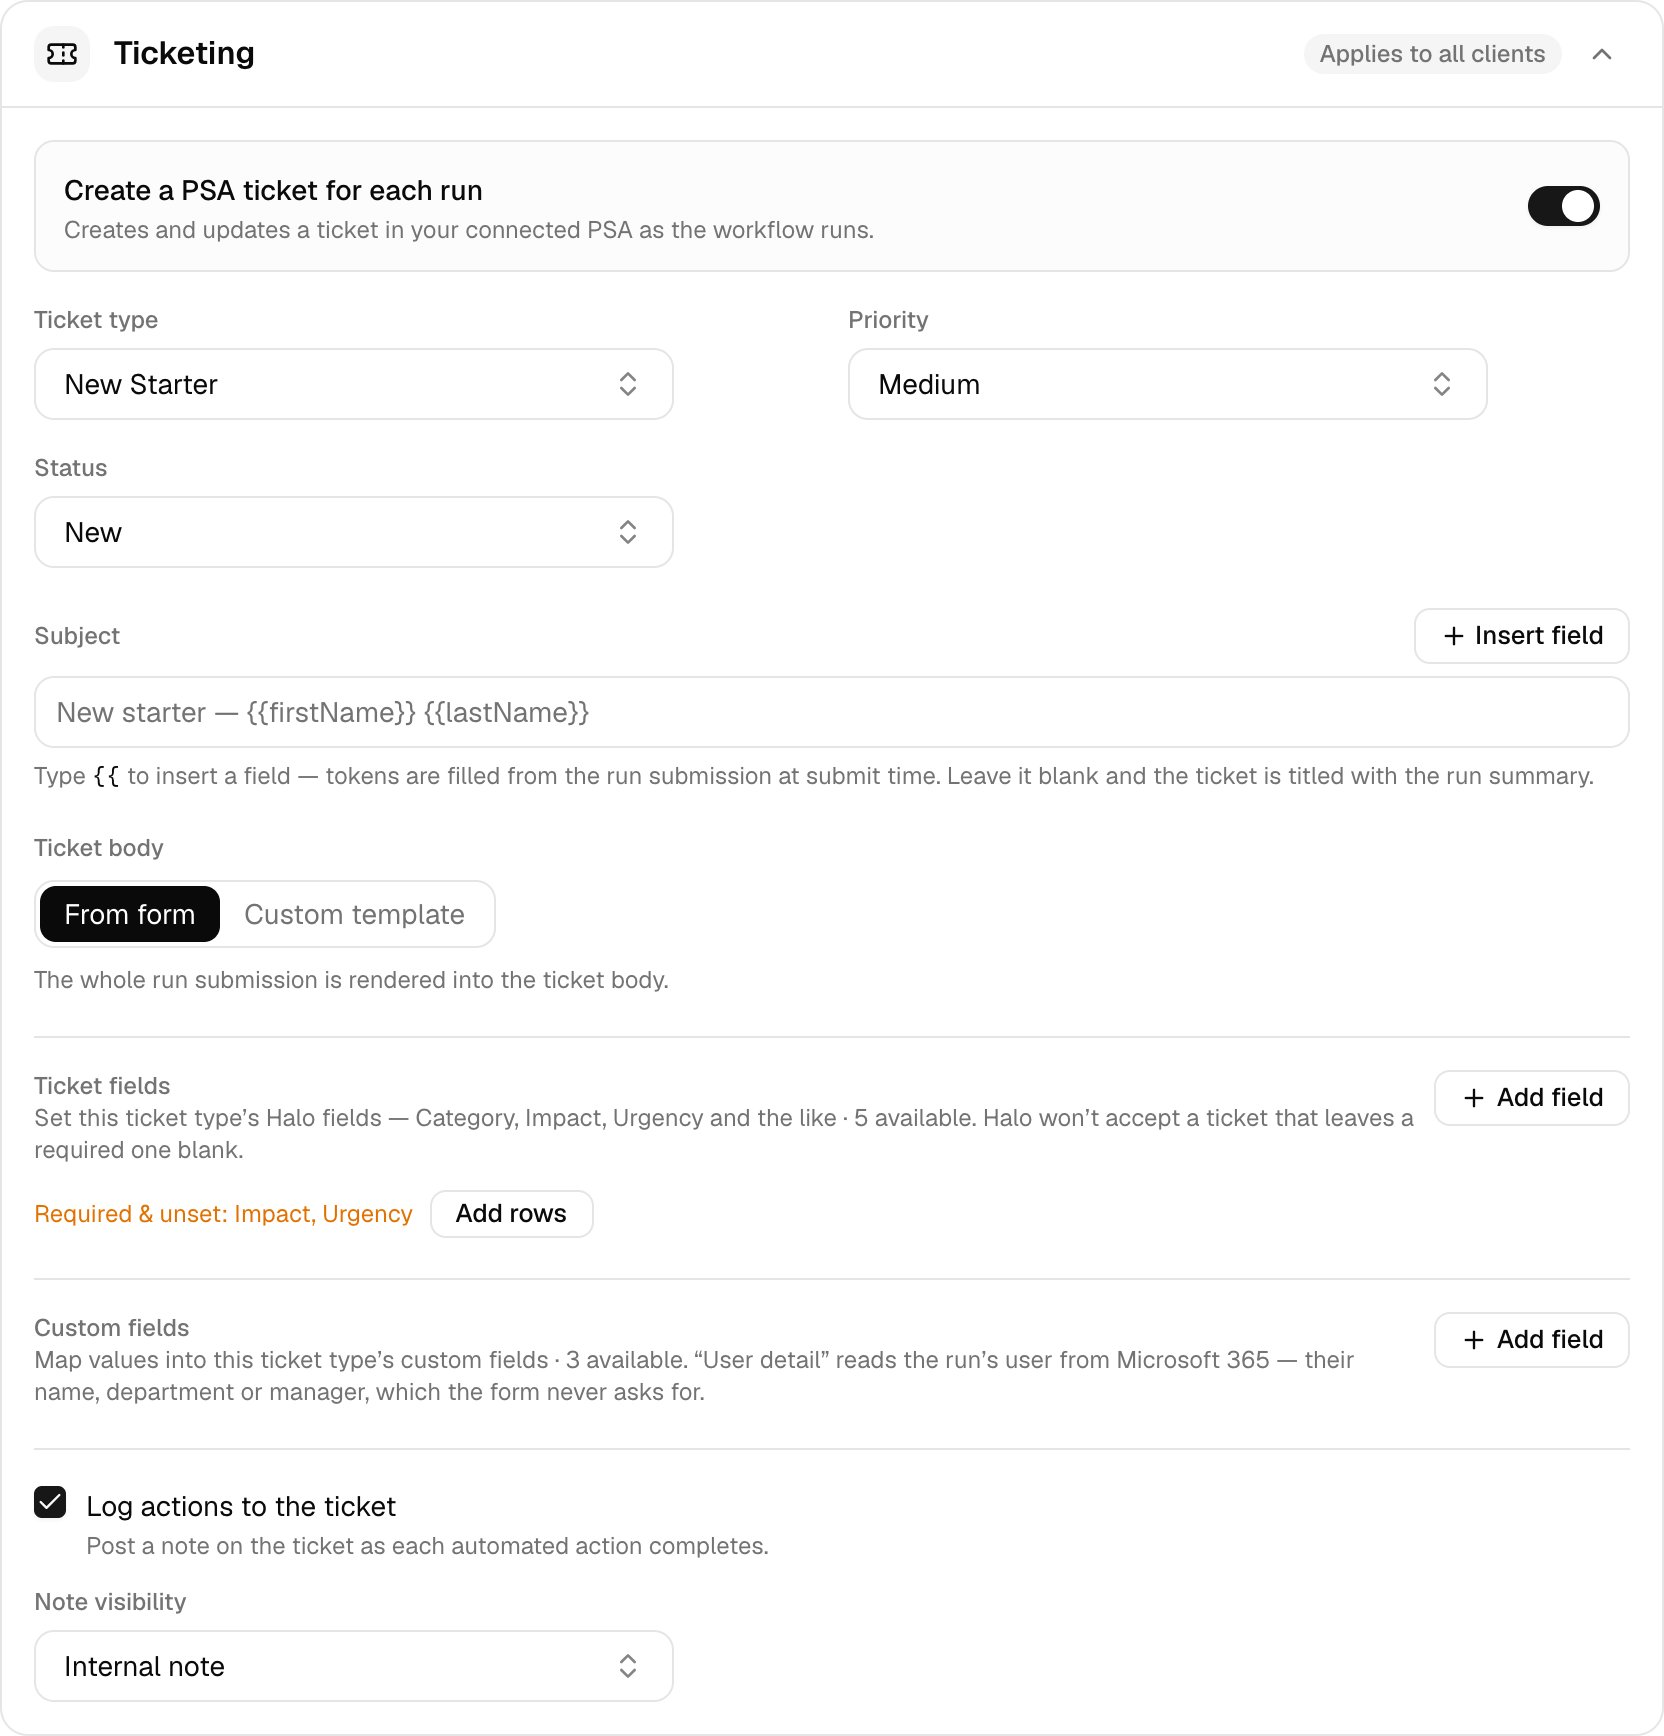
Under Ticketing, turn on Create a PSA ticket for each run and pick the ticket type, priority and status (plus the board or queue for ConnectWise PSA and Autotask). Halo PSA rejects a ticket with a required field blank, so set those under Ticket fields.
The Ticketing card with Create a PSA ticket for each run turned on, Ticket type New Starter, Priority Medium, Status New, a Subject template, Ticket body set to From form, Ticket fields showing Required & unset: Impact, Urgency with an Add rows button, Custom fields, and Log actions to the ticket ticked with Note visibility Internal note.
5

Deliver the password

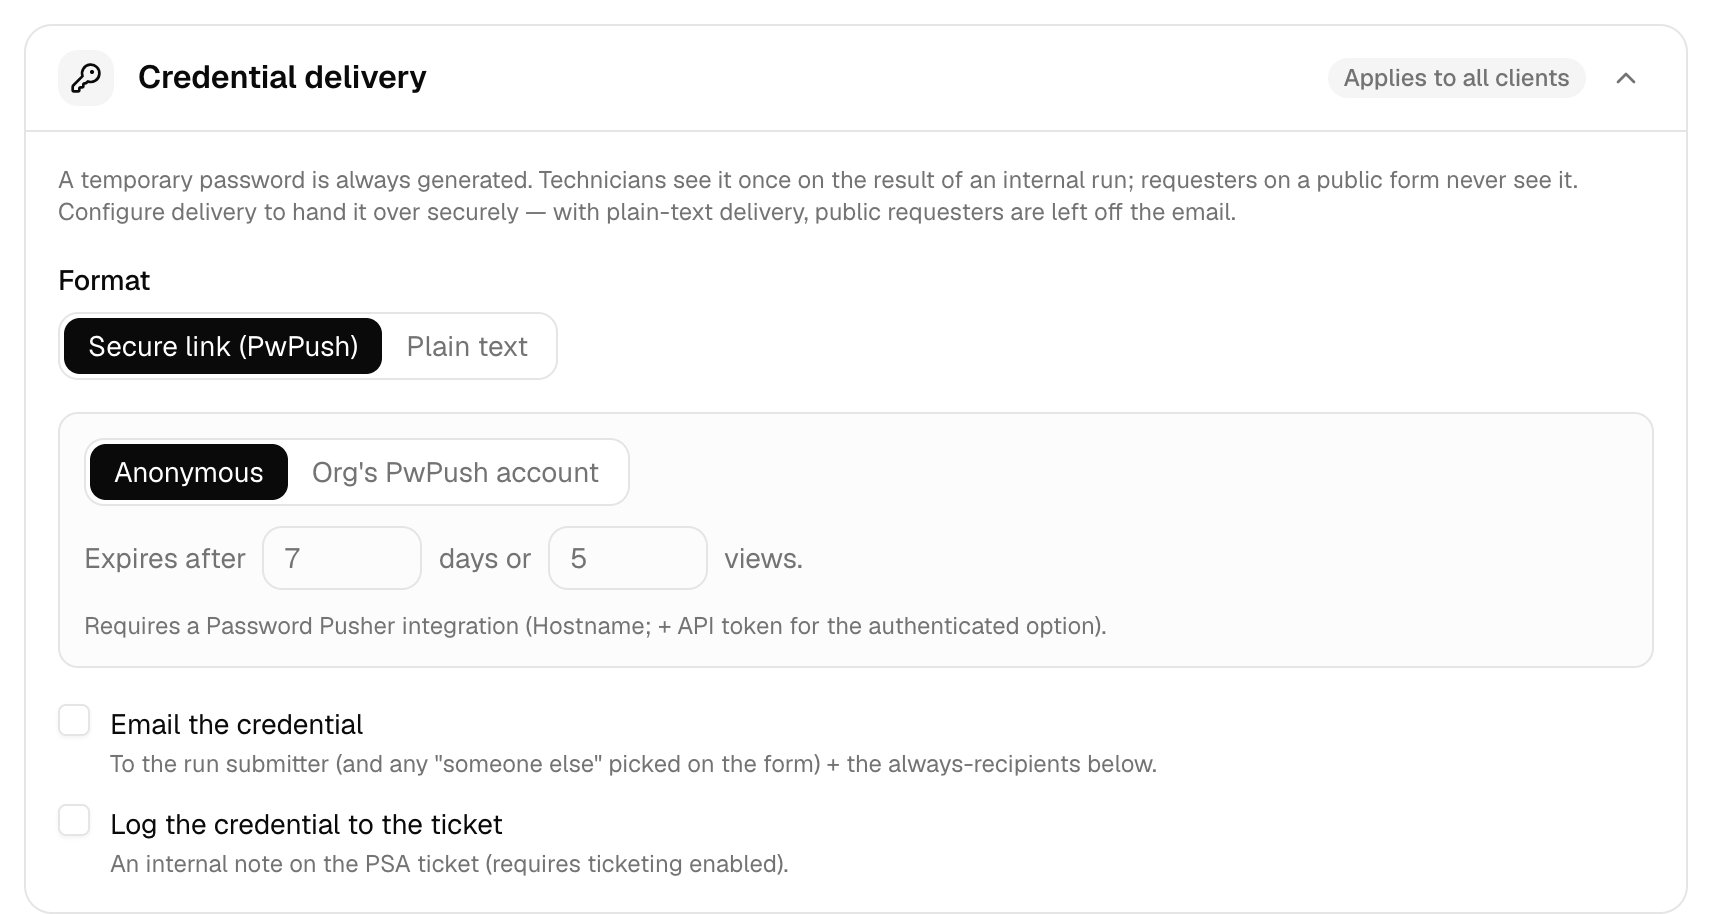
Under Credential delivery, choose Secure link (PwPush), which needs Password Pusher connected, or Plain text. Tick Email the credential to send it to the submitter; a public requester is never emailed a plain-text password.
The Credential delivery card with Format set to Secure link (PwPush), Anonymous selected, expiry after 7 days or 5 views, and Email the credential and Log the credential to the ticket checkboxes.
6

Save

Click Save changes. One save covers Base config and every client you changed, and ticks the step off on Home.

Settings for each client

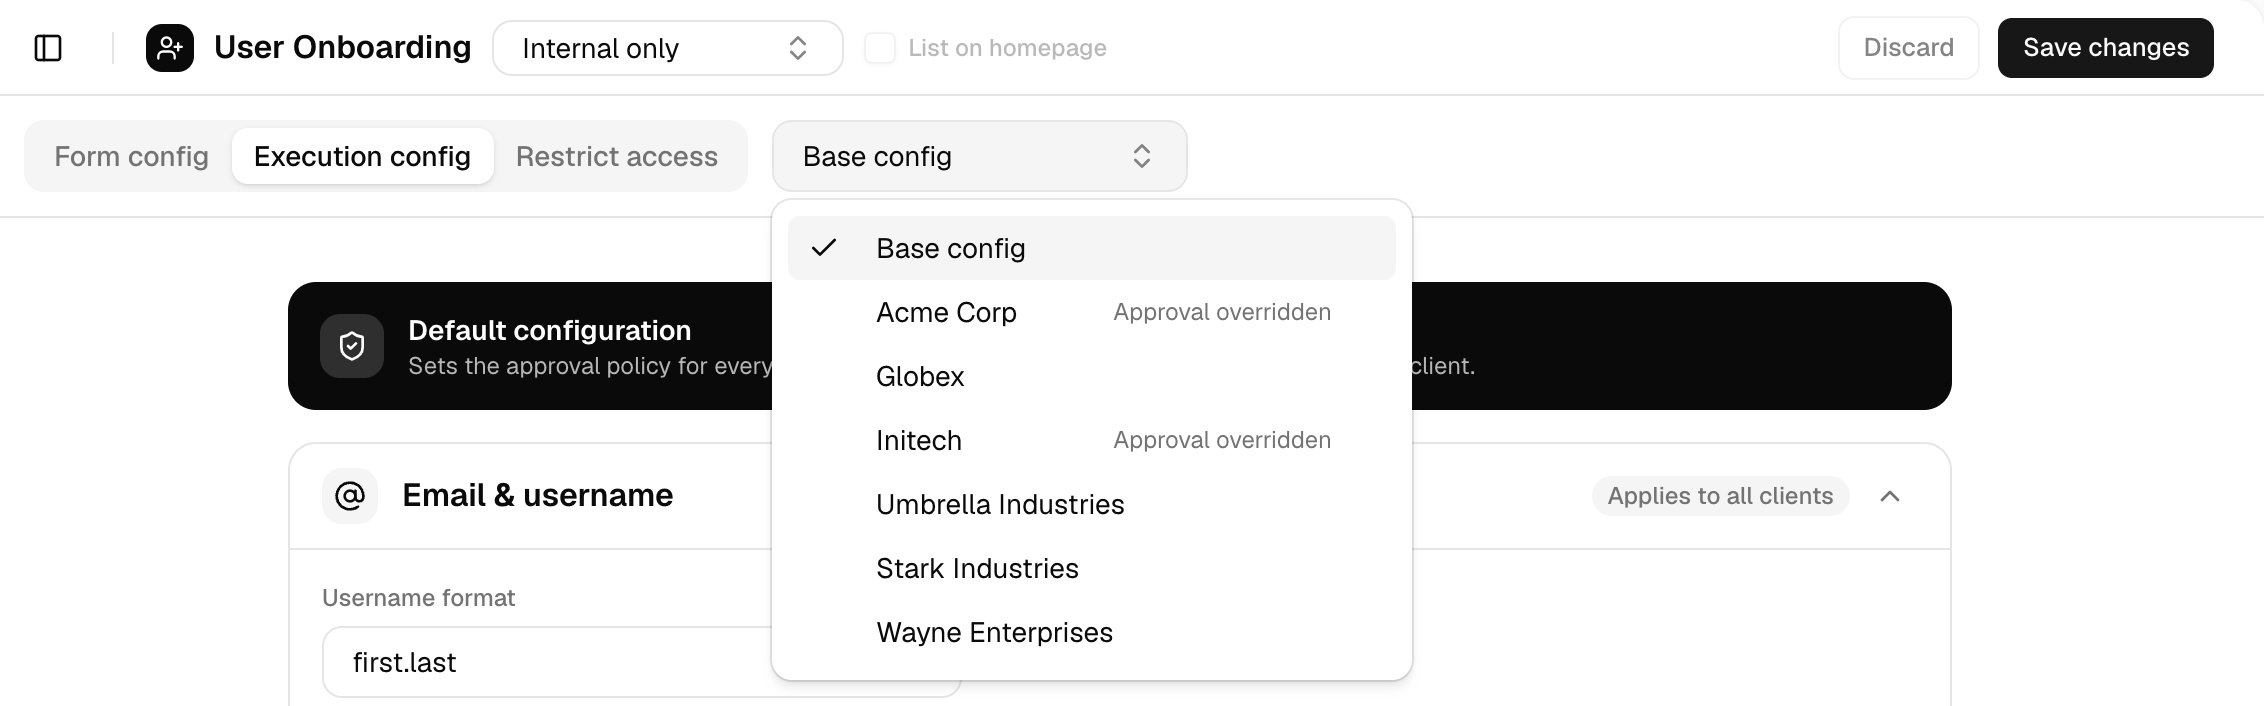
Base config is the default every client gets. To change something for one client, choose that client in the scope dropdown next to the tabs.

How configuration works: Base config, inheriting, and overriding a card for one client (1:26).

  • Inheriting default: the card follows Base config, including later changes to it.
  • Override: gives the client its own copy of the card. From then on, changes to Base config don’t reach that card for that client. Reset deletes the copy when you save, and the client follows Base config again.
  • These cards can be overridden: Email & username, Approval, Ticketing, User directory filters, Start date scheduling and Credential delivery. Availability and List on homepage are set on Base config only.
  • On Form config, a client can set each field to Hidden, Optional or Required, show or hide a section, and set its own options for a dropdown with a manual list. Add client section adds questions only that client is asked. Always on fields can’t change.
  • One Save changes saves Base config and every client you changed. Other clients aren’t touched.

Change the form for one client: a field made required and a question only Acme Corp is asked (1:22).
Preview form shows Base config only. To check a client’s form, open Run a workflow for that client.
The scope dropdown on Execution config open, listing Base config, then Acme Corp and Initech marked Approval overridden, Globex, Umbrella Industries, Stark Industries and Wayne Enterprises.
Some cards are client-specific: they have no default, and each client sets its own.

Settings for one client: base access, a conditional rule and an override for Acme Corp (1:20).

  • Base access: the licences, groups and shared mailboxes every starter gets. Without licences, accounts are created unlicensed.
  • Conditional rules: extra access when the form’s answers match. Click Add rule, choose a field and a value, then add groups, mailboxes or licences under Then grant. A rule’s licences can add to or replace the base licences, and its mailboxes are granted with full access.
  • On-premises AD: Create users in OU for synced clients, through the desktop agent.
  • Distributor licenses: see Licences and distributors.
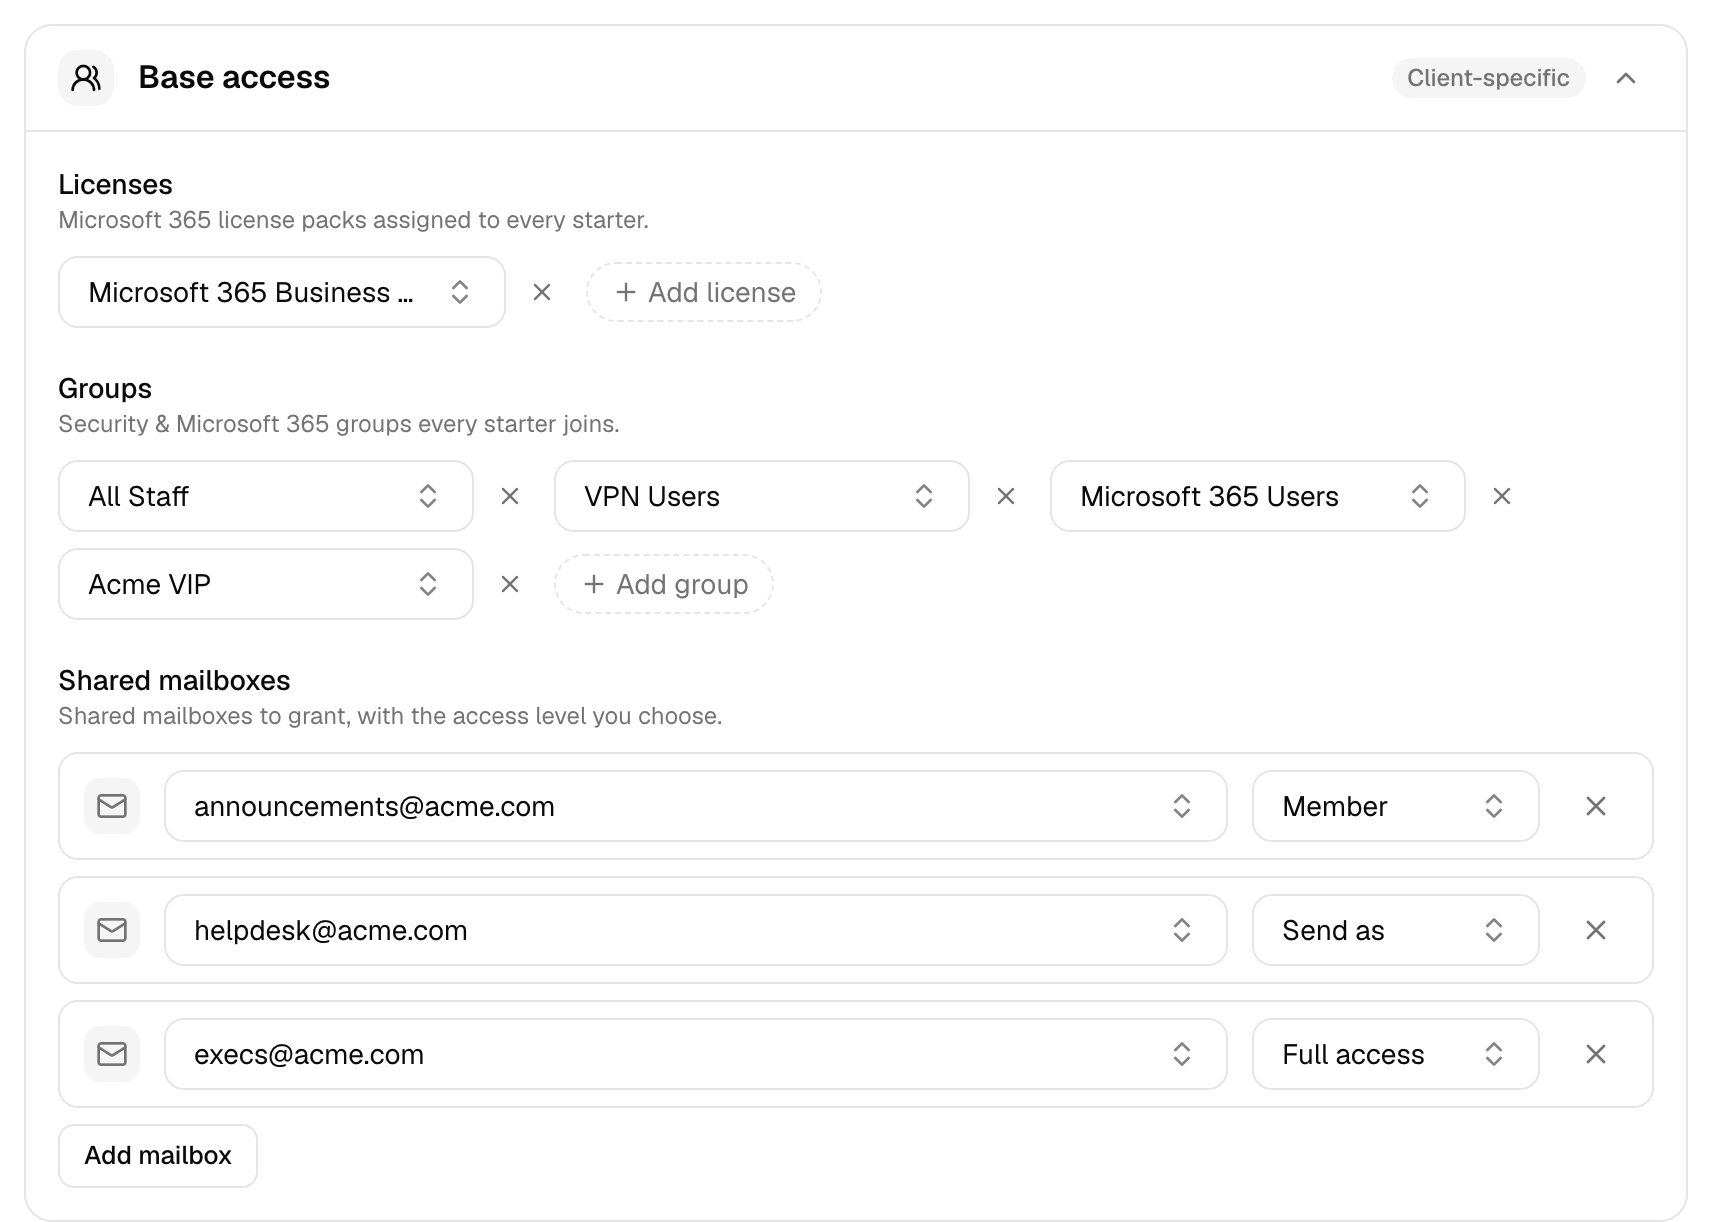
The Base access card for Acme Corp with a Microsoft 365 Business licence, the groups All Staff, VPN Users, Microsoft 365 Users and Acme VIP, and three shared mailboxes with Member, Send as and Full access.
For External approval, set each client’s approver on its Approval card; a run for a client without one is blocked at submit. Other workflows on Config use the same page, showing only the cards that apply.

Troubleshooting

Set the client’s primary domain on Clients, or choose Show options on form under Domain.
Set Default PSA in Settings > General, then reopen the workflow. See Connect your PSA.
No account was created. Free or buy a seat in the client’s tenant, or turn on auto-buy, then submit again.
Update the client’s licences under Base access and Conditional rules.
Connect Password Pusher, or set Credential delivery to Plain text.
Choose Secure link (PwPush), or add an Always send to address under Email the credential.
Next: Add your clients.