

Set up Autotask
1
Create an API user
Go to Admin > Admin Categories > Organization Settings & Users, open Resources/Users (HR) > Resources/Users, click New and select New API User.
2
Fill in the user
Set Security Level to API User (system) (API-only), or API User (system) Can’t Read Costs (API-only) to hide your internal costs. Email Address receives Autotask’s notifications about the integration, and Primary Internal Location sets the user’s timezone.
3
Generate the credentials
Under Credentials, click Generate Key and Generate Secret. Copy the full Username (Key), including the
@ and domain, and the Password (Secret).4
Create a tracking identifier
Under API Tracking Identifier, select Custom (Internal Integration), enter
Triggr as the Internal Integration Name and copy the Tracking Identifier.5
Save the API user
Leave Line of Business without associations and click Save & Close. Autotask won’t show the secret again.
6
Find your API zone
Open this address in a browser (no sign-in needed), replacing Your API host is the
USERNAME with the API user’s full username:url in the response up to /atservicesrest/, such as https://webservices5.autotask.net.Connect it in Triggr
1
Open the integration
Go to Integrations > Autotask and click Configure on the Base Configuration card.
2
Enter the credentials
Enter the Password (Secret) as Secret, your API host as Hostname (without 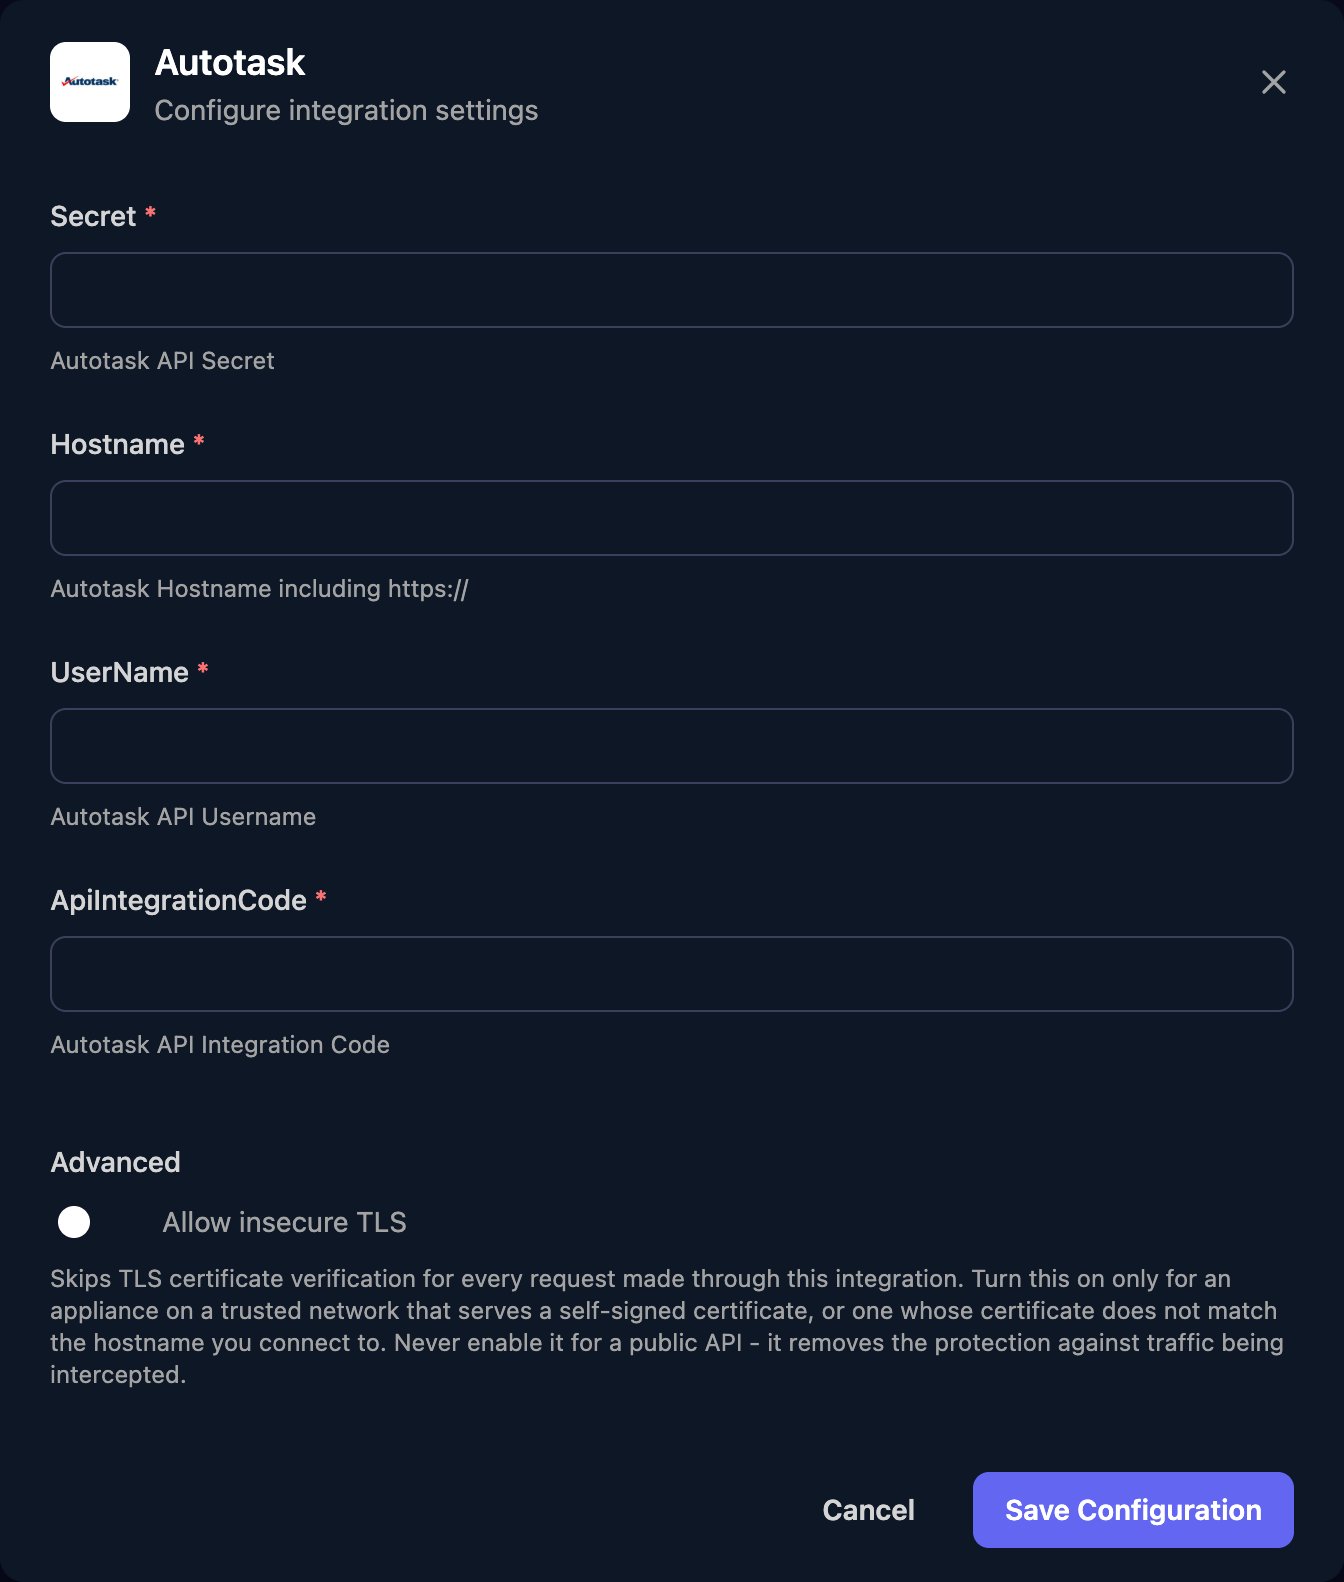
/atservicesrest), the full username as UserName and the Tracking Identifier as ApiIntegrationCode, then click Save Configuration.Map your clients
On the Client Mapping card, click Apply 100% Matches, then choose the Autotask company in Mapped to for anyone left. Only active companies of type Customer or Partner are listed. Triggr saves each match as the client’sautotaskId variable, which steps such as Create Ticket use to pick the company.
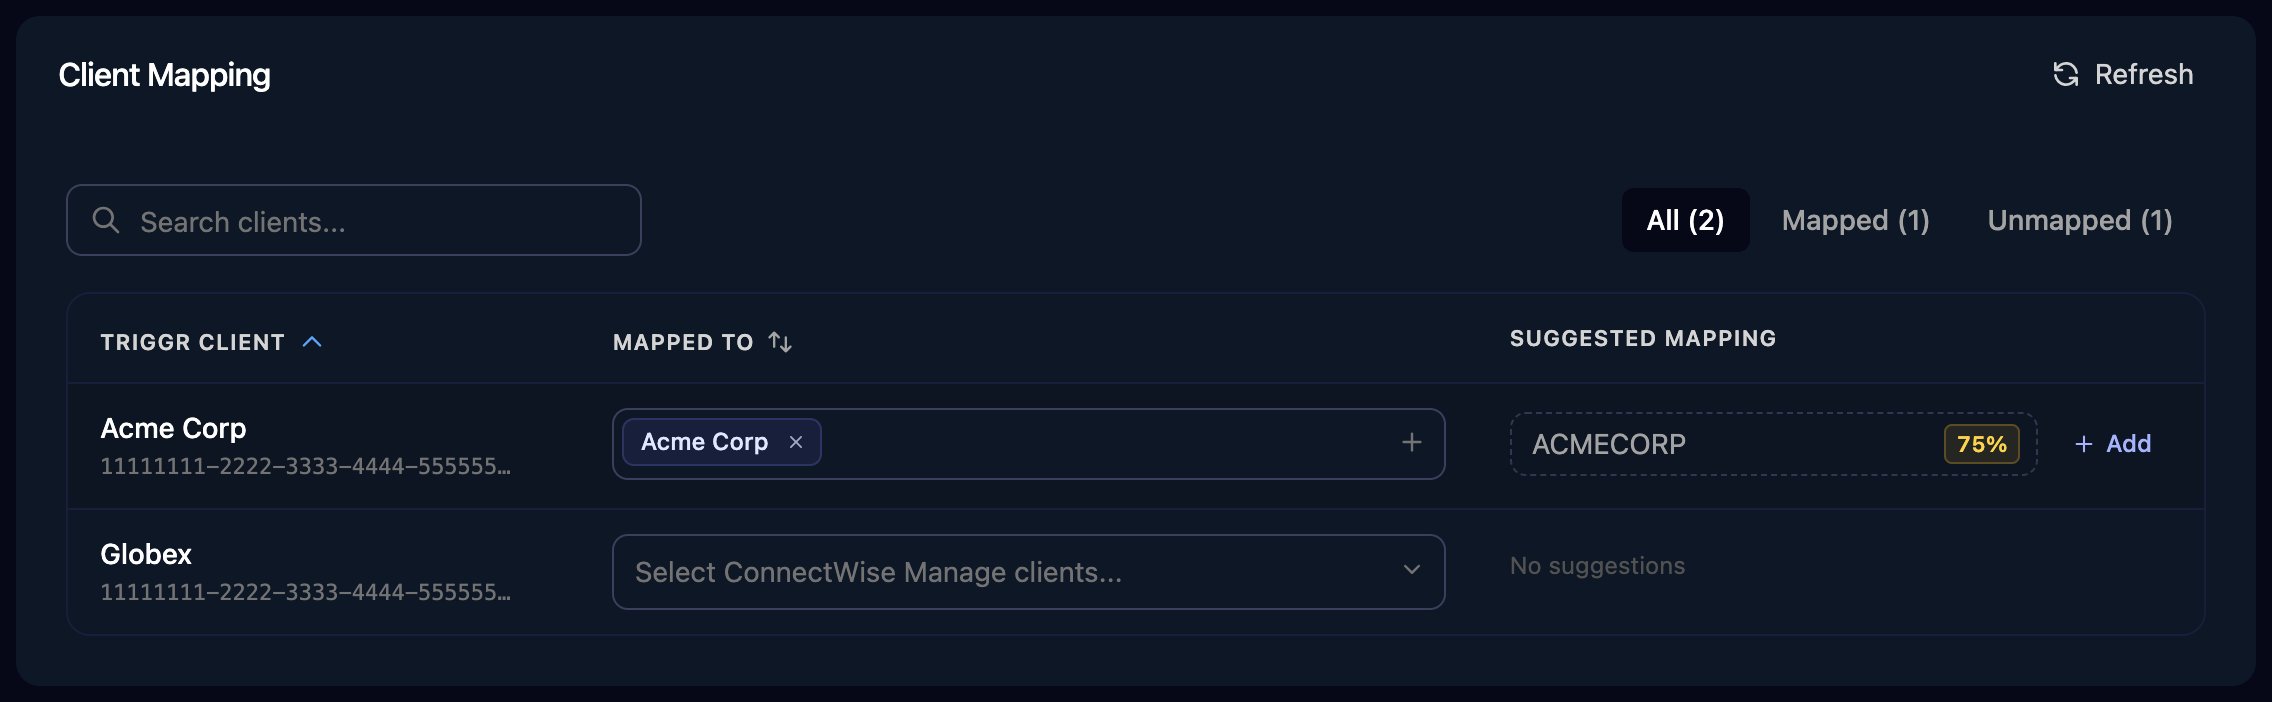
The Client Mapping card, shown here for ConnectWise Manage as an example.
Troubleshooting
Authentication errors (401)
Authentication errors (401)
Check UserName is the full username and ApiIntegrationCode is the same user’s Tracking Identifier. In Autotask, check the API user is Active; Autotask locks it after failed sign-ins, so clear Locked if it’s ticked.
Requests fail with correct credentials
Requests fail with correct credentials
Hostname must start with
https://, must not end in /atservicesrest and must be your own zone’s host.Lost or rotated secret
Lost or rotated secret
Click Generate Secret on the API user and Save & Close. In Triggr, click Edit on the Base Configuration card and paste it into Secret.
Companies are missing from Client Mapping
Companies are missing from Client Mapping
Check the company is active and a Customer or Partner, and that the API user’s security level doesn’t hide it. Then click Refresh on Client Mapping.