

Set up ScreenConnect
1
Install the RESTful API Manager
Go to Admin > Extensions, click Browse Extension Marketplace, find RESTful API Manager and click Install. If it’s already installed, click Check for Updates.
2
Set the authentication secret
Open the extension’s Options menu and select Edit Settings. Enter a long random string in the Custom field for RESTfulAuthenticationSecret, leave RESTfulAllowedOrigin empty and click Save Settings. Anyone with the secret can send commands to your machines, so store it like an administrator password.
3
Find your hostname
It’s the address you open ScreenConnect at, without
https://, such as yourcompany.screenconnect.com. An on-premises server must serve HTTPS at a public address; add the port if it isn’t 443 (support.example.com:8443) and allow Triggr’s IP addresses through any firewall.Connect it in Triggr
1
Open the client's configuration
Go to Integrations > ConnectWise ScreenConnect and click Configure on the client’s row in the Per-Client Configuration card.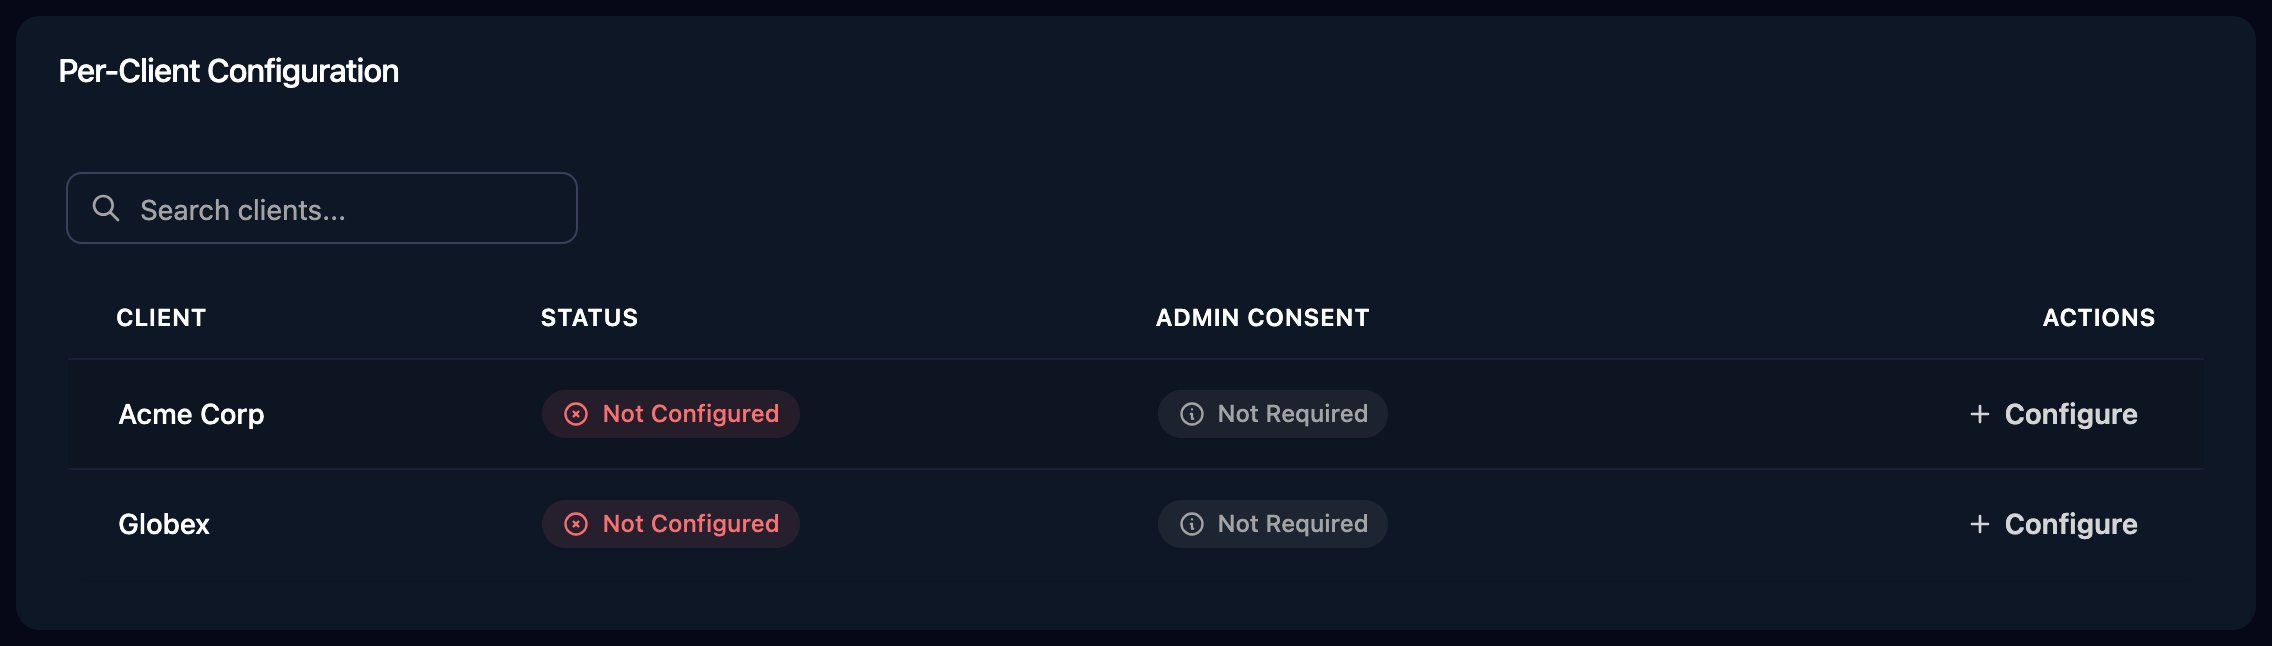
2
Enter the instance details
Enter the Hostname and the secret as Restful Authentication Secret, then click Save Configuration. For an on-premises server with a self-signed or internal certificate, turn on Allow insecure TLS first.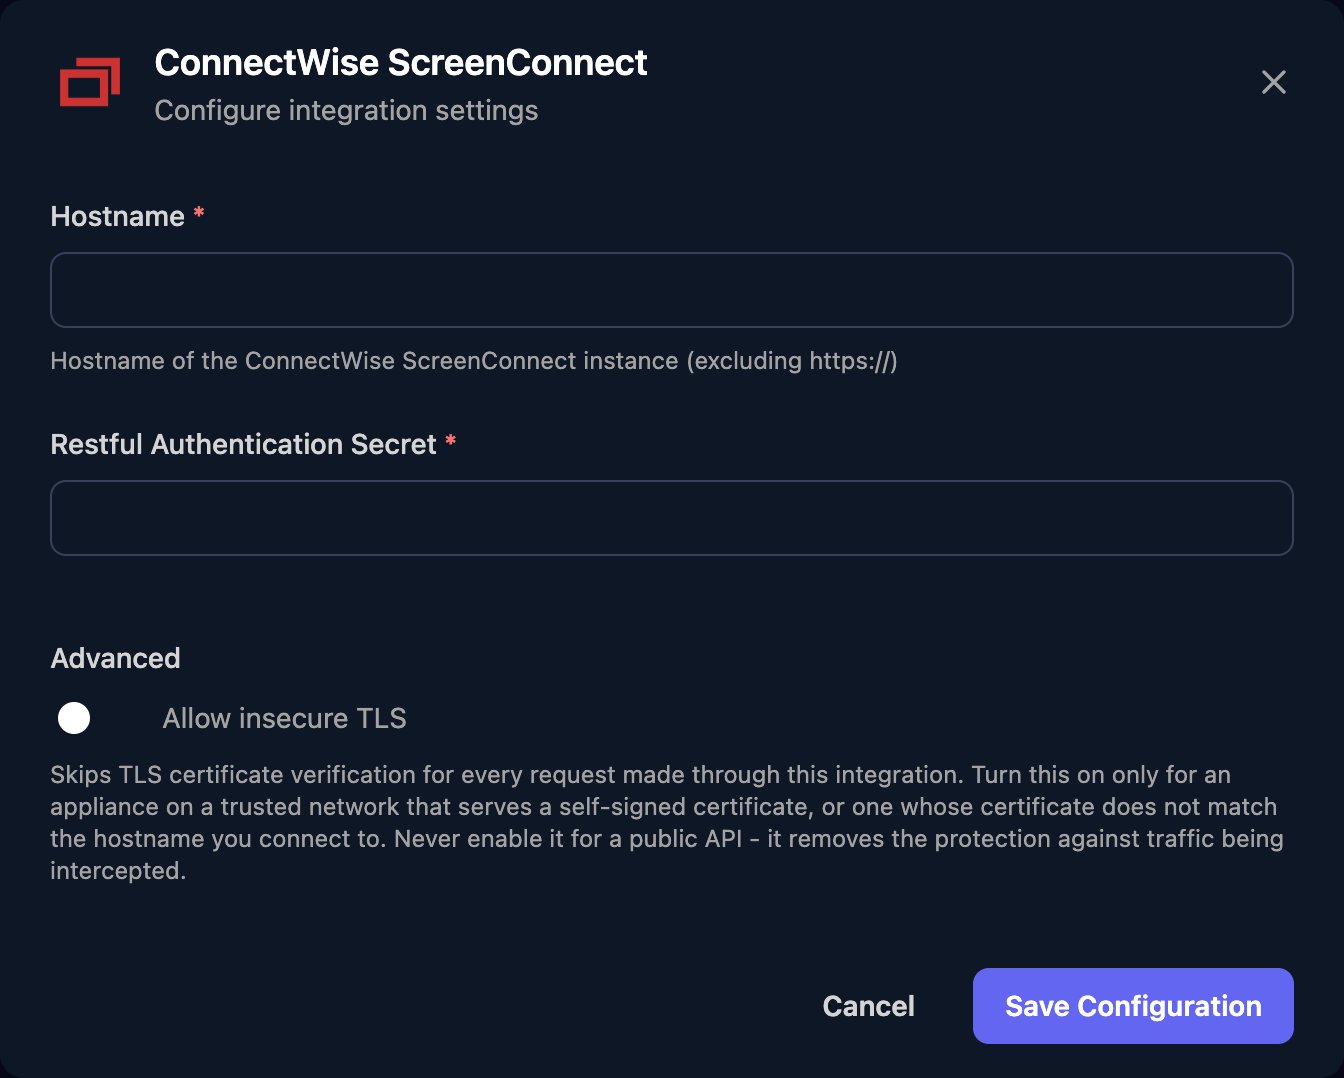
Use ScreenConnect in workflows
- Set every action’s
appExtensionIdto2d558935-686a-4bd0-9991-07539f5fe749, the extension’s ID on every instance. - Get Sessions By Filter takes a session group filter, such as
CustomProperty1 = 'Contoso'. - Make Post Request takes a method name as
endpoint, such asSendCommandToSession, and its parameters in order as a JSON array, such as["<session ID>", "ipconfig"].
Troubleshooting
No ConnectWise ScreenConnect integration is configured for this client
No ConnectWise ScreenConnect integration is configured for this client
Configure the client on the Per-Client Configuration card, then run the workflow again.
Authentication errors on every request
Authentication errors on every request
Check the secret matches RESTfulAuthenticationSecret exactly, RESTfulAllowedOrigin is empty and the extension isn’t Inactive. If you changed the secret, update every row.
Triggr can't connect to the instance
Triggr can't connect to the instance
Hostname must be only the hostname and port, with no
https:// or path, served over HTTPS at a public address. For certificate errors, turn on Allow insecure TLS in each row that uses the server.The method isn't found
The method isn't found
Check
appExtensionId and the endpoint spelling. AddNoteToSession needs version 1.0.6 or later of the extension.