

- An OAuth client: Triggr acts as the admin who clicks Authorize.
- A service account with domain-wide delegation: the only way to change Gmail delegates and forwarding on other users’ mailboxes.
Set up an OAuth client
1
Create a project in the client's organisation
Signed in to the Google Cloud console as a client user, go to IAM & Admin → Manage Resources > Create Project and choose the client’s organisation as the location.
2
Enable the APIs
In APIs & Services → Library, enable Admin SDK API, plus Gmail API and Google Calendar API if workflows use them.
3
Configure Google Auth platform
In Google Auth platform → Branding, click Get started, enter an App name and User support email, choose Internal under Audience, add a contact email and click Create. Leave Data Access empty: Triggr asks for its scopes when you authorise.
4
Create the OAuth client
In Google Auth platform → Clients, click Create client, choose Web application and add this under Authorized redirect URIs, then click Create and copy the Client ID and Client secret:Google shows the secret only once; if you lose it, open the client and click Add secret.
If the client restricts API access, tick Trust internal apps in the Admin console under Security → Access and data control → API controls, or set the app to Trusted in Manage App Access.
Set up domain-wide delegation
1
Enable the APIs
In the Google Cloud console, enable Admin SDK API and the APIs your workflows call, such as Gmail API, Google Calendar API, Google Drive API or Enterprise License Manager API.
2
Create a service account and key
In IAM & Admin → Service Accounts, click Create service account (it needs no project roles). Open it, go to Keys > Add key → Create new key, choose JSON and click Create, then copy the Client ID from Advanced settings.If key creation is blocked, an Organization Policy Administrator must relax the
iam.managed.disableServiceAccountKeyCreation policy for the project.3
Authorise it in the client's Admin console
As a super admin in the Admin console, go to Security → Access and data control → API controls → Manage Domain Wide Delegation, click Add new, enter the Client ID and add these scopes under OAuth scopes:Click Authorize, then View details on the entry to check every scope is listed. Changes can take up to 24 hours. See Google’s Control API access with domain-wide delegation.
Connect it in Triggr
1
Open the client's configuration
Go to Integrations > Google Workspace and click Configure on the client’s row in the Per-Client Configuration card.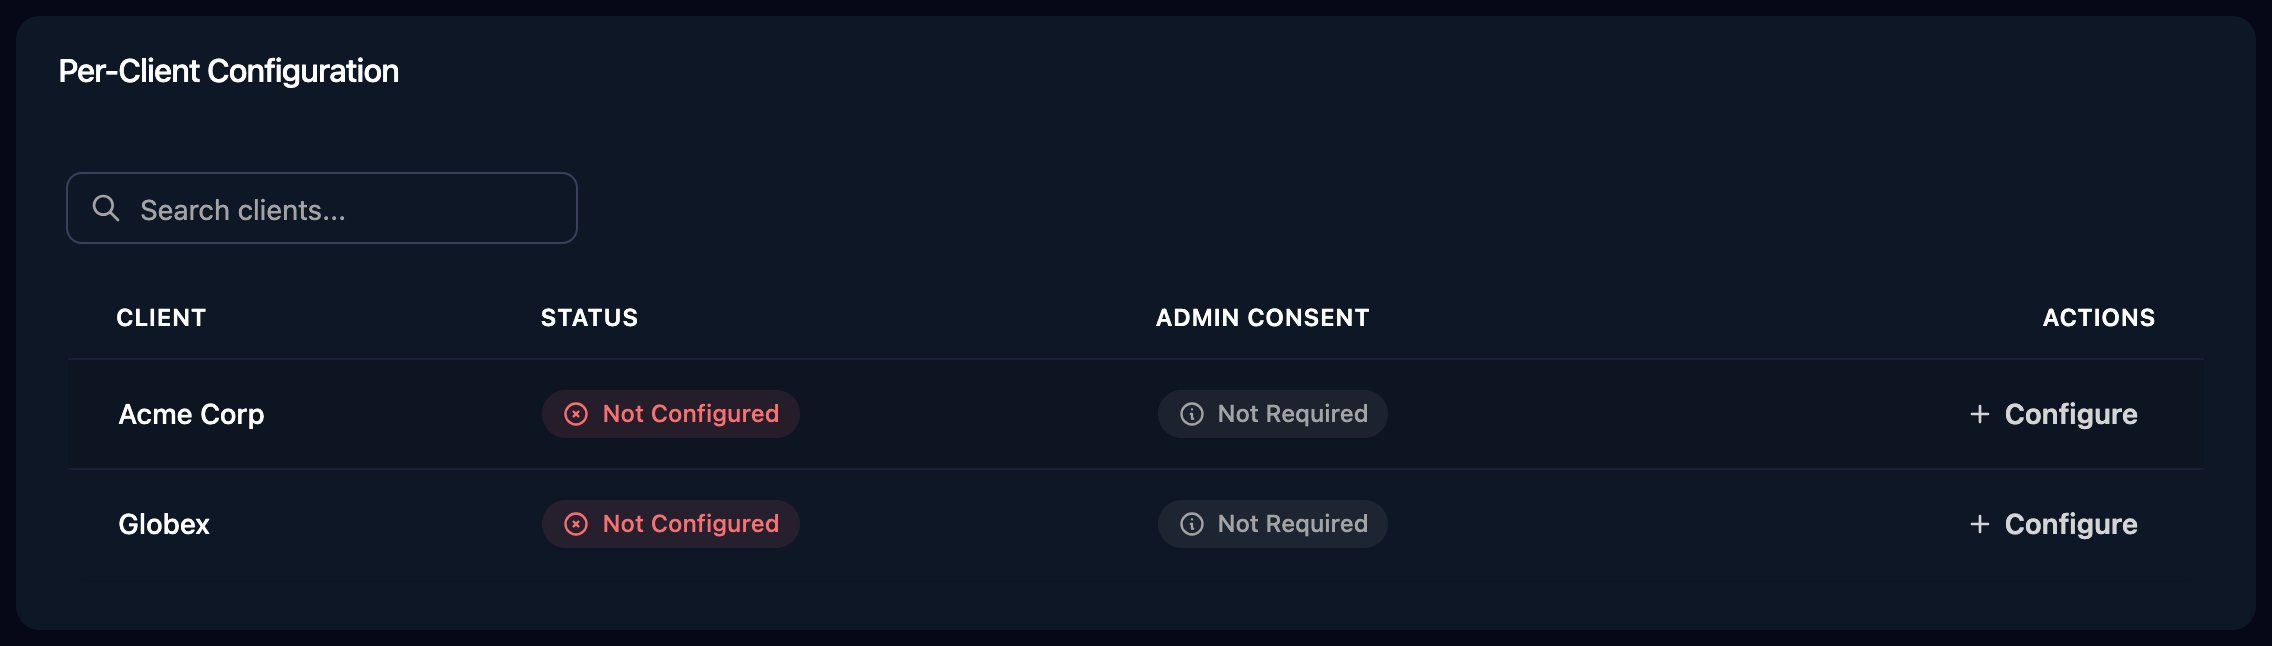
2
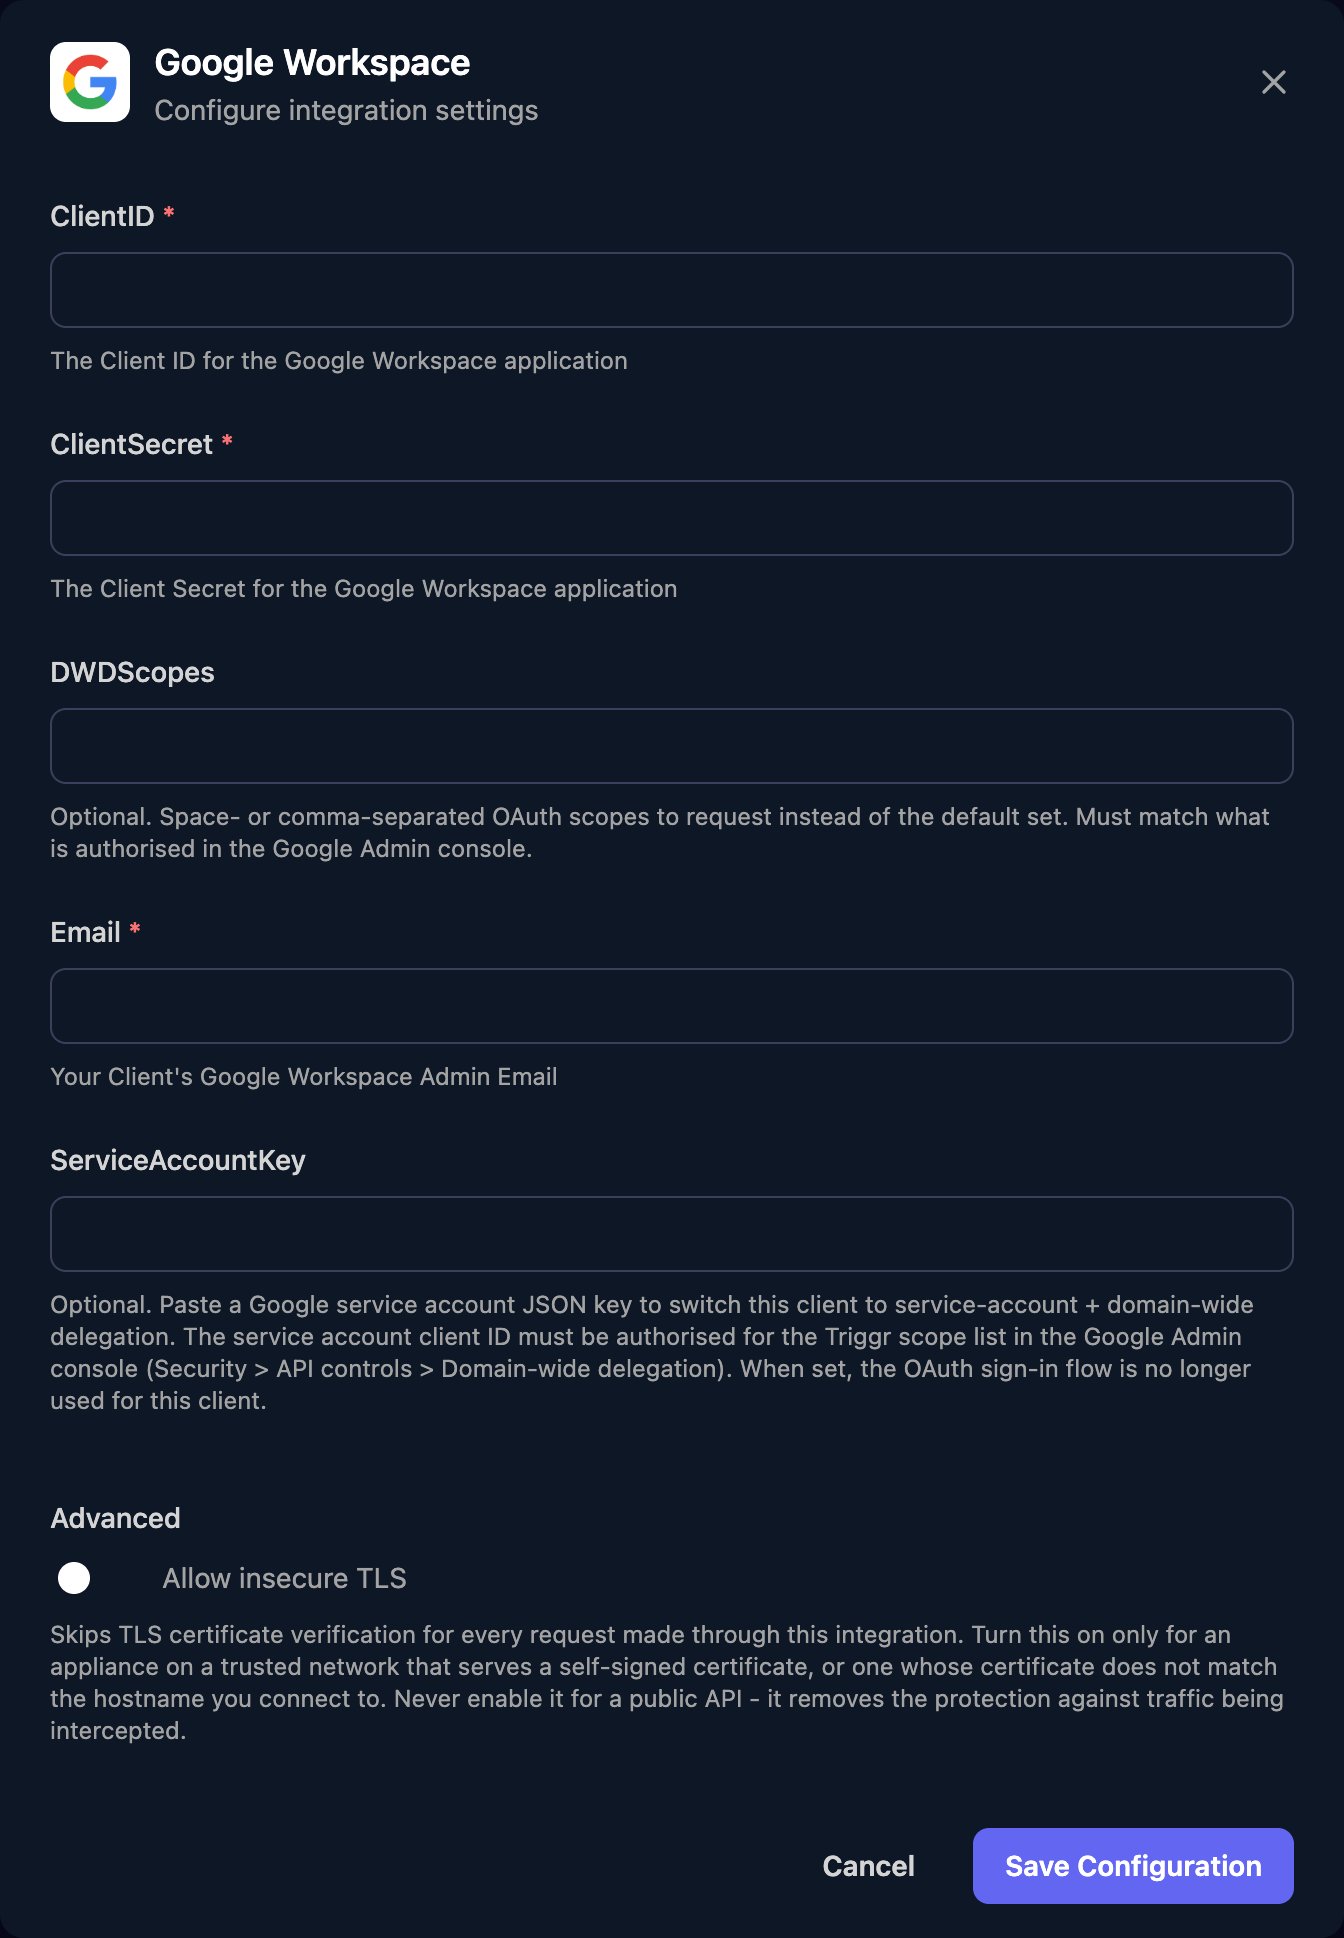
Enter the client's details
- OAuth client: enter the ClientID, ClientSecret and the admin’s Email, and leave ServiceAccountKey and DWDScopes empty.
- Domain-wide delegation: paste the whole JSON key into ServiceAccountKey and a super admin into Email. ClientID and ClientSecret are required but unused: keep existing values, or enter the service account’s client ID and
-. Leave DWDScopes empty unless you authorised a shorter list.
3
Authorize (OAuth client only)
Click Authorize on the client’s row and sign in as the admin you entered. With a service account key, Triggr skips OAuth sign-in and acts as the mailbox owner for Gmail requests to a user’s mailbox, and as Email for everything else.
Troubleshooting
An API has not been used in project or is disabled
An API has not been used in project or is disabled
Enable it under APIs & Services → Library in that project, then wait a few minutes.
Delegation denied from Gmail
Delegation denied from Gmail
Changing another user’s Gmail settings needs domain-wide delegation.
ServiceAccountKey is not valid JSON, or is missing client_email or private_key
ServiceAccountKey is not valid JSON, or is missing client_email or private_key
Paste the entire key file into ServiceAccountKey, from the opening
{ to the closing }.Access token expired and no refresh token available
Access token expired and no refresh token available
The client’s configuration was saved but never authorised. Click Authorize on its row.