

Set up Auvik
You need a mailbox for a dedicated Triggr user in Auvik. If Auvik uses Single Sign-On for All Users, the user must also exist in your identity provider.1
Choose a role
The built-in API Access Only role covers most actions. For Dismiss Alert or SNMP pollers, go to Manage Users > Roles > Add Role on your multi-site dashboard, tick API Role Only and select the permissions you need. Don’t use Read Only, which has no API permissions.
2
Invite a Triggr user
In Manage Users, click Invite User and enter an address such as
triggr@yourcompany.com. Select every site Triggr should work with, give the user the role on each and click Invite. Authorise the user on sites you add later, too.3
Generate an API key as that user
Accept the invitation and sign in as the Triggr user (only users can generate their own keys). Click the username in the side navigation bar, click Generate API Key and copy the key. Auvik shows it only once.
4
Find your region
It’s the three characters before
my.auvik.com in your Auvik address, such as us2 in https://yourcompany.us2.my.auvik.com.Permissions
API Access Only includes every permission below except the last two rows. The SaaS Management actions also need an Auvik SaaS Management subscription.Connect it in Triggr
1
Open the integration
Go to Integrations > Auvik and click Configure on the Base Configuration card.
2
Enter the credentials
Enter the API Key, choose your Region, enter the Triggr user’s sign-in email address as Username, then click Save Configuration.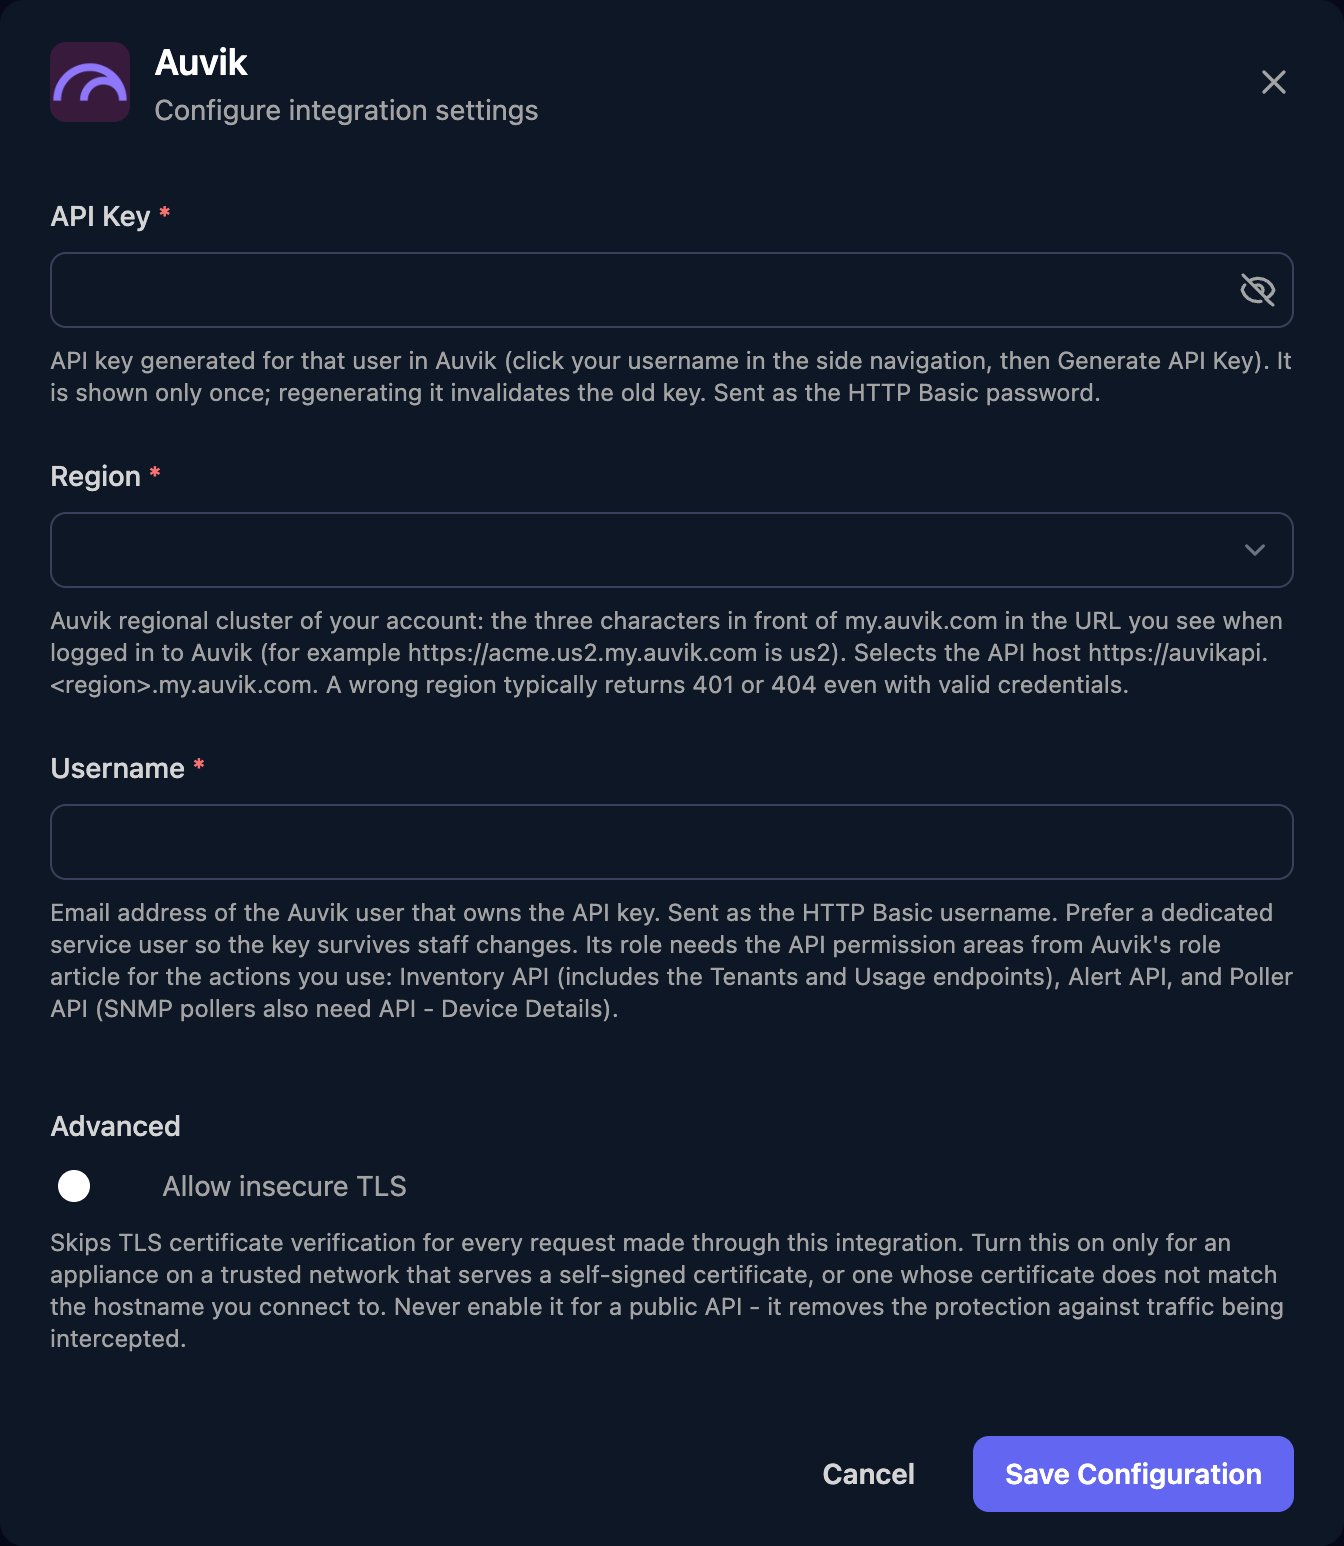
Map your clients
On the Client Mapping card, click Apply 100% Matches, then choose the Auvik site in Mapped to for anyone left. A client can map to several sites. Multi-sites aren’t listed, and sites are named by their domain prefix (acme in acme.us1.my.auvik.com), so short prefixes may need mapping by hand.
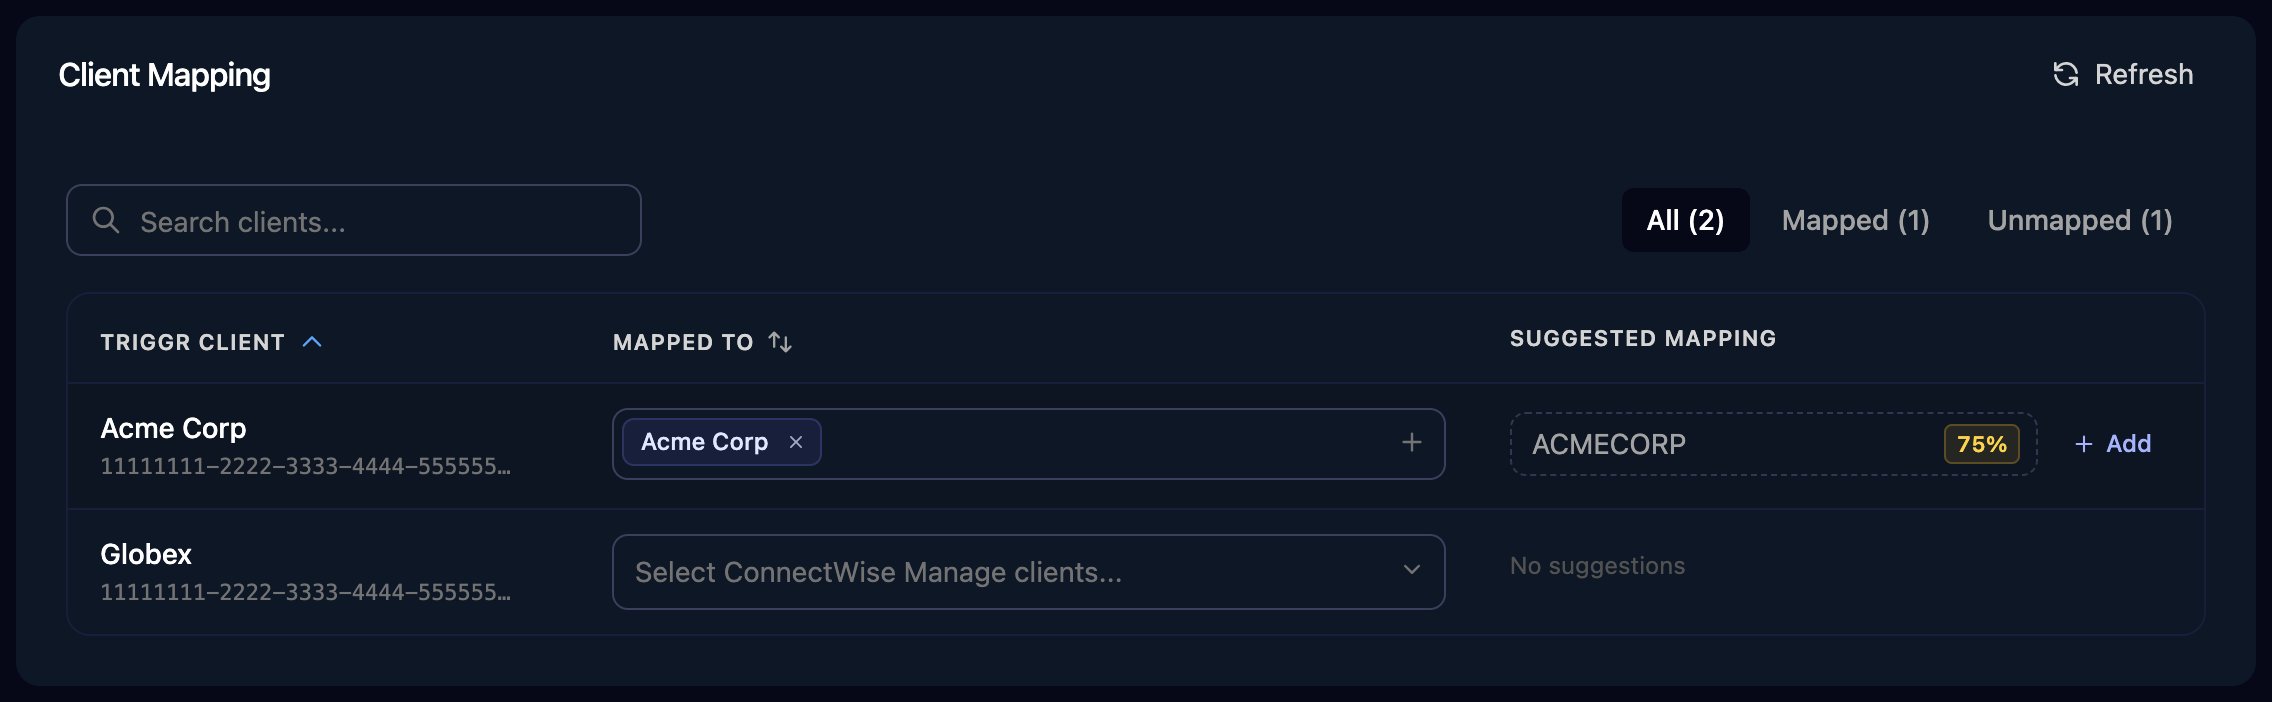
The Client Mapping card, shown here for ConnectWise Manage as an example.
auvikTenantId, auvikTenantIdCsv and auvikTenantIdList variables. Pass {{ ctx.client.auvikTenantIdCsv }} as tenants on list and statistics actions, or {{ ctx.client.auvikTenantIdList[0] }} where an action takes one tenantId. To follow links.next to the next page of results, use a Generic Integration Action step with URL Type set to Absolute URL.
Troubleshooting
Every action fails with 401
Every action fails with 401
Check Username is the full sign-in email, the key hasn’t been regenerated, and Region matches your Auvik address, which Auvik occasionally moves. Verify Credentials returns 200 when the username and key are valid.
An action fails with 403
An action fails with 403
The role lacks the action’s permission, or the user isn’t authorised on every site in
tenants. After a rate limit, Auvik can also return 403 until its five-minute window resets.Sites are missing from Client Mapping
Sites are missing from Client Mapping
Authorise the Triggr user on the site with a role that includes API - Tenants, then click Refresh on Client Mapping. Map clients to the sites under a multi-site, not the multi-site.
Requests fail with 429
Requests fail with 429
Auvik allows 2,500 API requests in five minutes. Spread workflows that loop over many clients or pages out over time.
Statistics requests time out
Statistics requests time out
Ask for fewer tenants per call, a smaller page, and a shorter time range or coarser interval.