

- Remote: a Site Manager key and Console ID (remote). Ubiquiti’s cloud relays requests, so nothing is opened on the client’s network. Needs UniFi OS 5.0.3 or later.
- Local: a key from the console and Console URL (local). The console must be reachable from the internet over HTTPS.
Set up UniFi
- Remote
- Local
1
Create a Site Manager API key
At unifi.ui.com, signed in with the account that owns the console or your organisation’s account, go to Settings → API Keys, select Create New API Key and copy the key. Ubiquiti shows it only once. A personal account’s key only reaches consoles that account owns.
2
Find the console ID
Run List Hosts in UniFi Site Manager and copy the host’s
id, or copy the part after /consoles/ in the console’s address on unifi.ui.com. Include the colon and the digits after it, as in 900A6F003011…:123456789.Connect it in Triggr
1
Open the configuration
Go to Integrations > UniFi Network and click Configure on the Base Configuration card.
2
Enter the key and console
Enter the API Key, then fill in only one of Console ID (remote) or Console URL (local): the console’s public address with 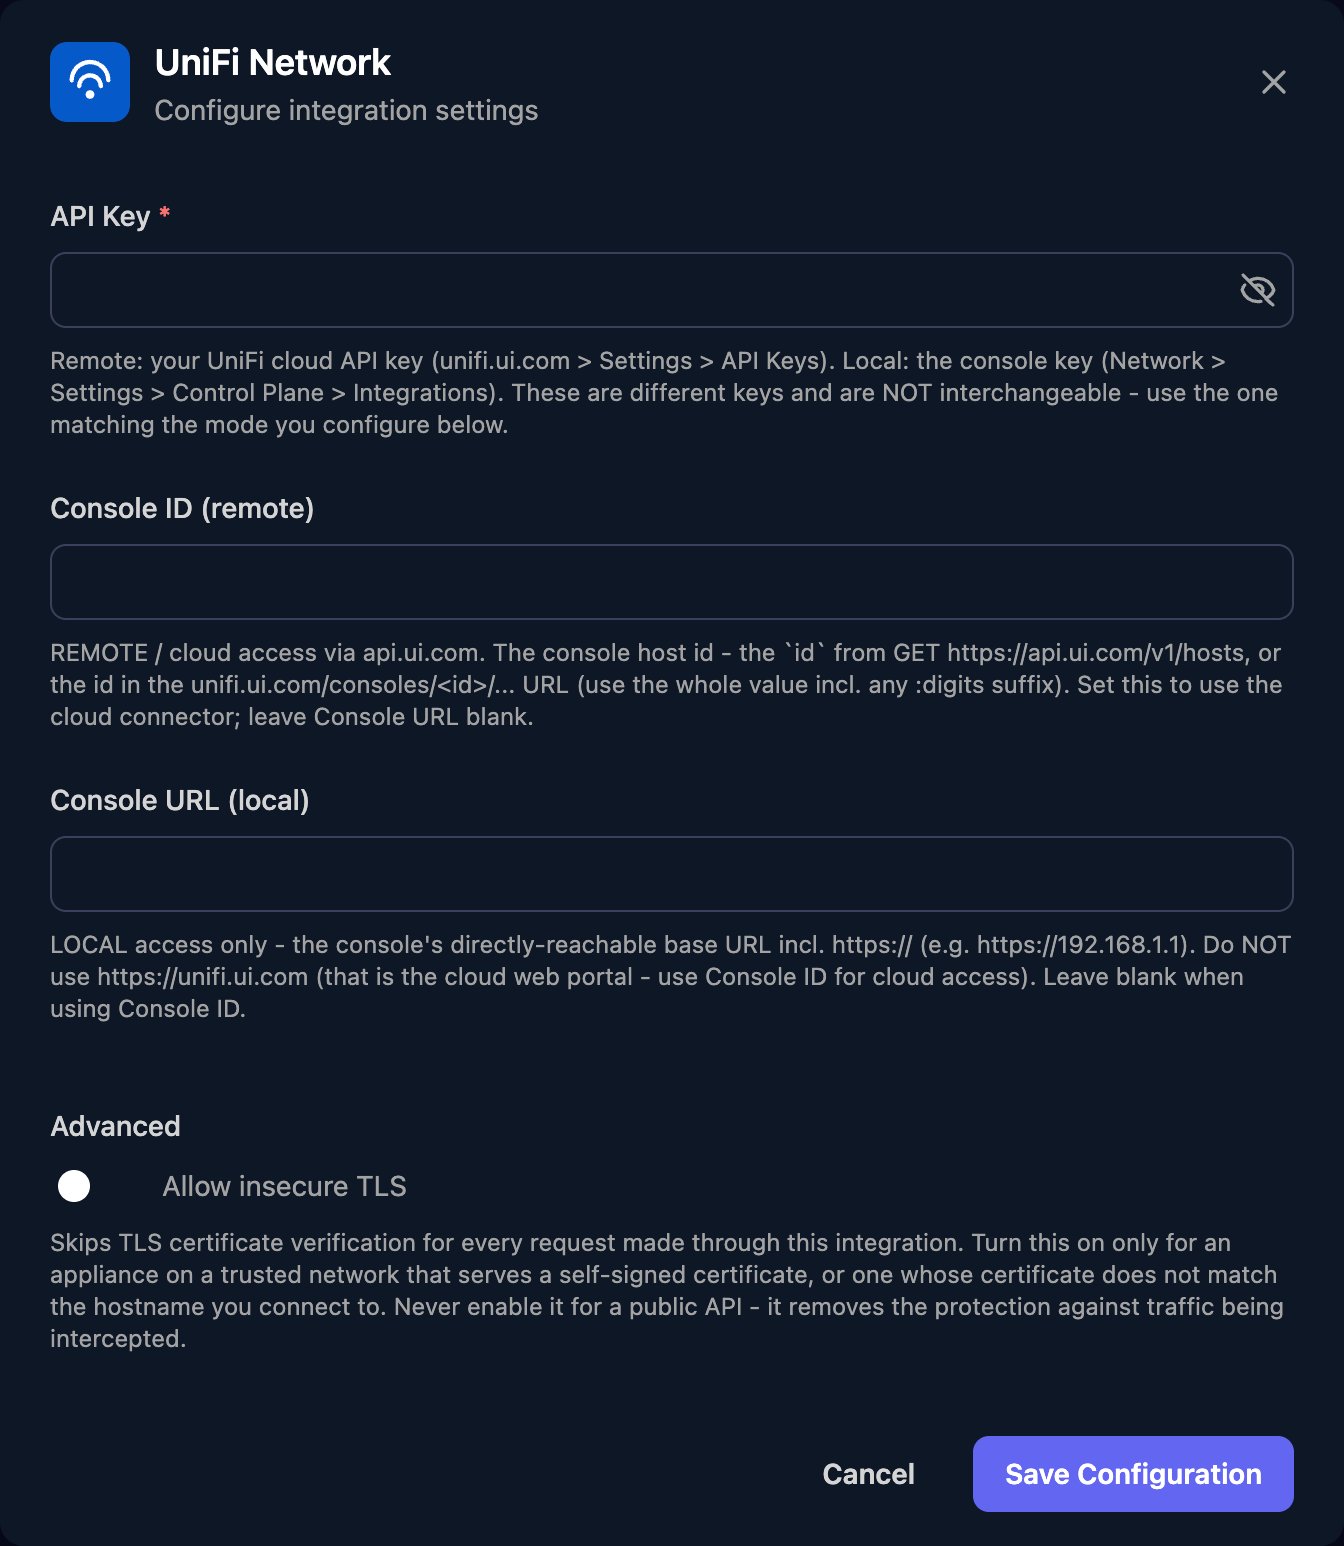
https:// and any non-443 port, such as https://unifi.example.com:8443, with no path. If both have a value, Triggr uses Console ID (remote). For a local console with a self-signed certificate, turn on Allow insecure TLS. Click Save Configuration.Set up each client
Per-client integrations never fall back to the Base Configuration, so click Configure on each client’s row and enter its API Key and console ID or URL. Clients under one UI account or organisation can share a Site Manager key with a different Console ID (remote).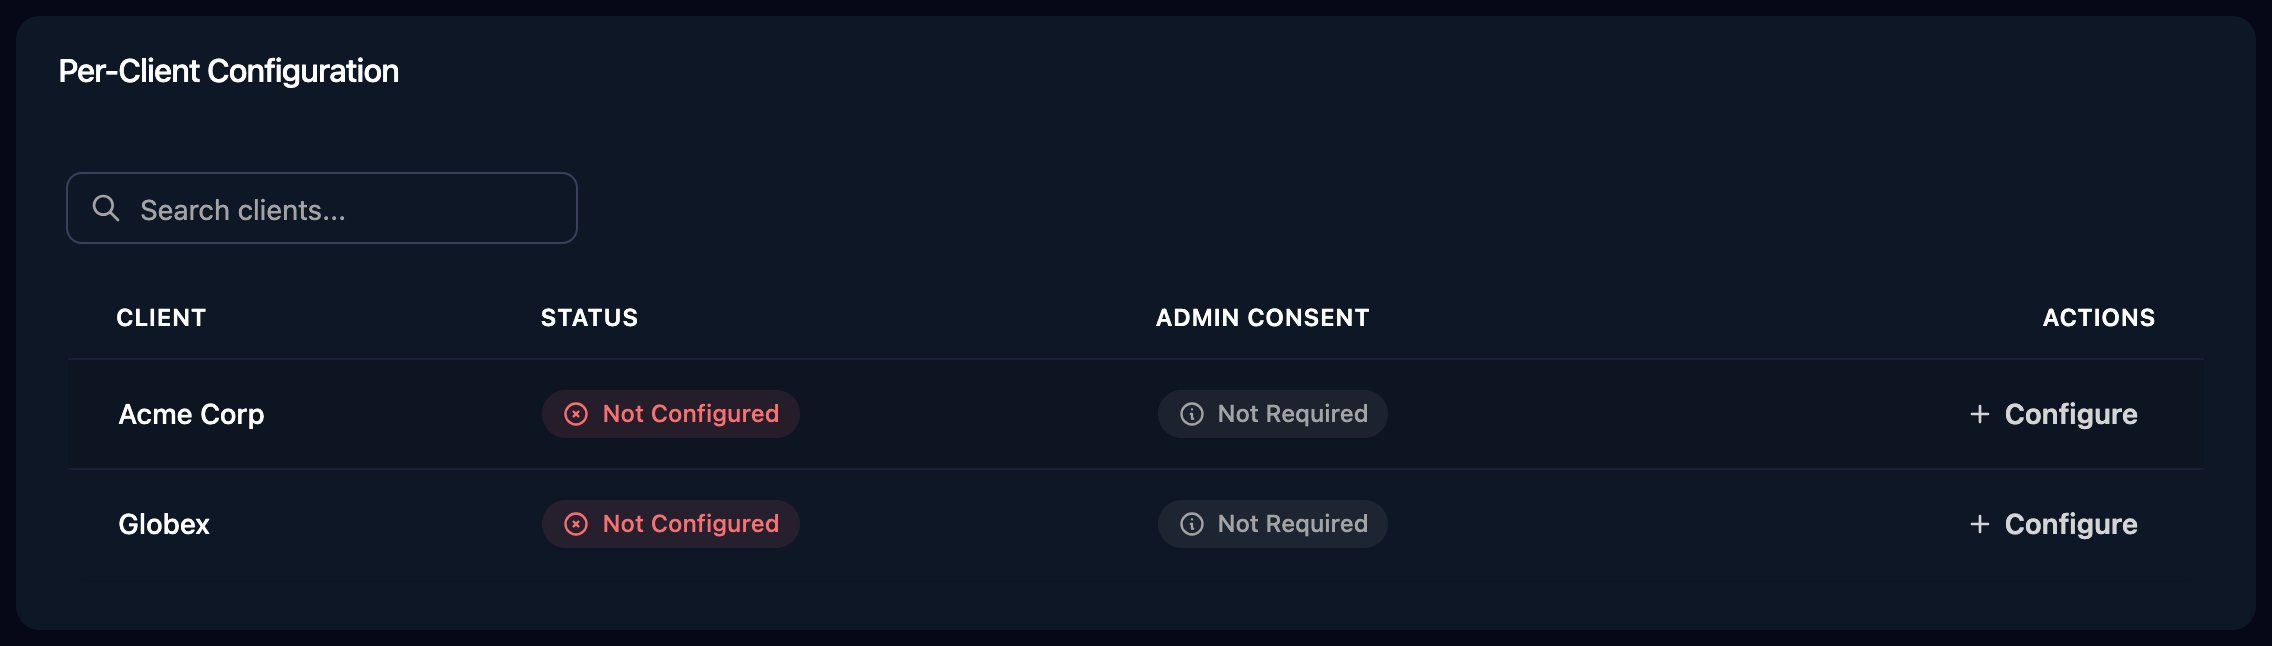
Use the actions
Run List Sites first: every other action except Get Application Info needs a siteid. Device, client and voucher actions also need the ID from their list action. Actions that change something take a JSON body:
Ubiquiti’s Network API reference lists the optional fields.
Troubleshooting
no UniFi Network integration is configured for this client
no UniFi Network integration is configured for this client
Configure the client on the Per-Client Configuration card, with either a Console ID (remote) or a Console URL (local).
set a Console ID (remote, via api.ui.com) or a Console URL (local)
set a Console ID (remote, via api.ui.com) or a Console URL (local)
The configuration the workflow used has both fields blank. If the workflow ran for a client, fill in that client’s configuration, not the base one.
401 or 403 errors
401 or 403 errors
Match the key to the field, and clear the field you don’t use. A remote 403 means the key’s account can’t reach the console.
Remote requests time out, are rate limited or return 502
Remote requests time out, are rate limited or return 502
Ubiquiti’s cloud connector ends requests after 25 seconds and allows 100 requests a minute per console. For a 502, check the console is online and Console ID (remote) includes the part after the colon.
A local connection fails
A local connection fails
Console URL (local) must be a public address, not one such as
192.168.x.x, with HTTPS forwarded and Triggr’s IP addresses allowed. For certificate errors, turn on Allow insecure TLS.