

Set up the FortiGate
Repeat these steps on each client’s FortiGate.1
Create an administrator profile
In System > Admin Profiles, click Create New. Set each area your workflows read to Read and each area they change to Read/Write, leave the rest at None, and click OK.
2
Create a REST API administrator
In System > Administrators, select Create New > REST API Admin. Choose your profile in Administrator Profile, leave PKI Group off, and add each of Triggr’s outbound IP addresses under Trusted Hosts with a
/32 mask. Click OK and copy the token, which FortiOS shows only once.3
Allow HTTPS management
In Network > Interfaces, edit the interface with the public address and select HTTPS under Administrative Access. Note the HTTPS admin port in System > Settings > Administration Settings (443 by default), and allow Triggr’s IP addresses through anything in front of the FortiGate.
Connect it in Triggr
1
Open the client's configuration
Go to Integrations > FortiGate and click Configure on the client’s row in the Per-Client Configuration card, or on the Base Configuration card for your own firewall.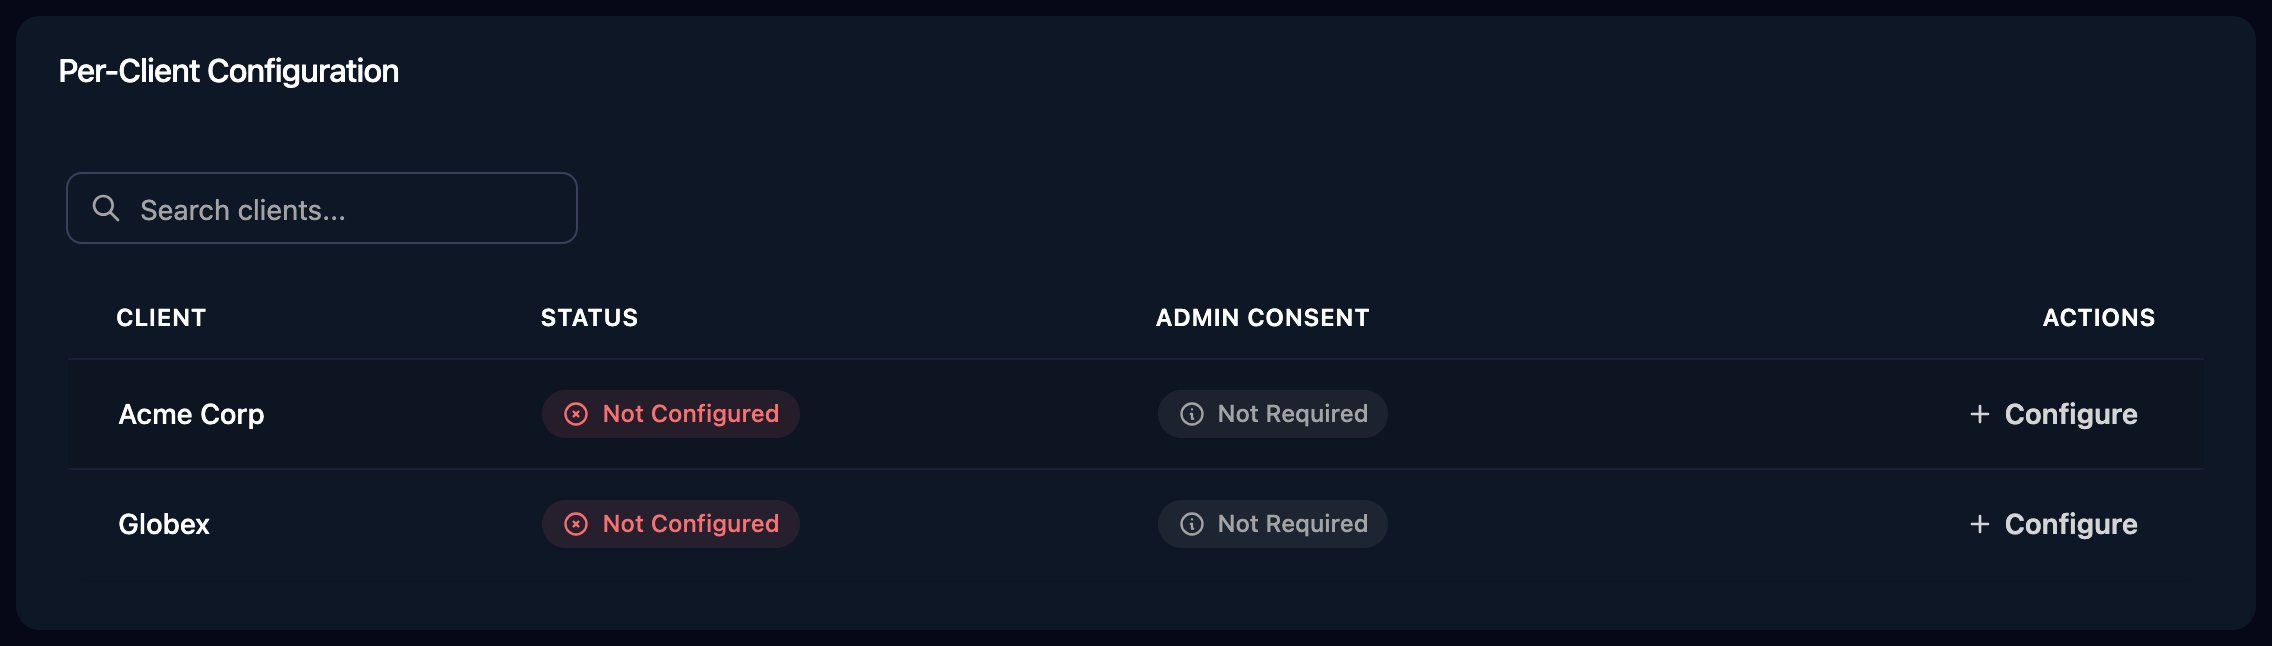
2
Enter the token and URL
Enter the REST API Token and the FortiGate Management URL, such as 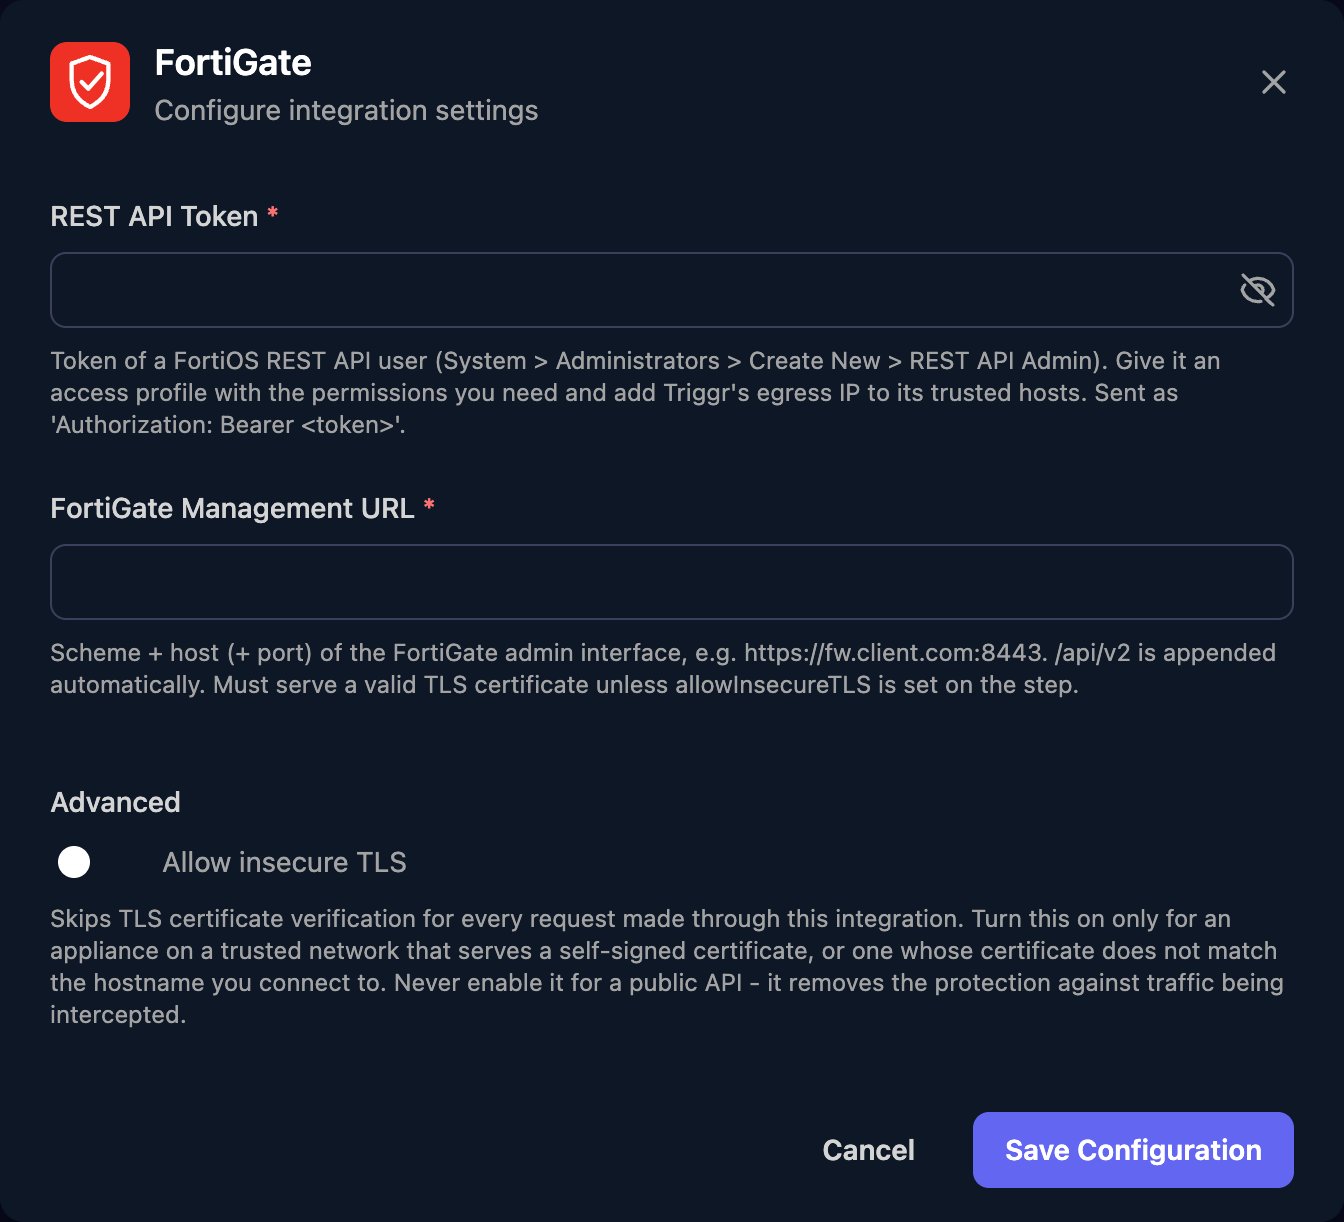
https://fw.example.com:8443, with the port if it isn’t 443 and no /api/v2 or other path. If the FortiGate uses a self-signed certificate, turn on Allow insecure TLS. Click Save Configuration.fortiosPath, the path after /api/v2/, such as cmdb/firewall/policy.
Troubleshooting
No FortiGate integration is configured for this client
No FortiGate integration is configured for this client
Configure the client in the Per-Client Configuration card.
Authentication errors (401)
Authentication errors (401)
Check the token is complete and hasn’t been regenerated, and that every Triggr IP address is in the administrator’s Trusted Hosts.
Permission errors (403)
Permission errors (403)
Set the area the action uses to Read or Read/Write in the administrator profile.
Connection fails or times out
Connection fails or times out
Check the URL is the public address with
https:// and the right port, the interface allows HTTPS, nothing in front blocks Triggr’s IP addresses, and the hostname doesn’t resolve to a private address. For certificate errors, turn on Allow insecure TLS.404 errors
404 errors
Check FortiGate Management URL has no path after the host and port, and that the object or policy exists in the VDOM the step uses.