Triggr signs in once as a service account in your partner tenant, then works in each client’s tenant with the roles its GDAP relationship allows. There’s no app to register and nothing for your clients to install. You need a CSP partner tenant with Partner Center access as an Admin agent, a Global Administrator or Privileged Role Administrator in your partner tenant, and MFA through Conditional Access (Microsoft Entra ID P1 or P2) or per-user MFA.
In Triggr Core, Connect Microsoft 365 on Home walks you through the Triggr side of this page. Do the Partner Center and Microsoft Entra steps here first. See Connect Microsoft 365.

Request a GDAP relationship with each client

Skip any client whose active relationship already includes the roles you need.
1

Start the request

In Partner Center, select Customers, the customer, then Admin relationships > Request for new relationship (or Administer > Request admin relationship for a customer with no reseller relationship).
2

Name it and choose roles

Enter a name the client will see, set Duration in days (up to 730), tick the recommended roles and select Save.
3

Send it

Set Auto Extend to Yes, select Finalize request and send the request email, unchanged, to a Global Administrator at the client. The relationship is active once they approve it.
Roles can’t be added to a relationship later: request a new one instead. Microsoft doesn’t auto-extend a relationship that includes Global Administrator. See Microsoft’s Obtain granular admin permissions.

Create the service account

1

Create the user

In the Microsoft Entra admin centre for your partner tenant, go to Entra ID > Users > New user > Create new user and create a user such as triggr@yourcompany.com with a strong password stored in your password manager. It needs no licence.
2

Add AdminAgents and Global Administrator

Under Assignments, add the AdminAgents group (only Admin agents can list your customers and grant Triggr’s consent) and the Global Administrator role (needed only to grant admin consent; you remove it at the end), then select Create.
3

Require MFA and register it

Add the account to a Conditional Access policy that requires MFA or turn on per-user MFA, exclude it from policies that require a compliant device or allowed locations, then sign in as it once and register an MFA method your team can reach.
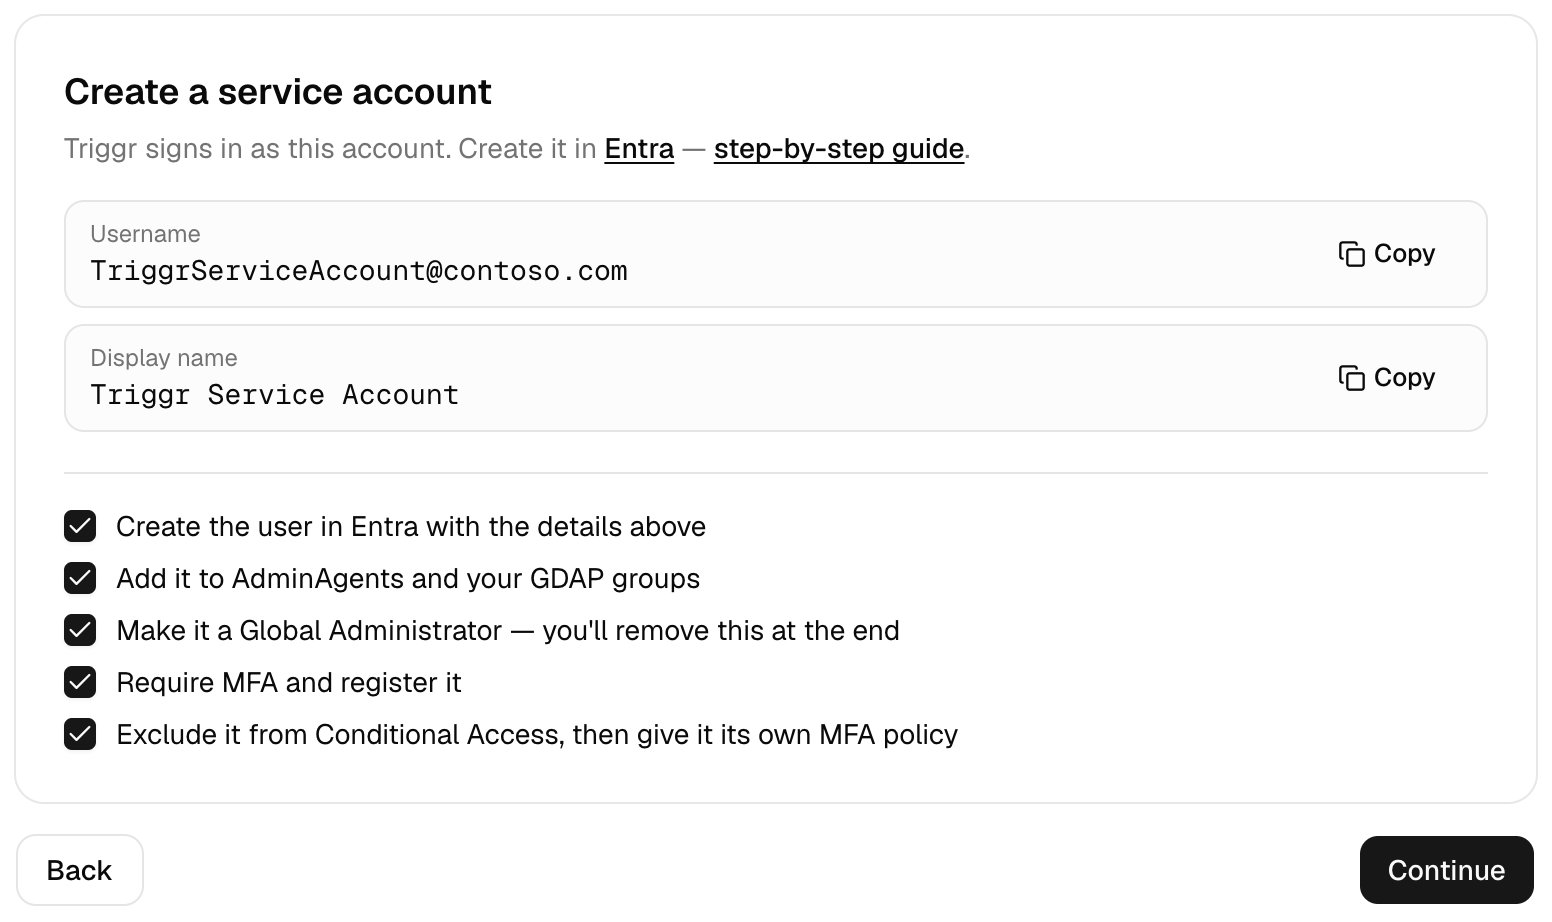
The Create a service account step with a Username and Display name to copy, and five ticked items: create the user in Entra, add it to AdminAgents and your GDAP groups, make it a Global Administrator, require MFA, and exclude it from Conditional Access.

Triggr Core's Create a service account step lists the same five items.

Partner Center rejects sign-ins without MFA, and changes in Microsoft Entra take up to an hour to reach Partner Center. See Microsoft’s MFA requirements for partner tenants.

Give the account access to your clients

1

Create Triggr's security group

In Entra ID > Groups > New group, create a Security group such as Triggr GDAP with the service account as a member.
2

Assign it roles in each client's relationship

In Partner Center, open the client’s relationship under Admin relationships, select Add security groups, tick Triggr’s group, tick the recommended roles and select Save. The assignment shows Active after about 30 seconds. Repeat for each client.
You can only assign roles the relationship includes. See Microsoft’s Grant granular permissions to security groups.

Connect it in Triggr

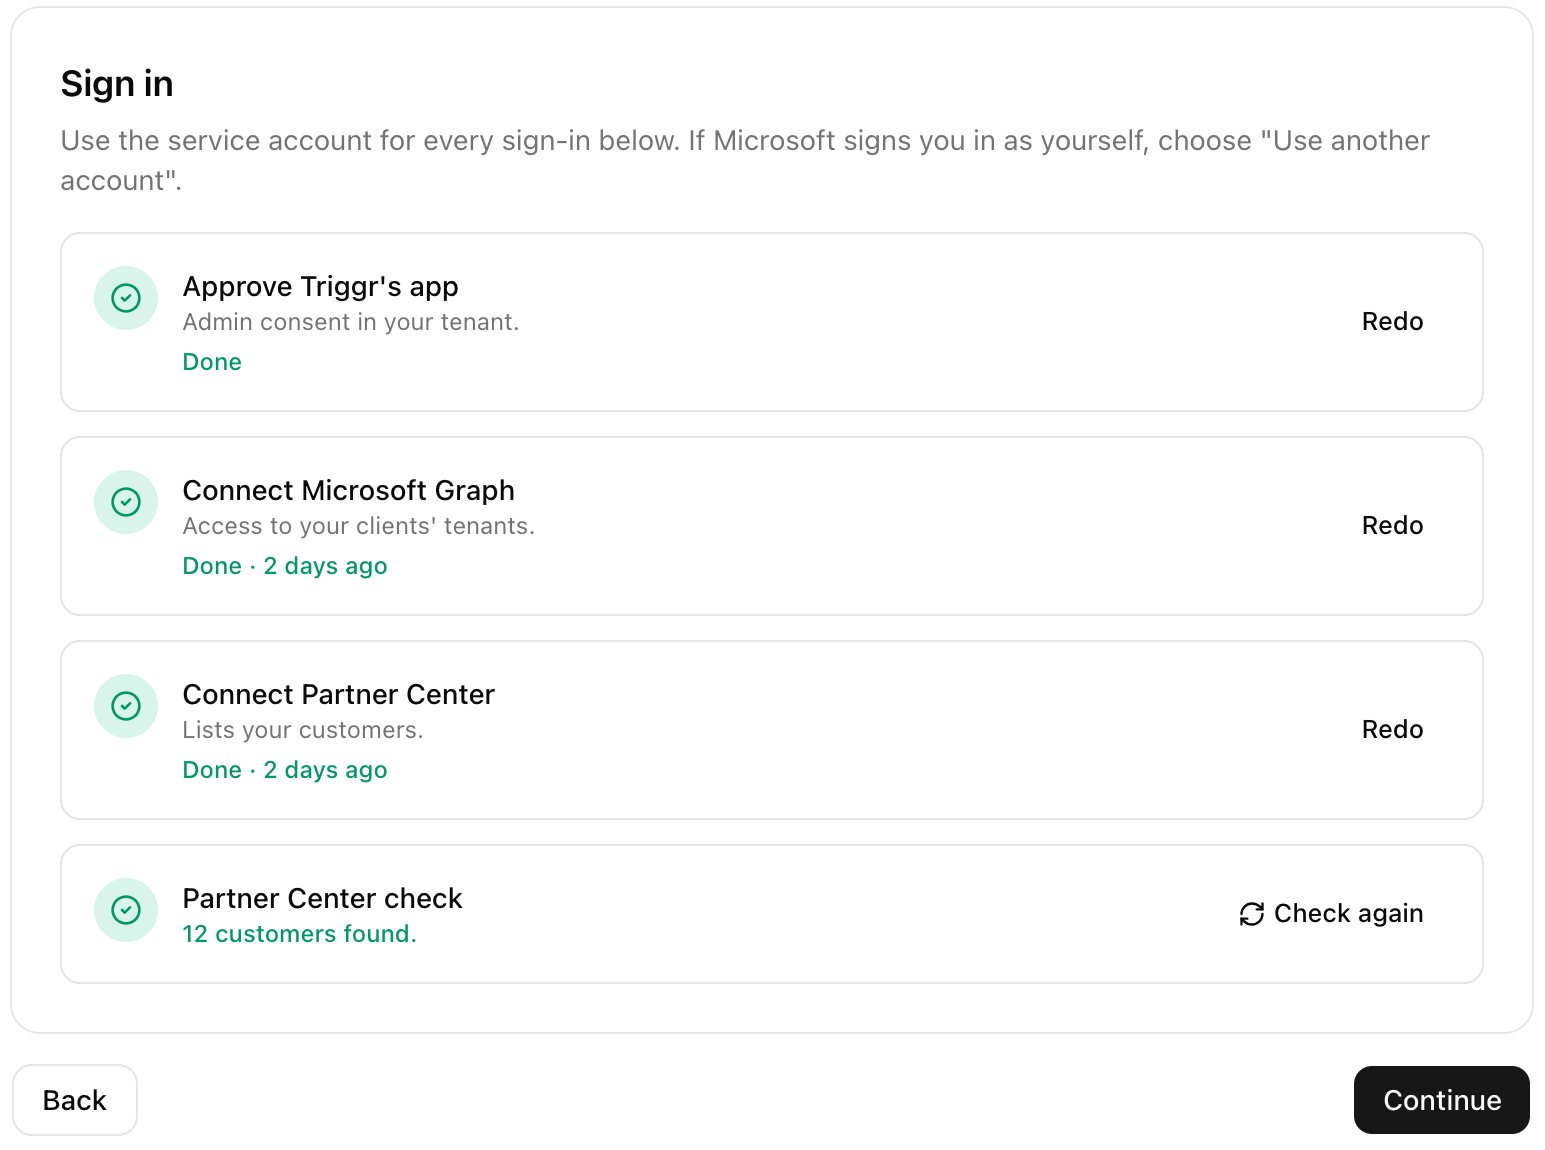
On Home, click Set up next to Connect Microsoft 365 and follow Connect Microsoft 365. Its Sign in step grants admin consent, authorises Microsoft Graph and connects Partner Center, each time as the service account.
The Sign in step with four rows, Approve Triggr's app, Connect Microsoft Graph, Connect Partner Center and Partner Center check, each marked done, with Redo and Check again buttons.
Once Admin Consent shows Granted on both integrations, remove Global Administrator from the service account in Microsoft Entra. Keep it in AdminAgents and Triggr’s security group. Workflows that run without a client use the Base Configuration, in your own tenant.
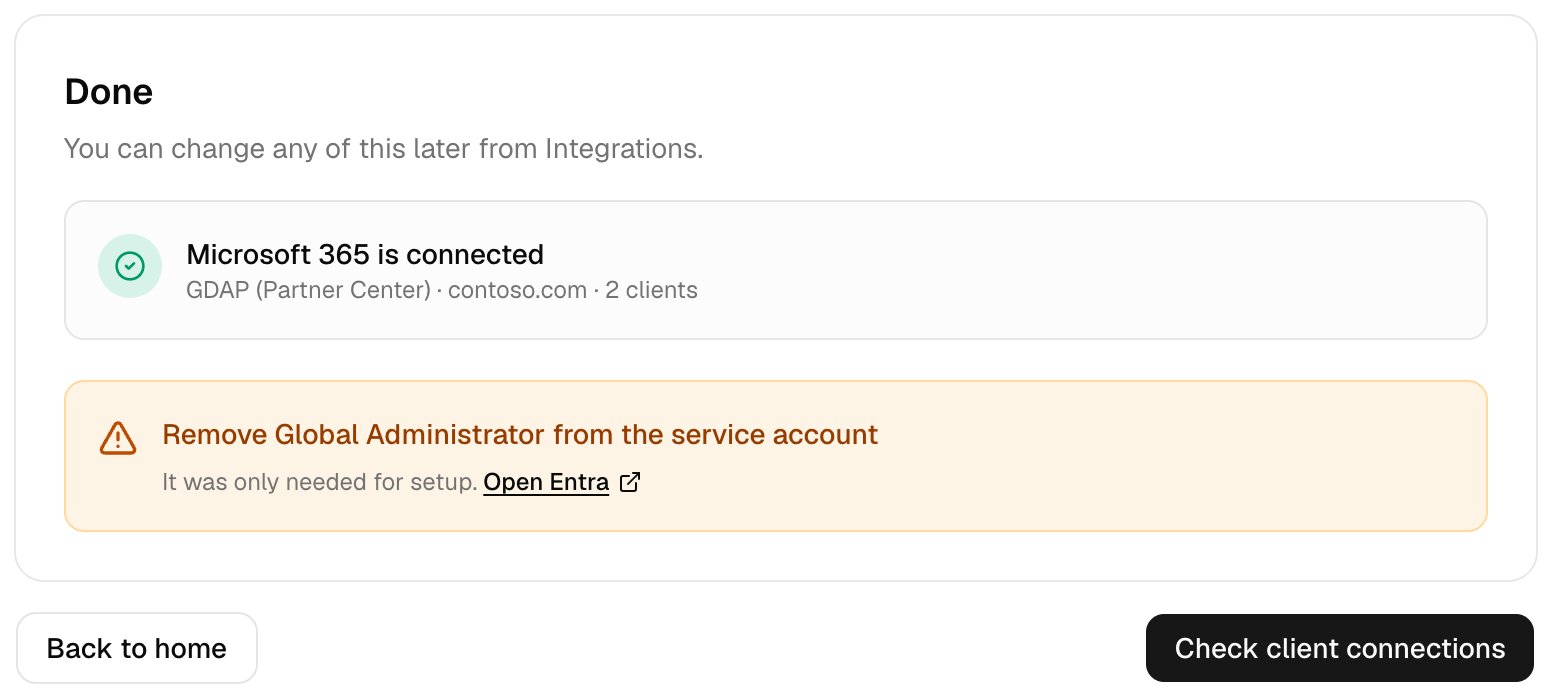
The Done step showing Microsoft 365 is connected with GDAP (Partner Center), contoso.com and 2 clients, a warning to remove Global Administrator from the service account with an Open Entra link, and Back to home and Check client connections buttons.

Triggr Core's Done step reminds you.

Make GDAP your default Microsoft connection

In Studio, go to Settings > Org Variables, click Setup Wizard and choose GDAP under Preferred Microsoft Connection Method; in Triggr Core, set Default Microsoft connection in Settings > General. Steps with Connection Type set to Automatic then use GDAP, and each client’s page shows a GDAP Health card. For one step only, set its Connection Type to Microsoft Graph (GDAP).
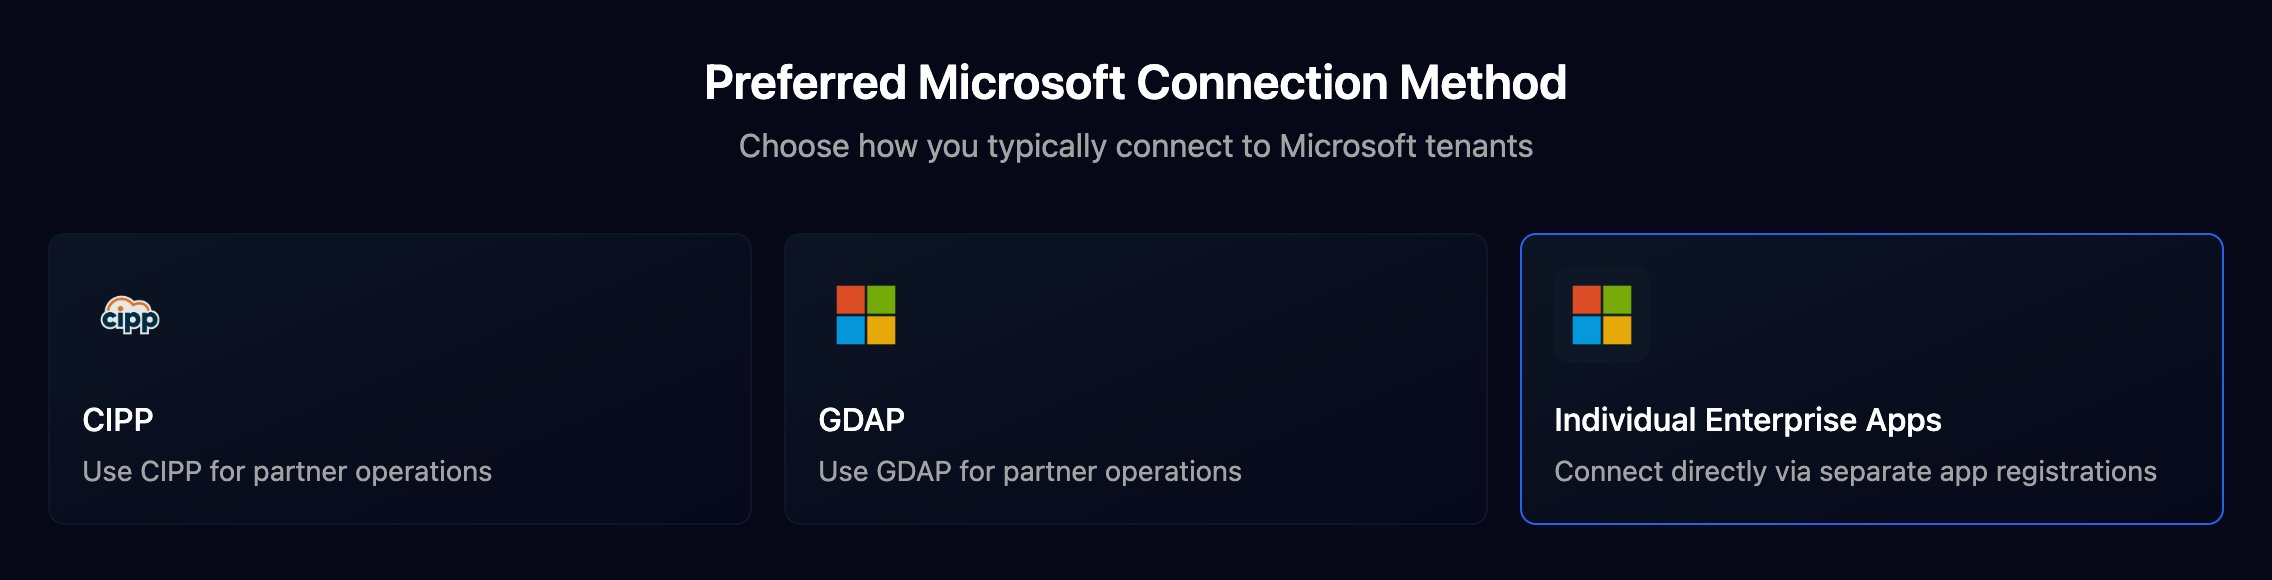
The Setup Wizard's Preferred Microsoft Connection Method question with three cards: CIPP, GDAP and Individual Enterprise Apps, the last one selected.
Per-client integrations never fall back to the Base Configuration, so each client needs its own tenant ID. In Triggr Core, import your customers from Partner Center and click Link all on Clients instead; see Add your clients.
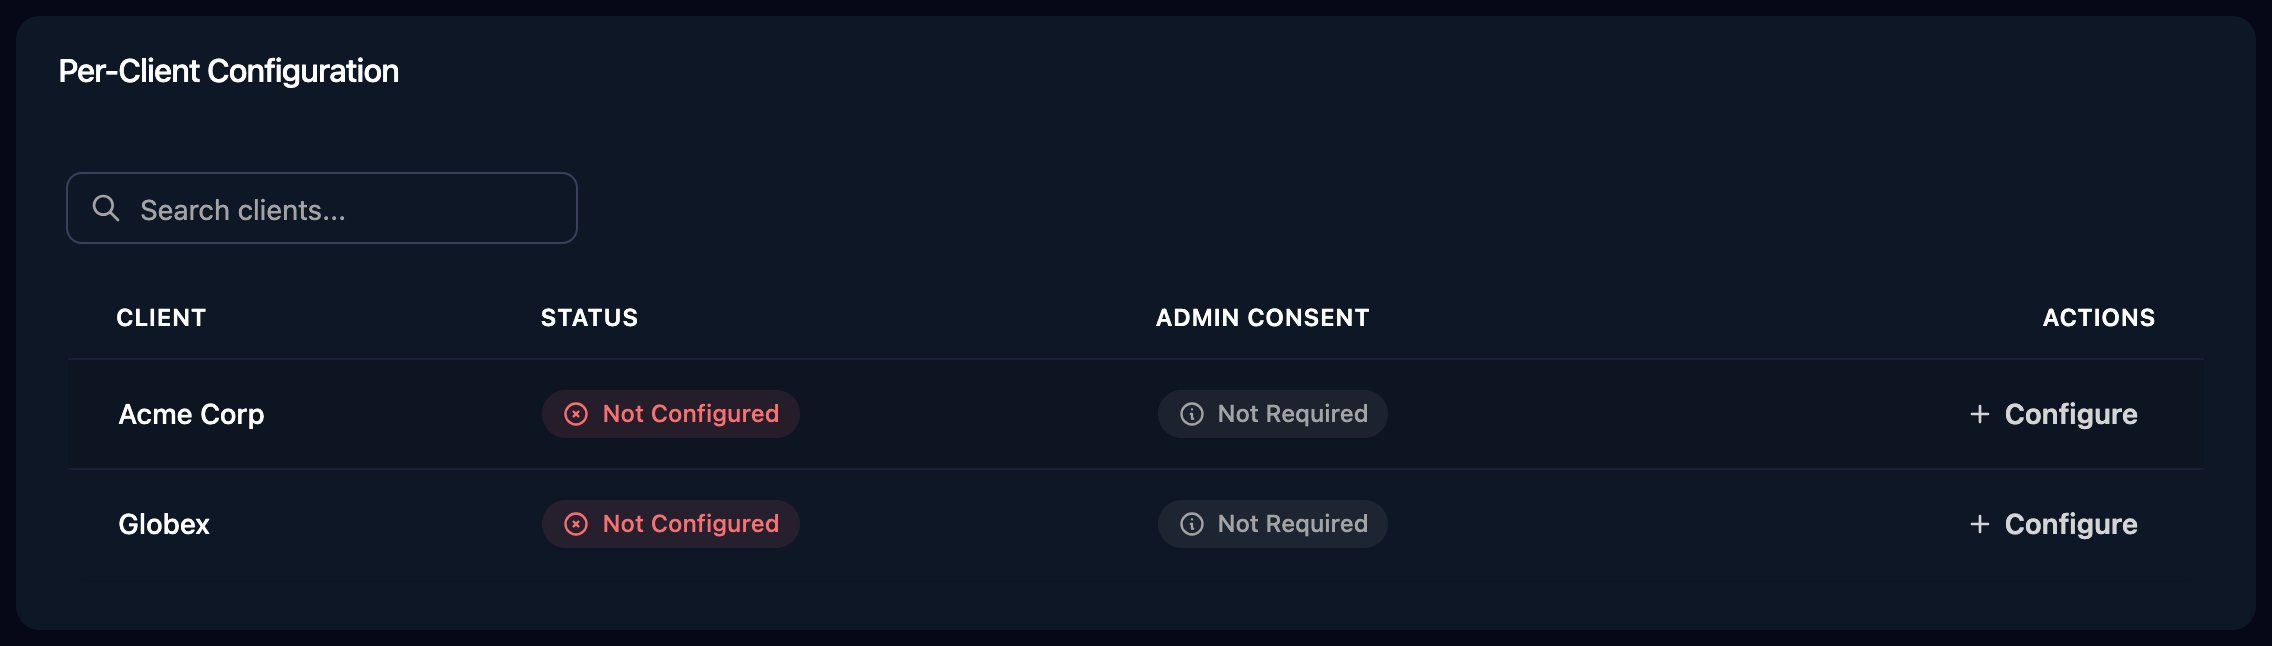
The Per-Client Configuration card listing Acme Corp and Globex, each Not Configured with Admin Consent Not Required and a Configure button.
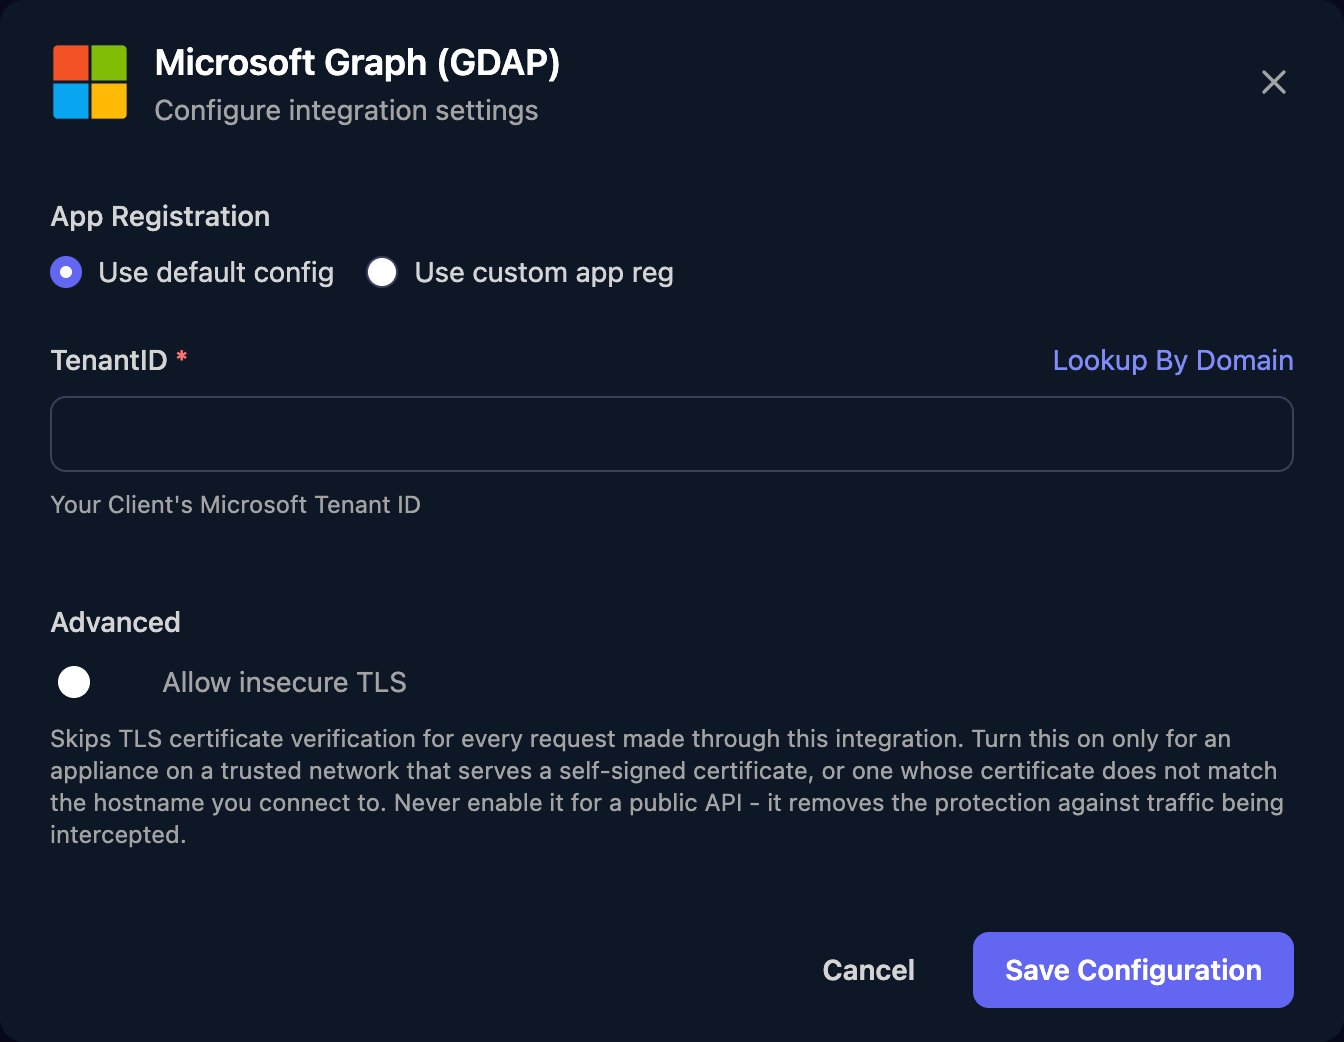
  • One client: click Configure on its row, enter its TenantID (or click Lookup By Domain and enter any domain verified in the client’s tenant) and click Save Configuration.
  • Many clients: click Automap, then Approve All. It links every unlinked client that has a microsoftTenantId variable and tells you how many it skipped.
Saving writes the client’s microsoftTenantId variable and creates its Microsoft Exchange configuration from the tenant’s default domain. Linked clients show GDAP Setup instead of Admin Consent and Authorize. Triggr grants its consent through Partner Center, so it needs Microsoft CSP connected as the service account and Cloud Application Administrator (or Application Administrator) assigned to Triggr’s group in the client’s relationship.
  • One client: on its GDAP Health card, click Grant app consent, then Grant consent. Or click Repair, which also sets up Exchange.
  • Every client: on Clients, click Repair all, then Repair.
  • From a workflow: use the Grant GDAP Consent step. Remove GDAP Consent removes all of Triggr’s access to a client’s tenant.
Microsoft takes a minute or two to apply a new consent; if a check straight afterwards still fails, wait and click Check now.

Set up Exchange for mailbox steps

Mailbox steps run as Triggr’s app through Microsoft Exchange, which needs Exchange.ManageAsApp and the Exchange Administrator role in each client’s tenant. Repair grants both when Triggr’s group has Privileged Role Administrator in the client’s relationship; without it, grant Exchange access yourself.

Check the connection

Triggr checks every linked client nightly. The client’s GDAP Health card shows Microsoft sign-in, Graph permissions, Admin roles, GDAP relationship (with its end date) and Recent failures, and under Won’t fully work here names each workflow missing a role, a permission or Exchange, with the fix. Click Check now to check one client (once a minute), or Check all on Clients (once every 10 minutes).
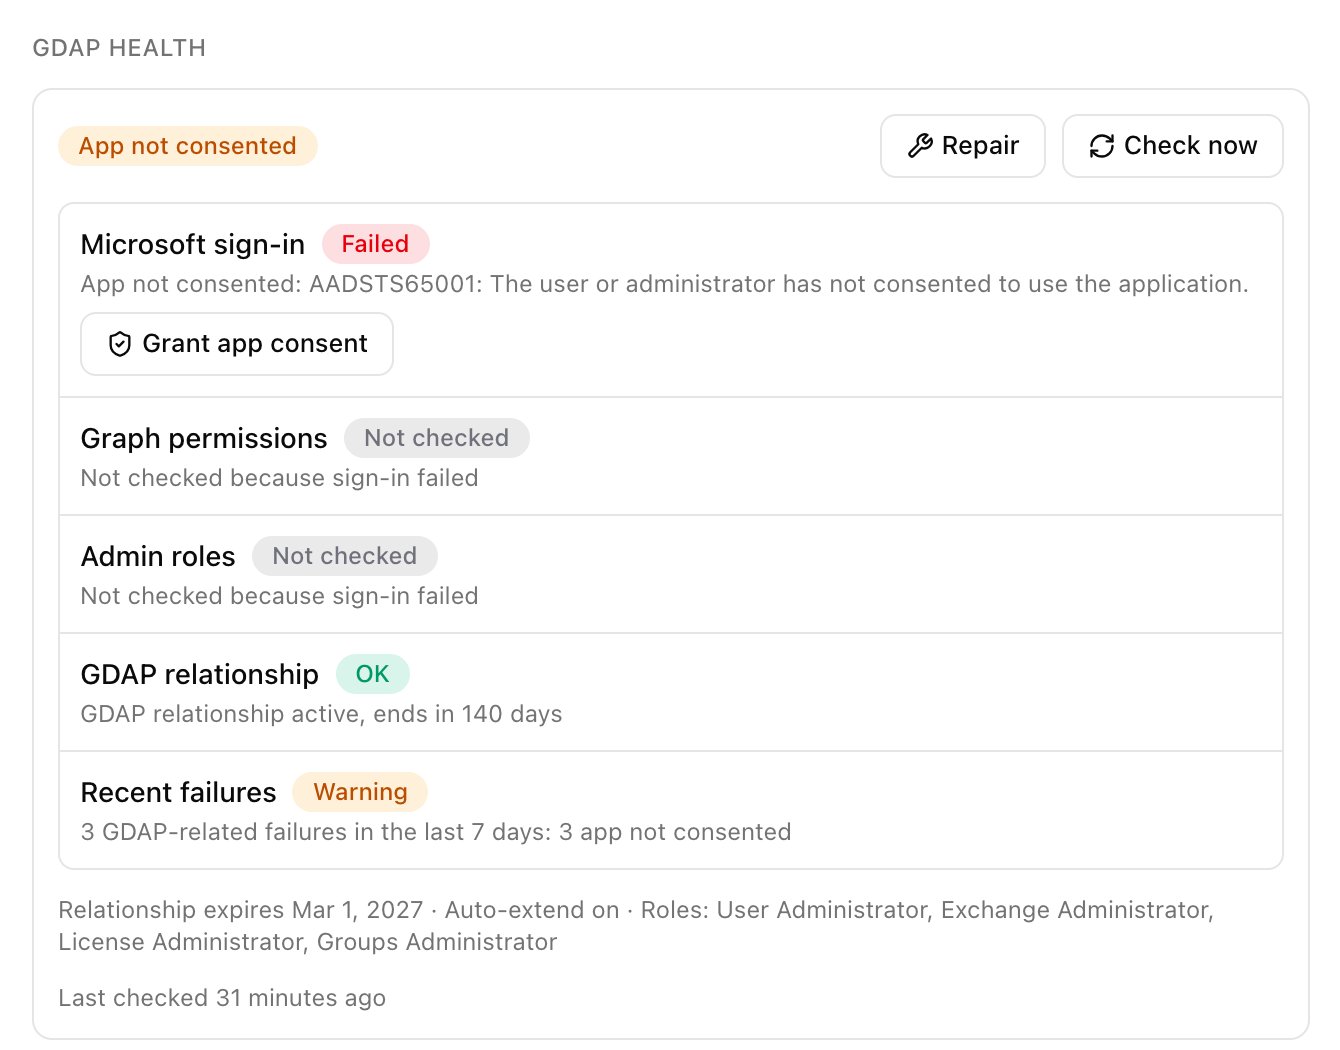
GDAP health showing App not consented with Repair and Check now buttons, and checks for Microsoft sign-in, Graph permissions, Admin roles, GDAP relationship and Recent failures.

A client's GDAP Health card in Triggr Core. Studio shows the same checks on the client's page.

Repair (org admins only) lists what it will do, then grants or replaces Triggr’s consent, sets up Exchange and checks again. It never changes GDAP relationships or roles, and runs at most once every six minutes per client. To see relationship end dates, select Expiring on Clients. If the card says Triggr can’t read GDAP end dates yet, click Sign in with Triggr’s service account and sign in as that same account; anyone else changes the sign-in every client uses. For a weekly or daily summary, turn on GDAP alerts. GDAP Setup at the top of the integration page opens the GDAP Setup Wizard: Start Setup for All Tenants checks every client’s link, both sign-ins, its Partner Center relationship and Triggr’s access to its tenant, with fixes under View Remediations. For one client, click GDAP Setup on its row, then Start Setup Wizard.

Troubleshooting

The client isn’t linked (its GDAP Health card shows Not linked), and built-in Microsoft steps fail with … integration is not configured for tenant '<tenant-id>'. Link it or use Automap.
Click Grant app consent or Repair on the client’s GDAP Health card. If that fails, check Microsoft CSP is authorised as the service account, the account is in AdminAgents, and Triggr’s group has Cloud Application Administrator in the client’s relationship. See Microsoft CSP troubleshooting.
Triggr’s consent in the client is from an older permission set. Click Repair: it removes the consent and grants it again, so Triggr can’t reach the client for a minute or so.
Add the named role to the client’s GDAP relationship and assign it to Triggr’s group in Partner Center (a relationship without it needs replacing). Once the assignment is Active, click Check now.
Check the relationship is Active in Partner Center (not Approval Pending), Triggr’s group has an Active role assignment in it, the service account is in that group, and the client’s TenantID in Triggr is its own.
Click Renew on the card, or turn on Auto Extend in Partner Center. An expired relationship can’t be renewed: request a new one, assign Triggr’s group its roles again, then click Check now.
A policy in the client’s tenant blocked the service account (AADSTS53003). Exclude your partner tenant’s service provider users from it. See Conditional Access.
The service account’s password changed, its sessions were revoked or a policy in your tenant now blocks it. Click Authorize on the Base Configuration card and sign in as the service account with MFA. Repair reports this as “Triggr’s Microsoft sign-in for your organisation needs fixing first”.
Your own app registration’s client secret expired. Create a new secret in Microsoft Entra, click Edit on the Base Configuration card and paste its Value into ClientSecret.
The client’s TenantID is your partner tenant’s ID. Open its configuration in the Per-Client Configuration card and enter the client’s own tenant ID. Automap refuses this too, as it does a tenant another client already uses.
Repair and automatic setup take a short lock per client. Wait a few minutes, then run Repair again. “Checked less than a minute ago” and “repaired a few minutes ago” are the rate limits above.
Admin consent hasn’t been granted in your partner tenant. Click Admin Consent on the Base Configuration card and sign in as a Global Administrator, then click Authorize again.
The account you signed in with isn’t an Admin agent, or isn’t the service account. Sign in again as the service account, with it in AdminAgents.
Enter a domain verified in that tenant, such as its .onmicrosoft.com domain, or paste the tenant ID from Entra ID > Overview in that tenant.
More questions: see the Microsoft and GDAP FAQ.